Revival of the Hatch Part 6: Overhauling the Suspension
The suspension on my hatch was in rough shape. Nearly every bushings was ripped, the ball joints were original and questionable at best, and all of the various suspension arms were covered in rust and some still had over spray on them from when we painted the car years ago.
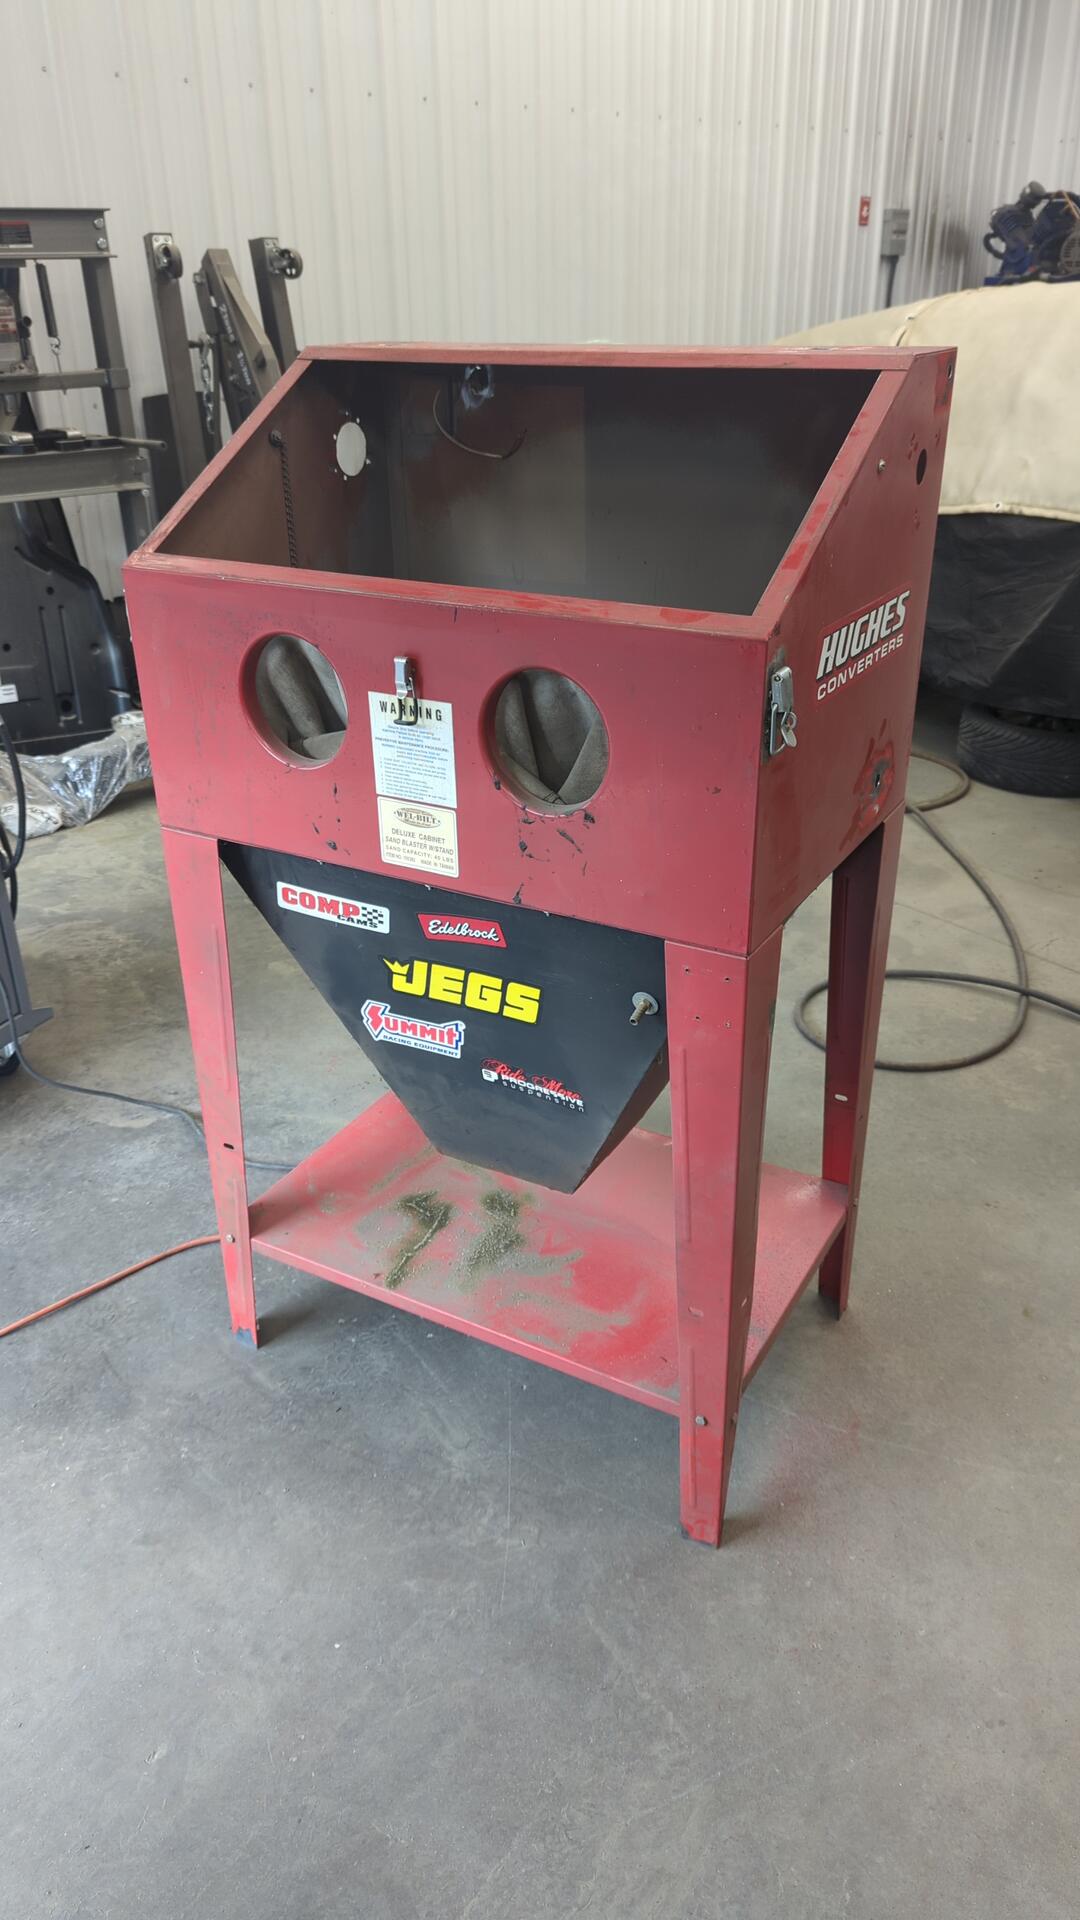
I wanted to go through and sandblast / paint everything but the main thing holding me back was that my sandblasting cabinet wasn’t operational. A couple years ago my Dad upgraded his blasting cabinet and gave me his old one. I’ve been meaning to fix it ever since I got it, but I never got around to it.
The cabinet was in reasonable shape but needed a bunch of new parts (nozzle, dust extractor, lens, and more) and was known for leaking a bunch of blasting media due to all the holes in it.
I decided to give it a quick revamp by welding up all the holes, seam sealing everything, and replacing the worn out parts with new Skat Blaster components.
Here’s the cabinet all torn down.
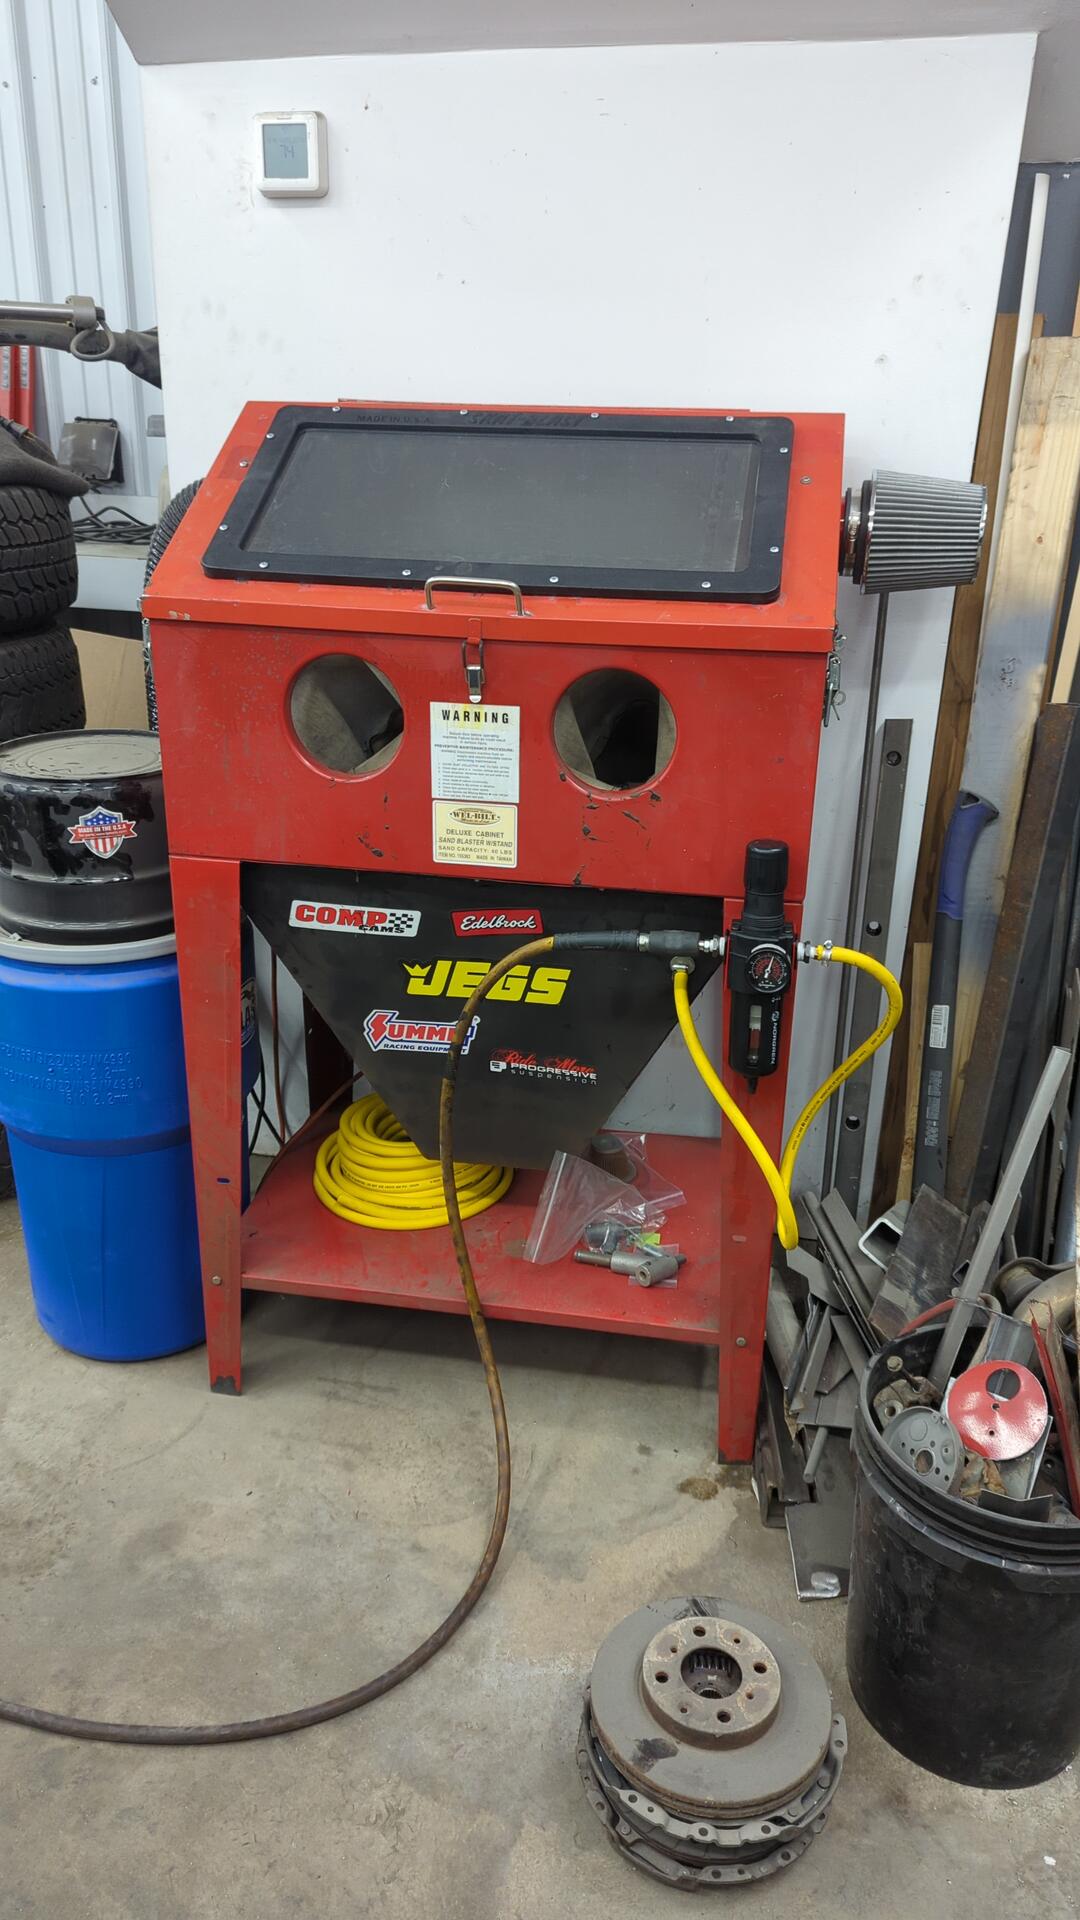
Done.
Yup that’s a KN air filter on it. The new dust extractor was pulling so much air that the original little dinky air inlet filter couldn’t keep up. I ended up using my 4" hole saw and making a custom inlet adapter for the K&N filter.
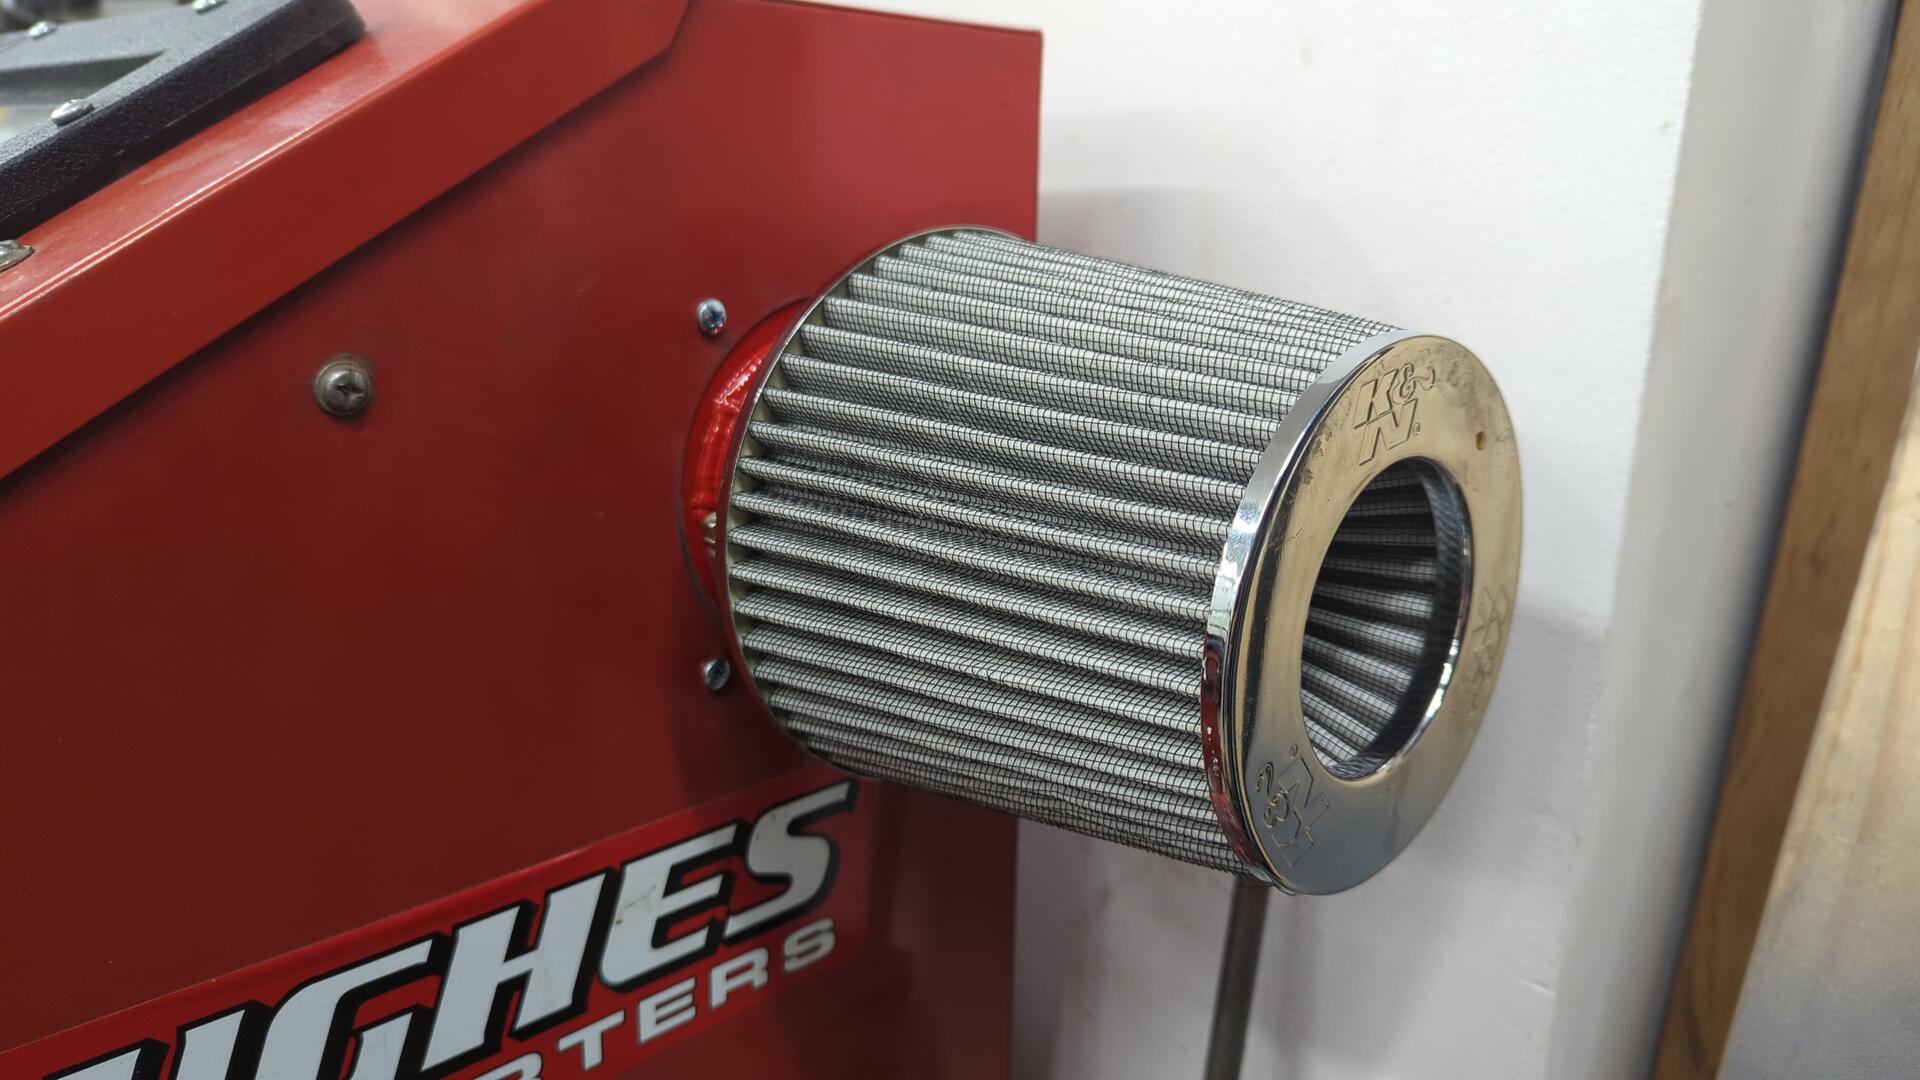
The K&N filter is totally overkill but I had it laying around and had no plans for it so I figured may as well put it to use.
All new glass lens with replaceable inner cover.

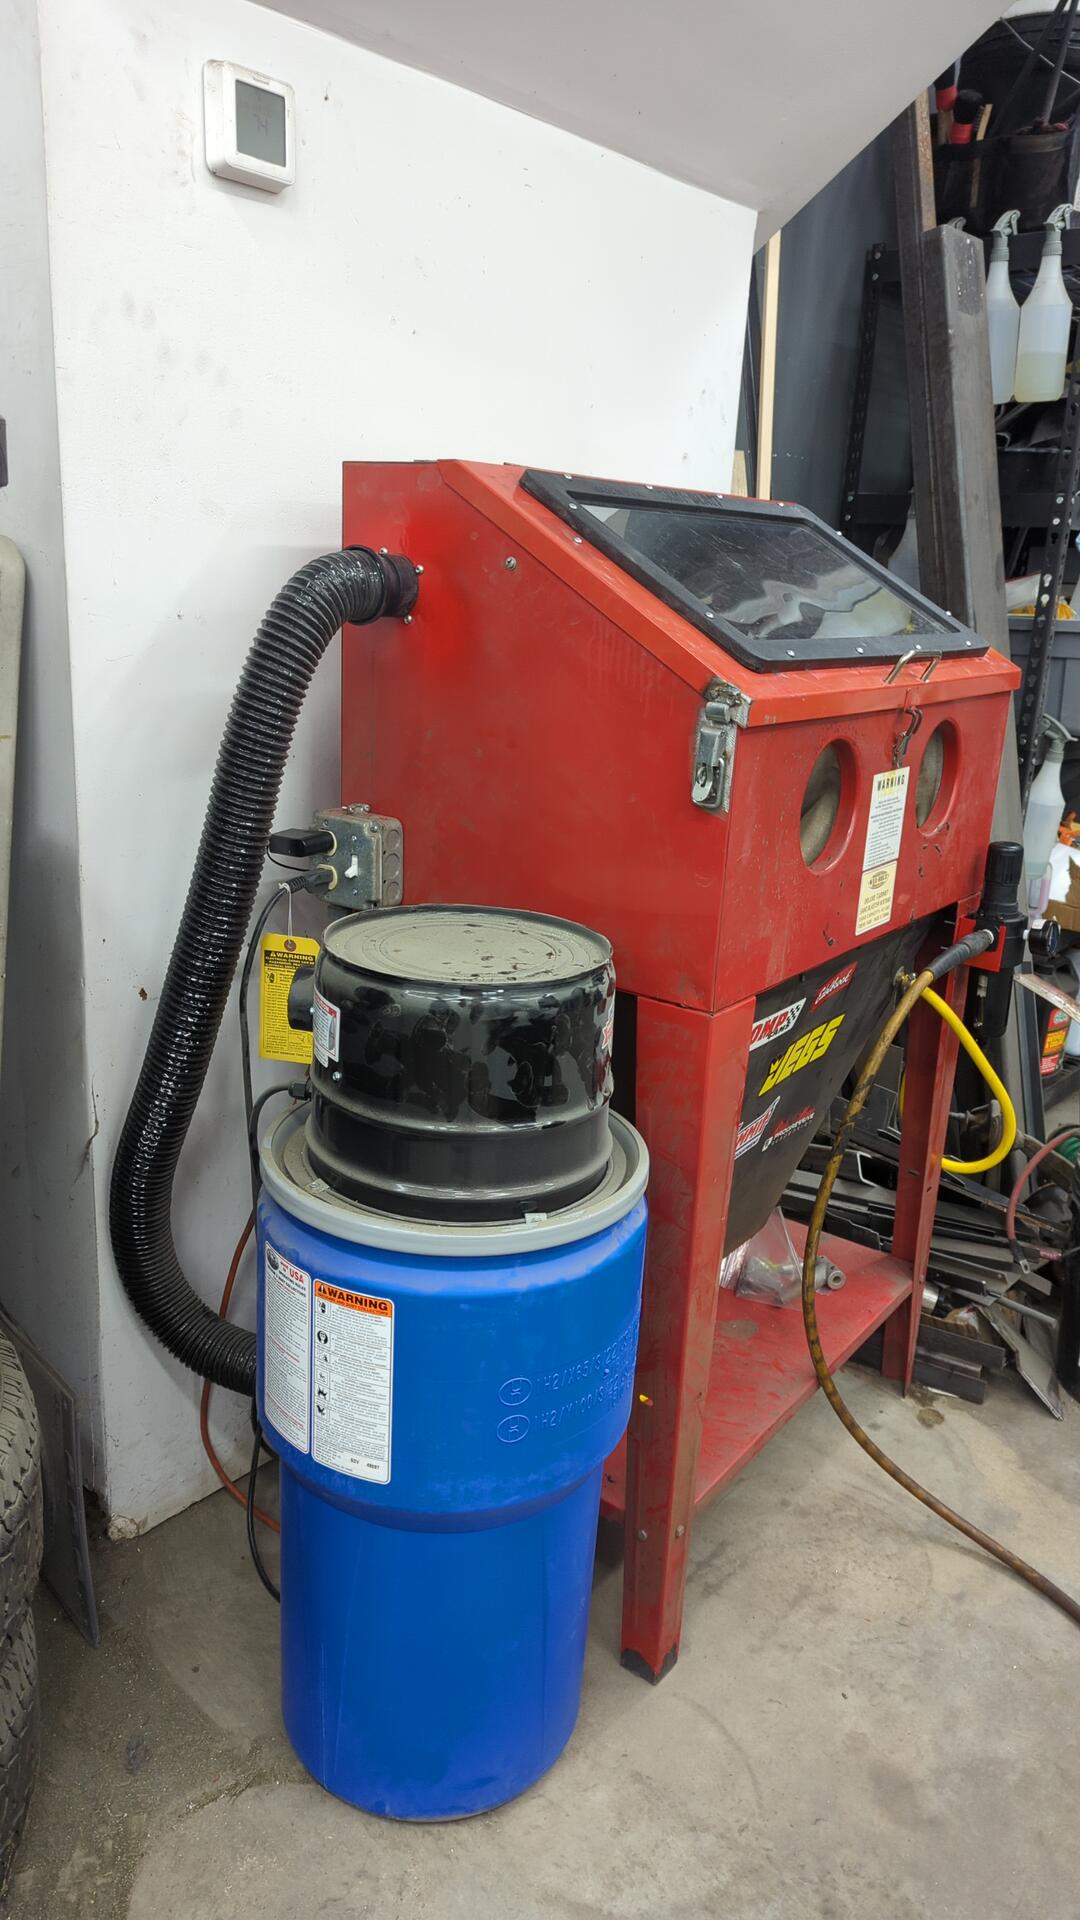
The new dust extractor (Skat Blaster Vac-55) is awesome. It’s super quiet and works great. I also like that it takes up less space than a shop vac.
Blasting media wise I’m running aluminum oxide in it. Aluminum oxide holds up great and eats rust like nothing. I’ve found it to be a little too rough on aluminum though so I try to only use it on steel parts (although I do still use it on aluminum sometimes).
Putting the Blaster to Use
To break in the blaster I decided to start with the front suspension bits. I’m not restoring the upper control arms because I plan on buying a camber kit.
All clean.
When taping off parts before sandblasting I’ve found using a layer of painters tape first and then covering that in duct tape works best. Using just duct tape tended to leave a sticky residue on the parts so by using painters tape everything comes off a lot easier.
A couple of coats of epoxy later.
New energy suspension bushings installed.

The grease that Energy Suspension includes with the bushings is some crazy sticky stuff. Good luck getting it off your hands if you’re not wearing gloves.
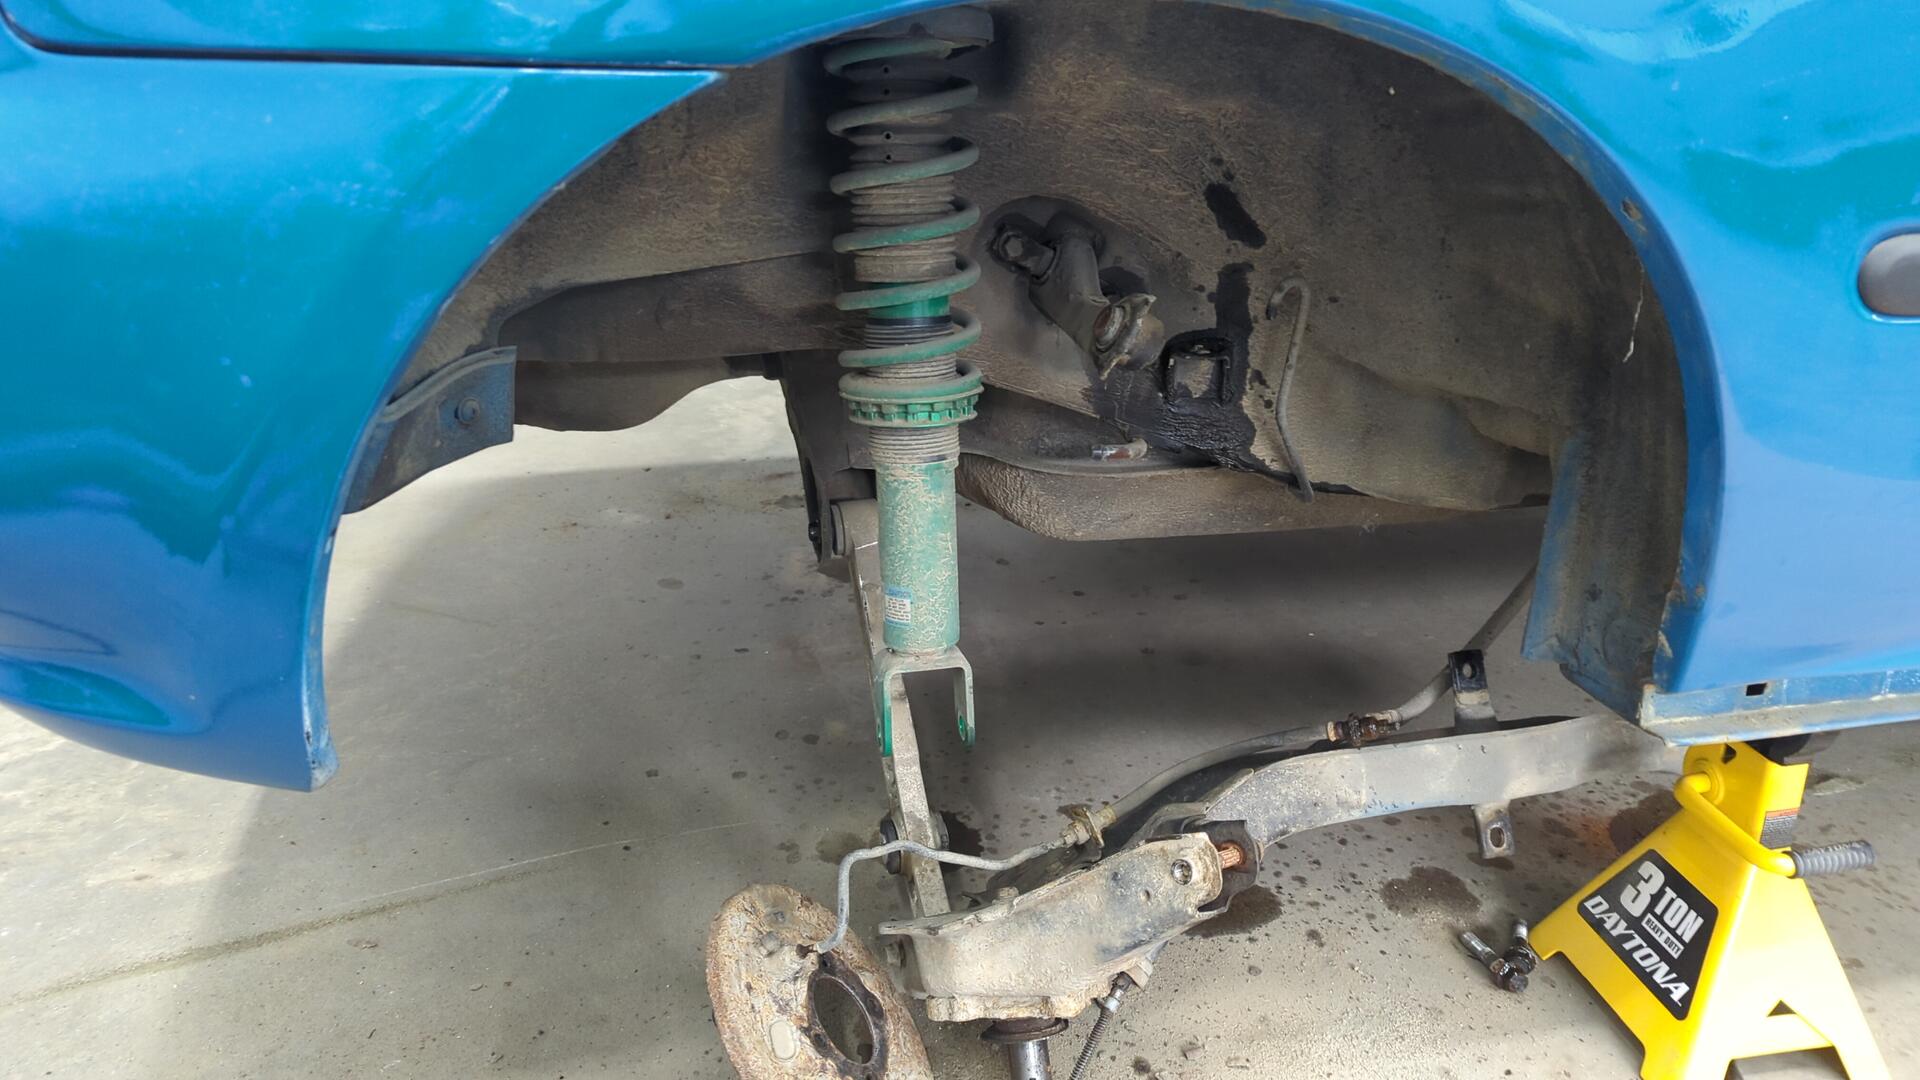
Removing the Rear Trailing Arms
The rear suspension has been needing some attention for awhile now. Most of it was still original as far as I’m aware and the only things that I’ve replaced back there have been one wheel cylinder, the coilovers, and lower control arms.
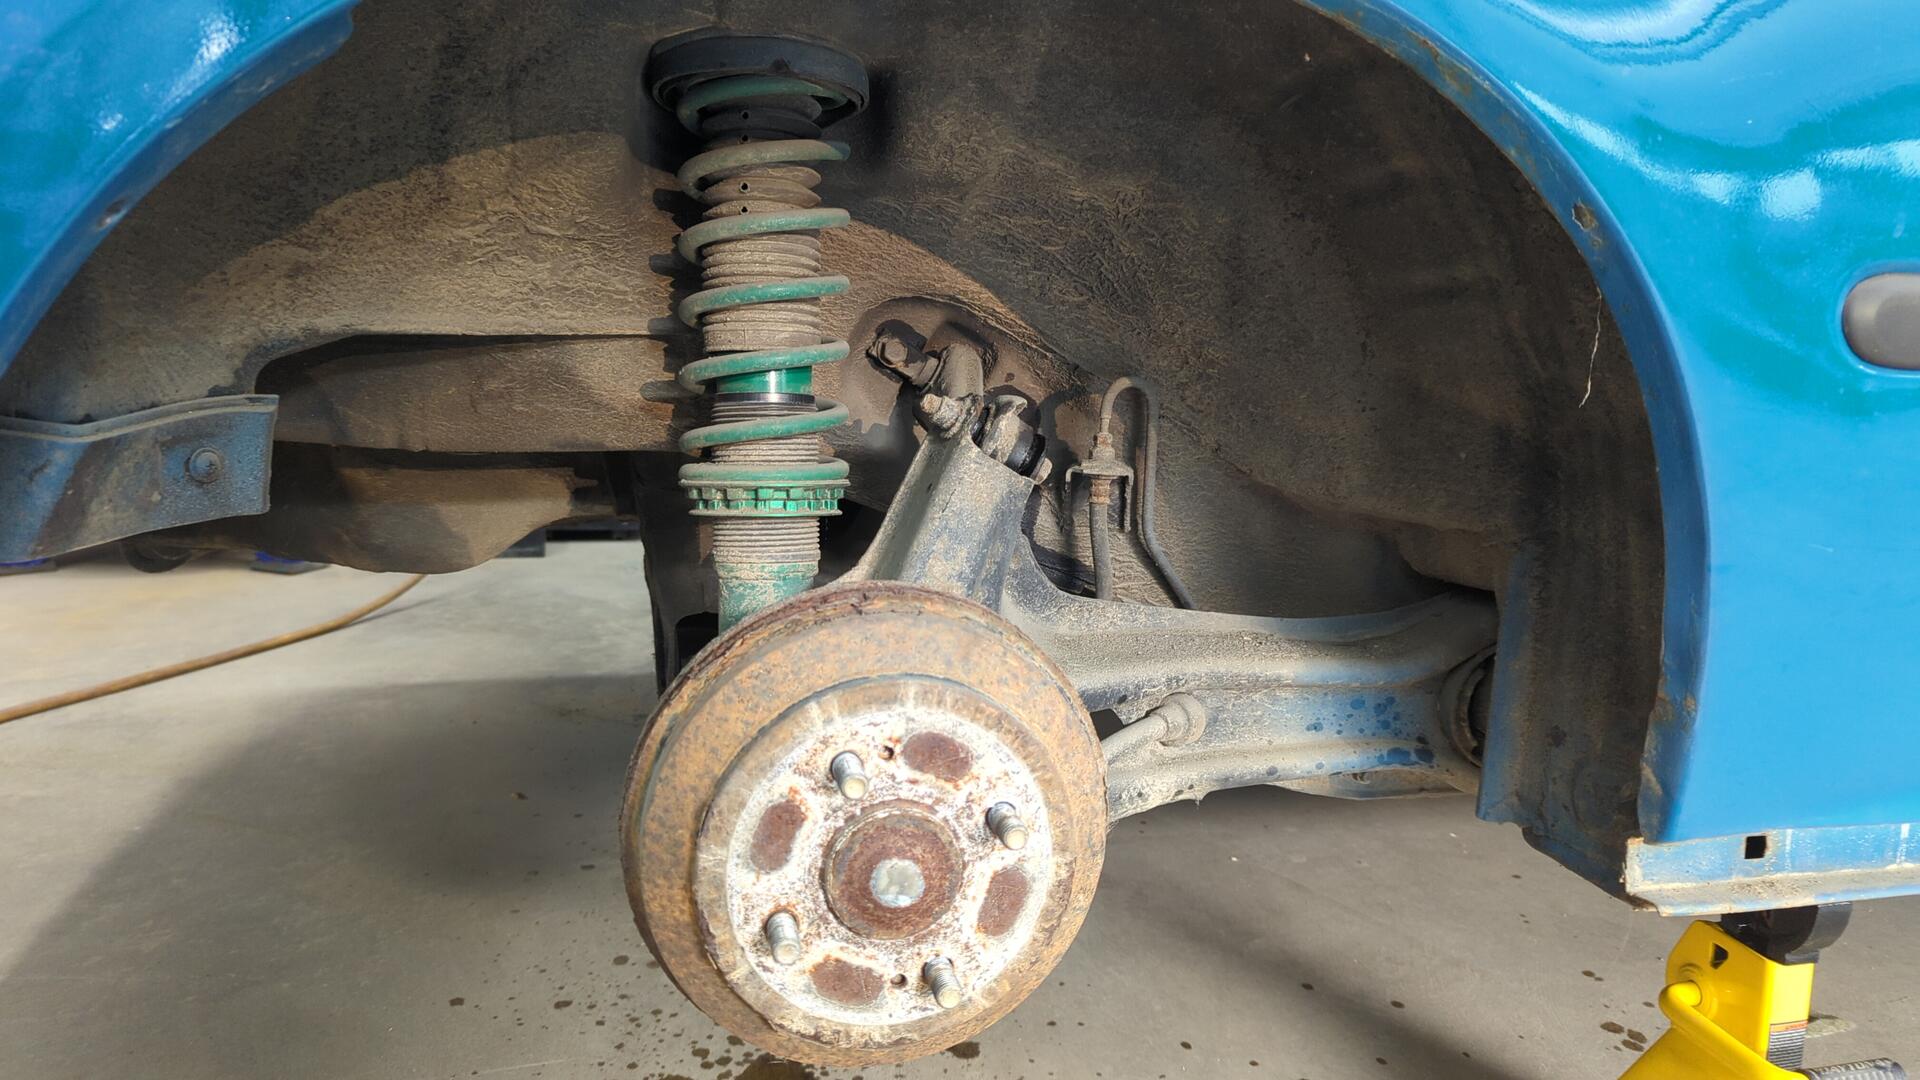
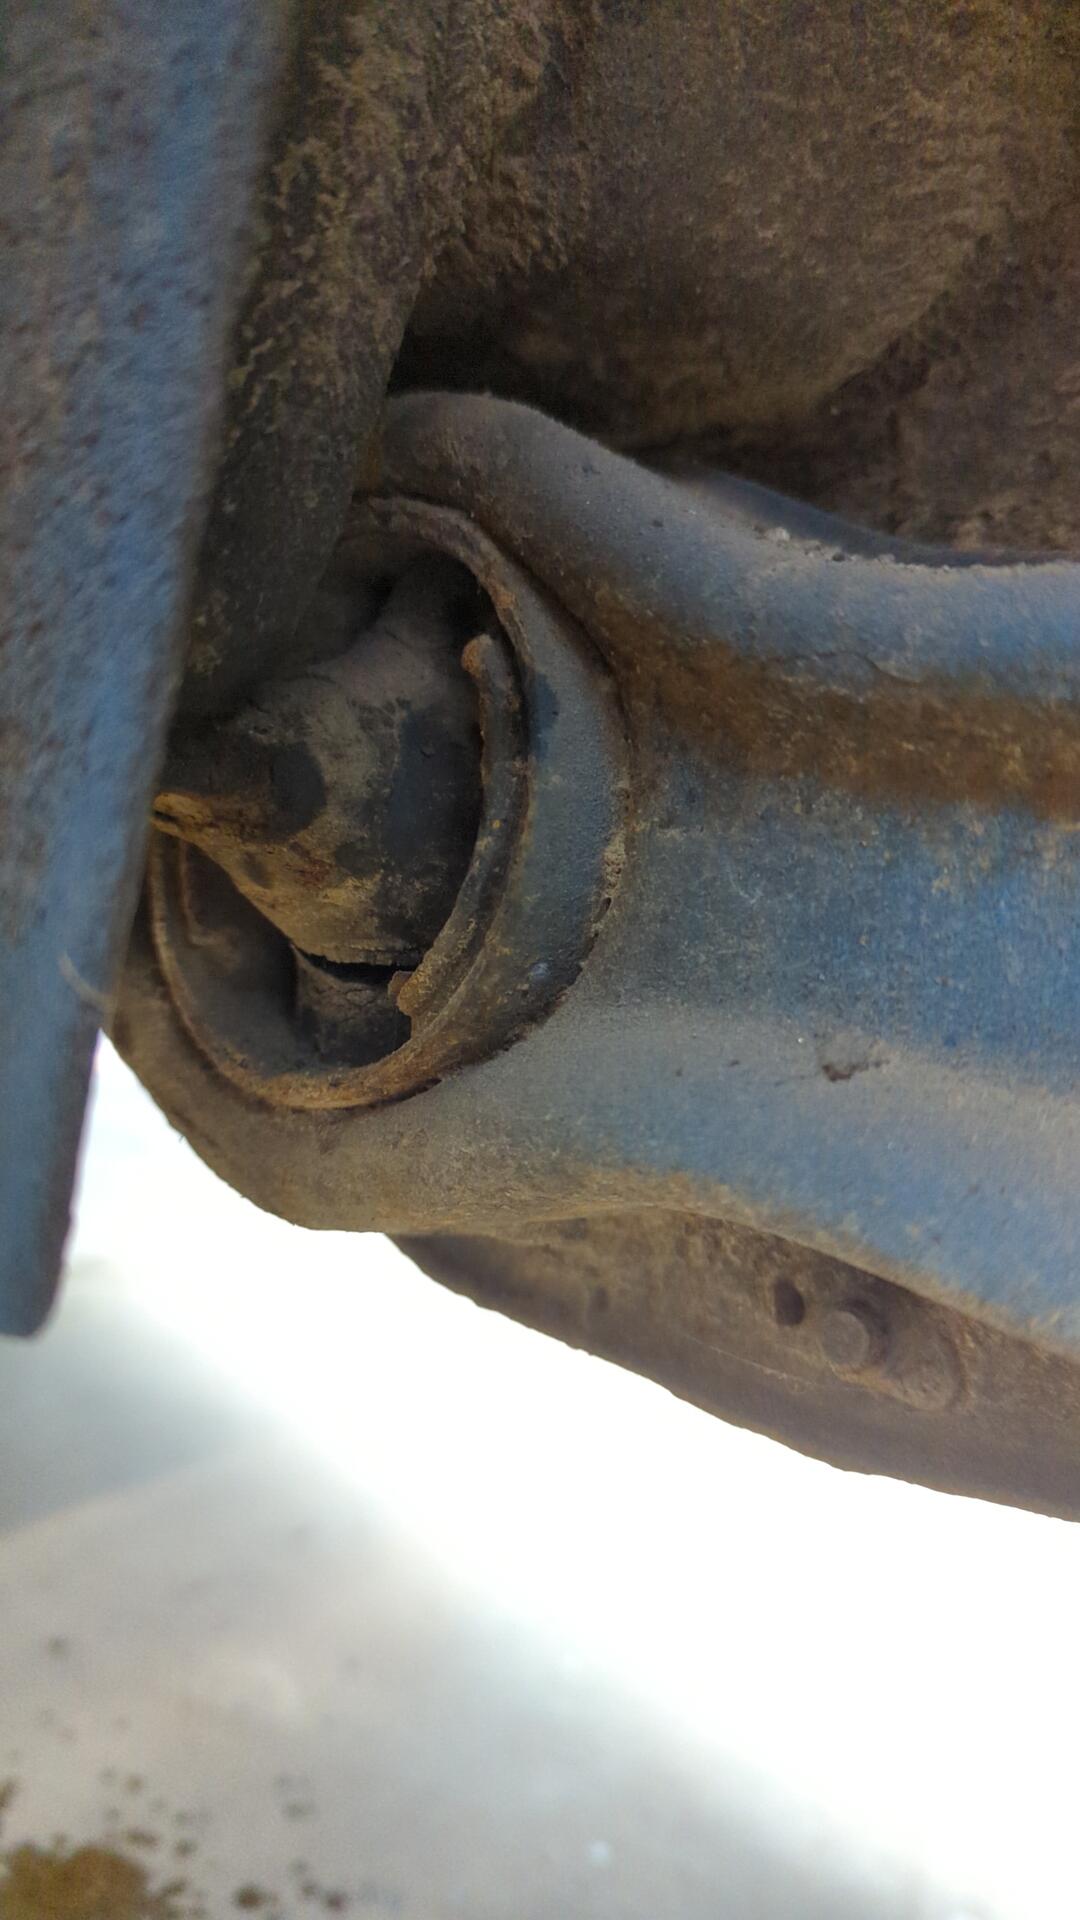
The trailing arm bushings were torn pretty bad.
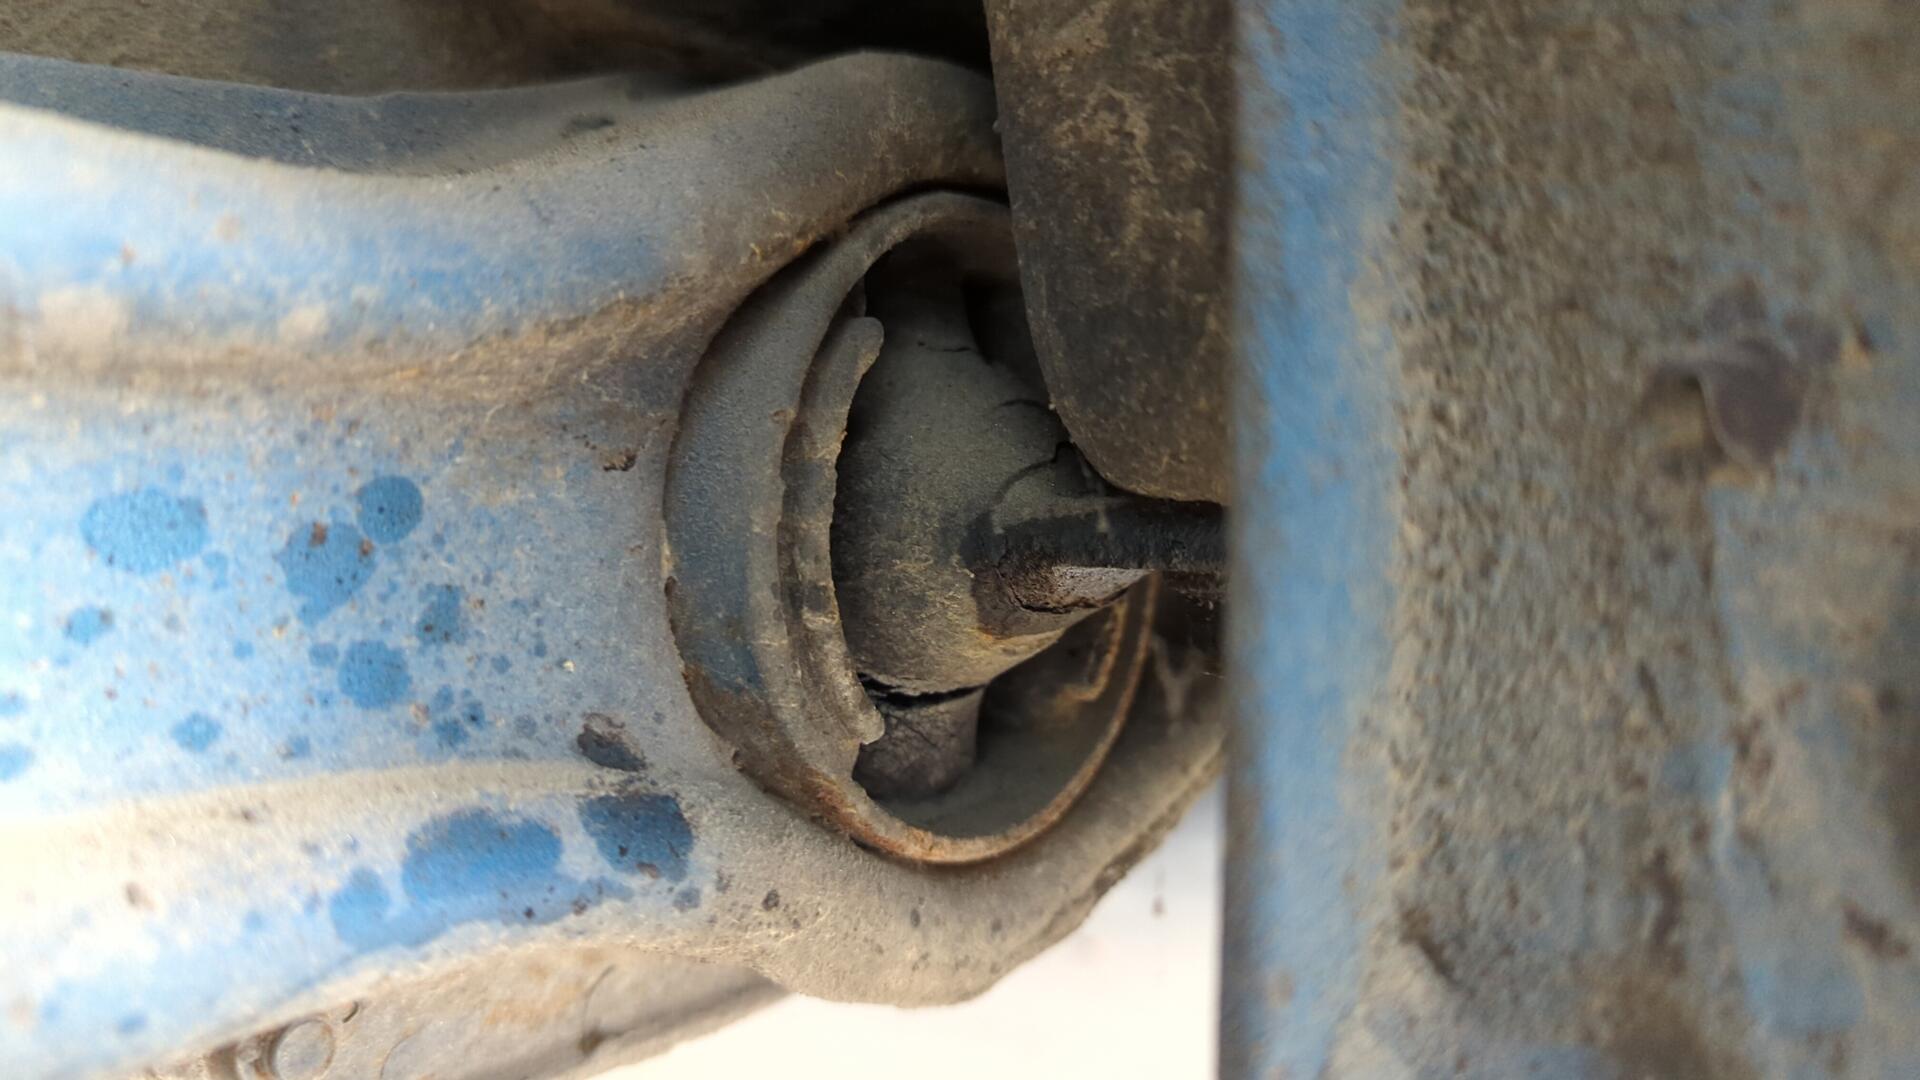
The driver side was in similar shape.

Dropping the rear trailing arms wasn’t too difficult. I started off by spraying everything with PB blaster and was able to remove every nut and bolt without much trouble.
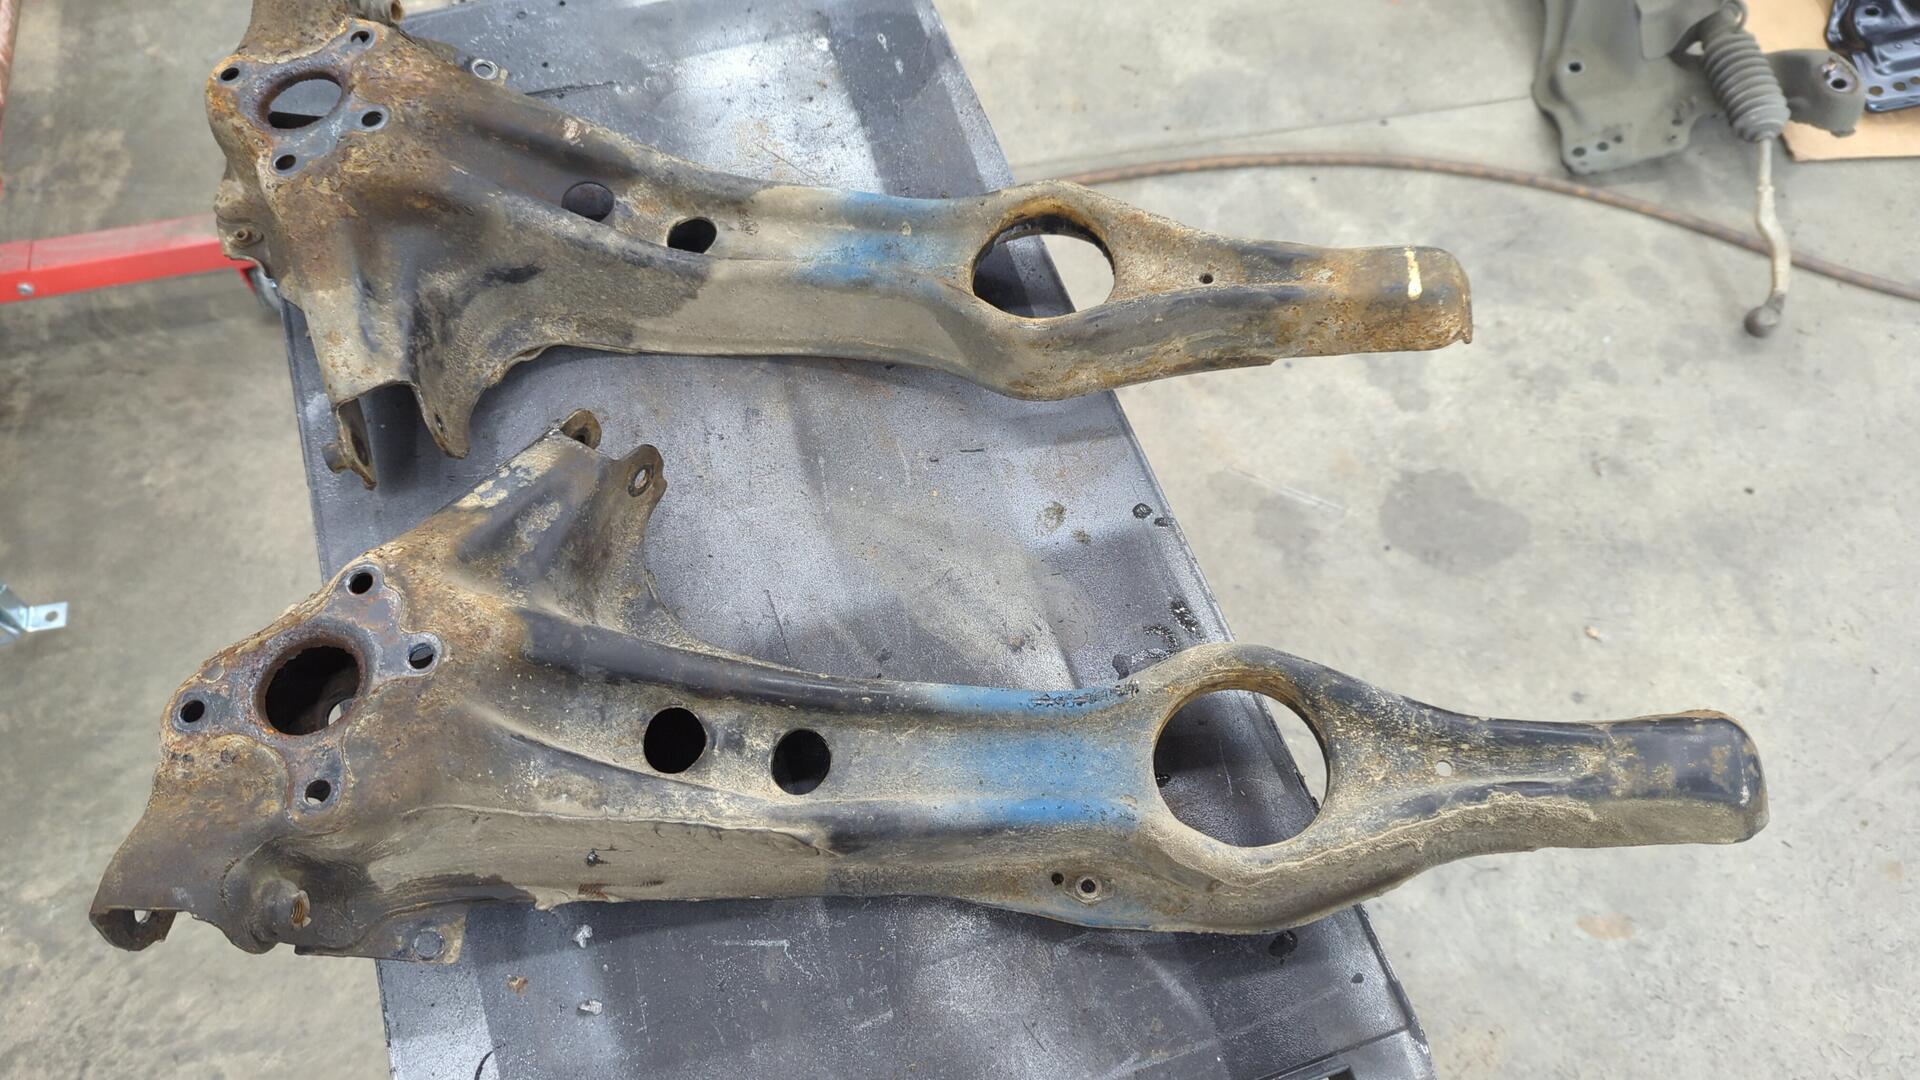
The arms are a little too rusty for my liking around the spindle but I’ll see what I can do with them. The rust hasn’t compromised the structural integrity but they’re so heavily pitted it’ll be hard to prevent the rust from coming back in several years.
And while the rear trailing arms may have come out easily, the rear compensator arms were a different story. The passenger one wasn’t too difficult to remove but the driver side one was stuck.
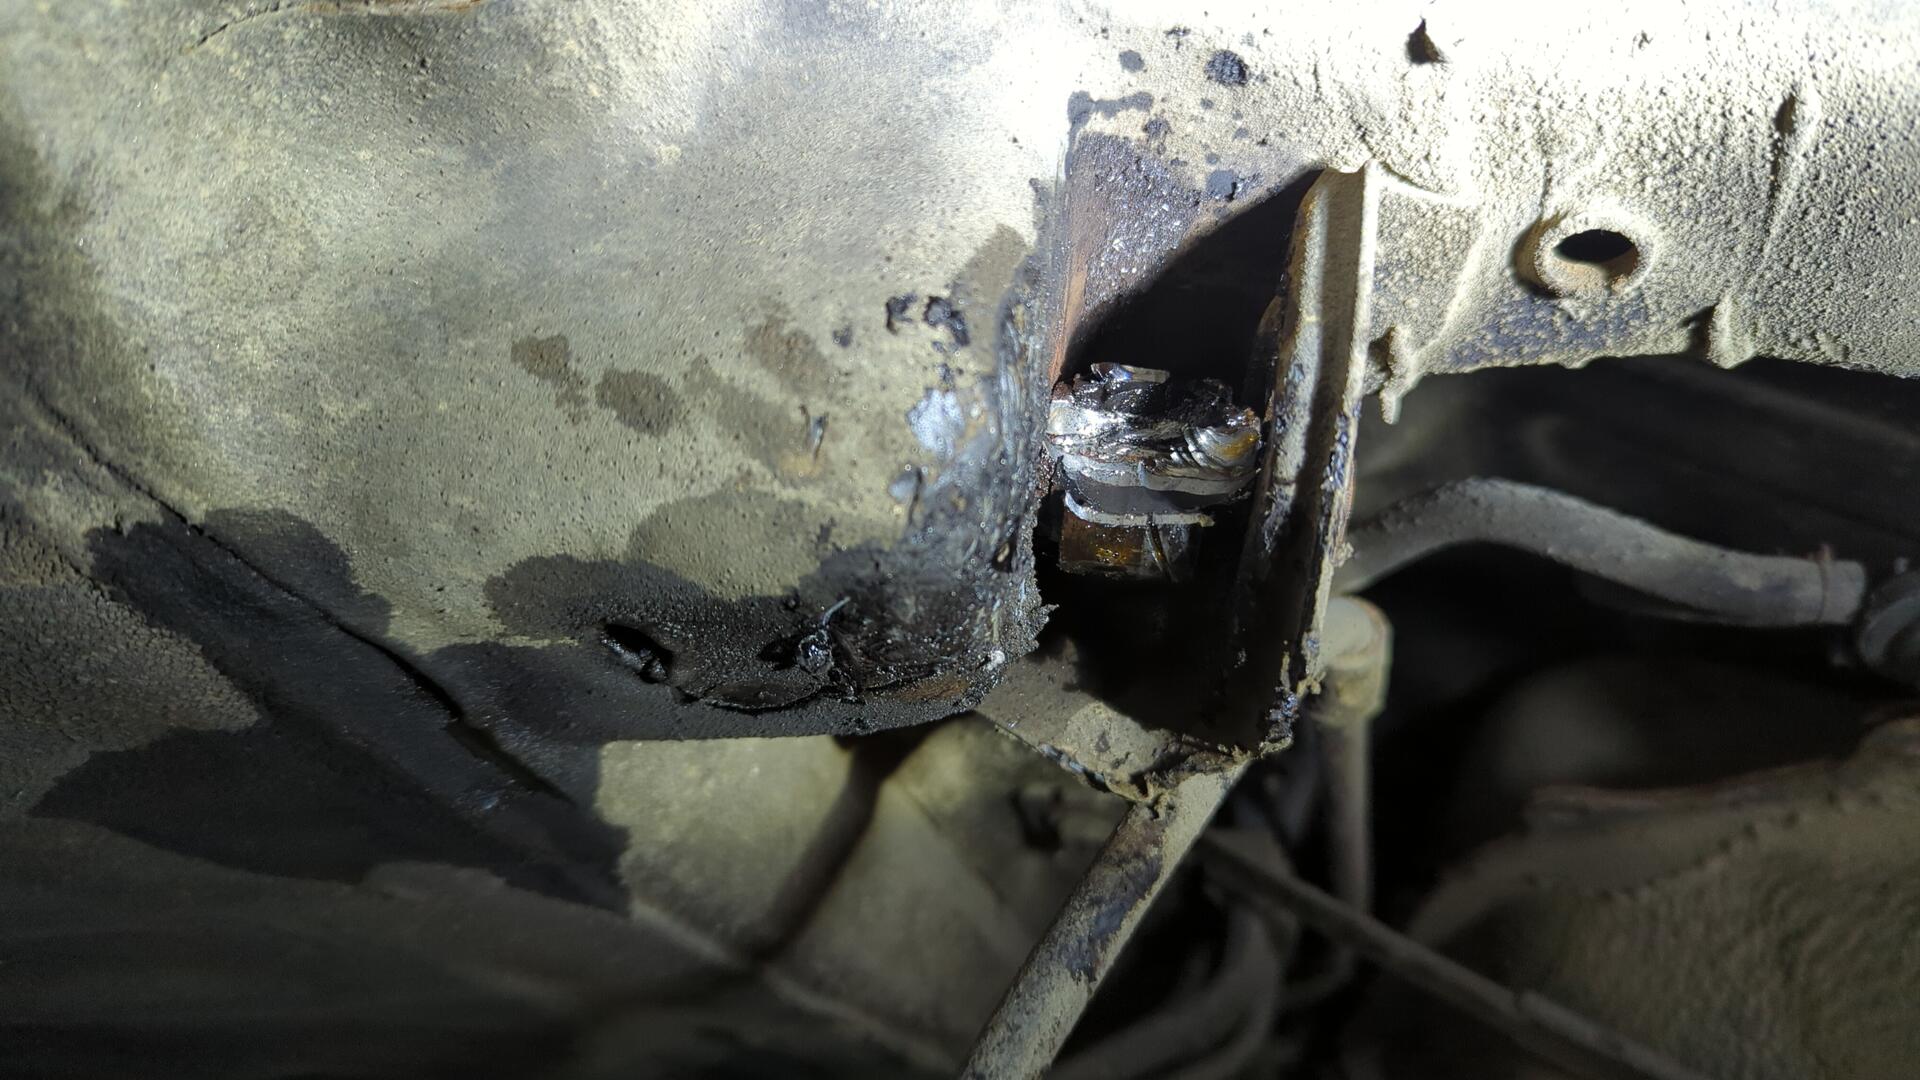
The compensator arm bolt goes into a captured nut within the body so I was worried I was gonna have to cut an access hole to get at the nut but with some fiddling I realized the nut wasn’t what was holding the bolt, it was actually the bushing.

Using my die grinder and sawzall I was able to make a relief cut in the bushing to break the tension and free up the bolt. Grinding through the rubber smelt horrible but it was the best option I had.
Success! No damage to the body either!

I did have to sacrifice the compensator arm to get to the bushing. Thankfully I found a new-to-me OEM set on Ebay for $20.
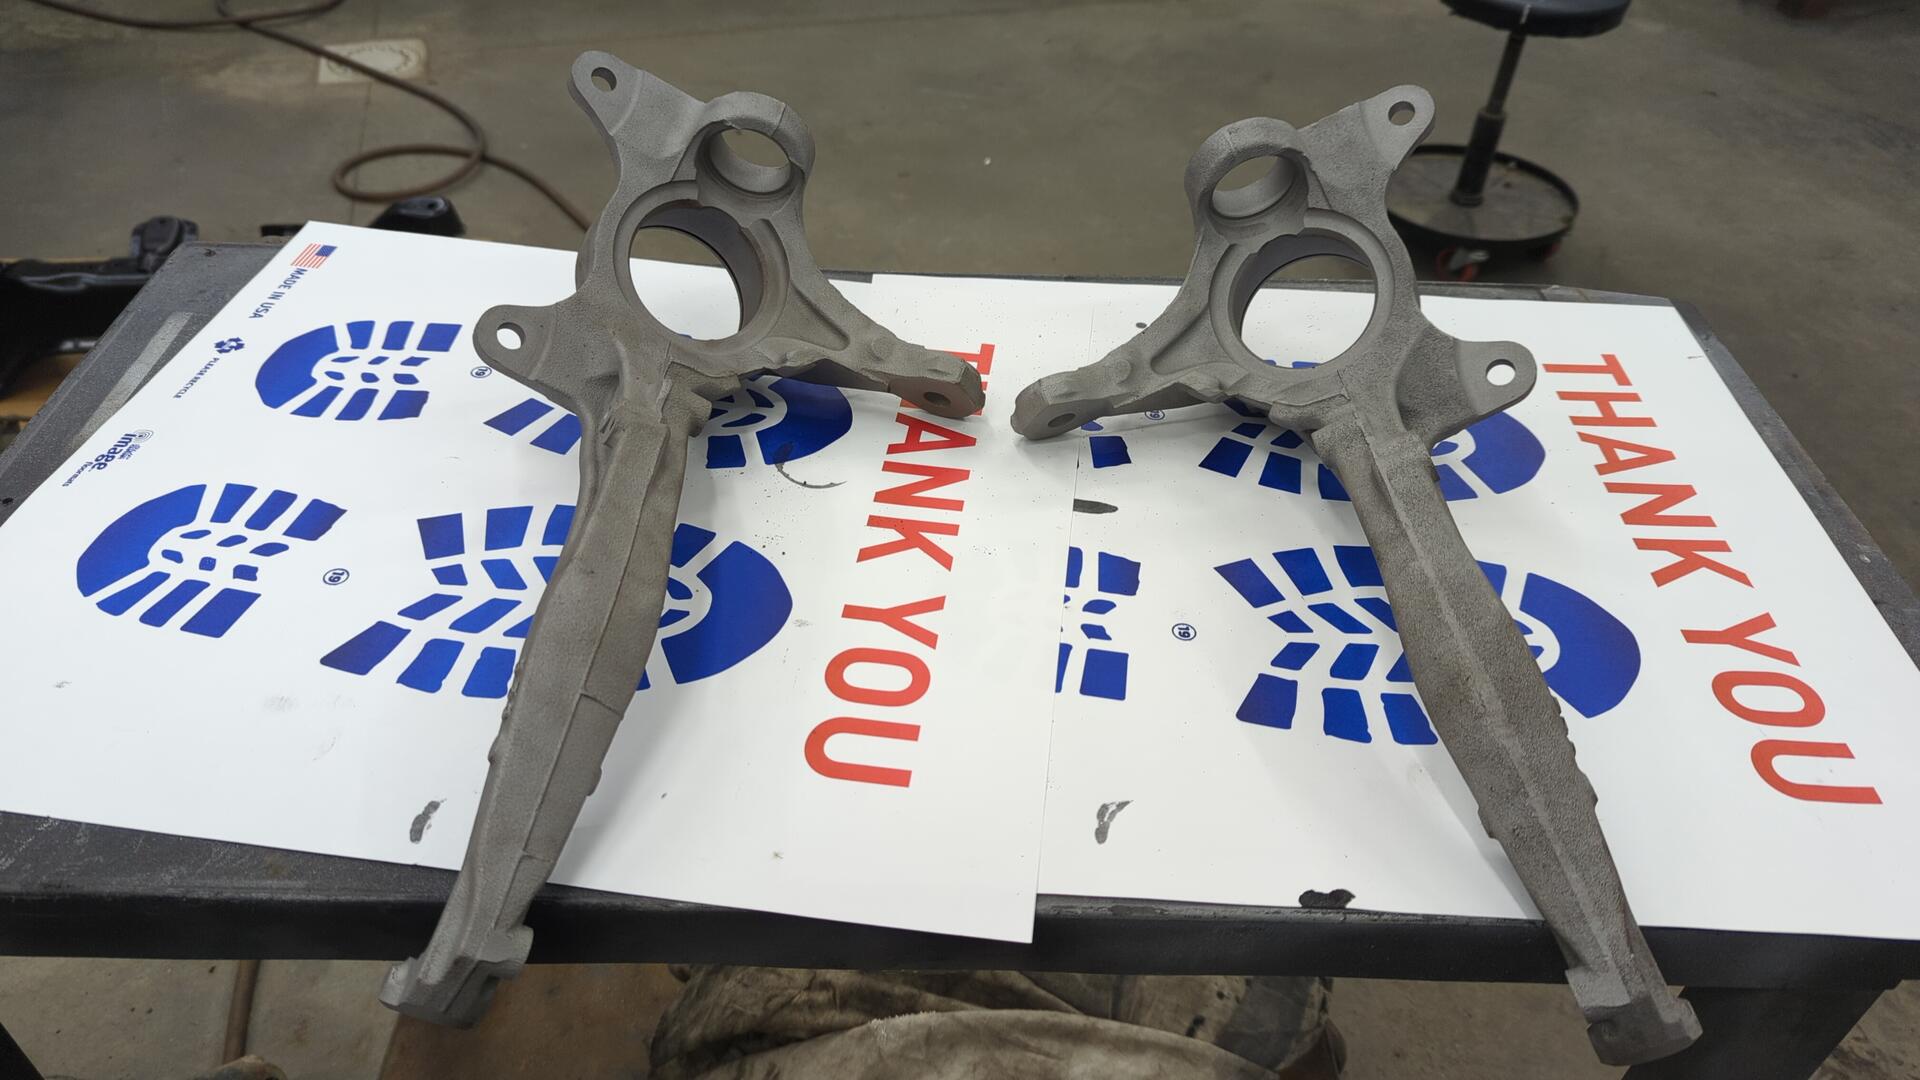
Upgrading the Front Knuckles to EX Knuckles
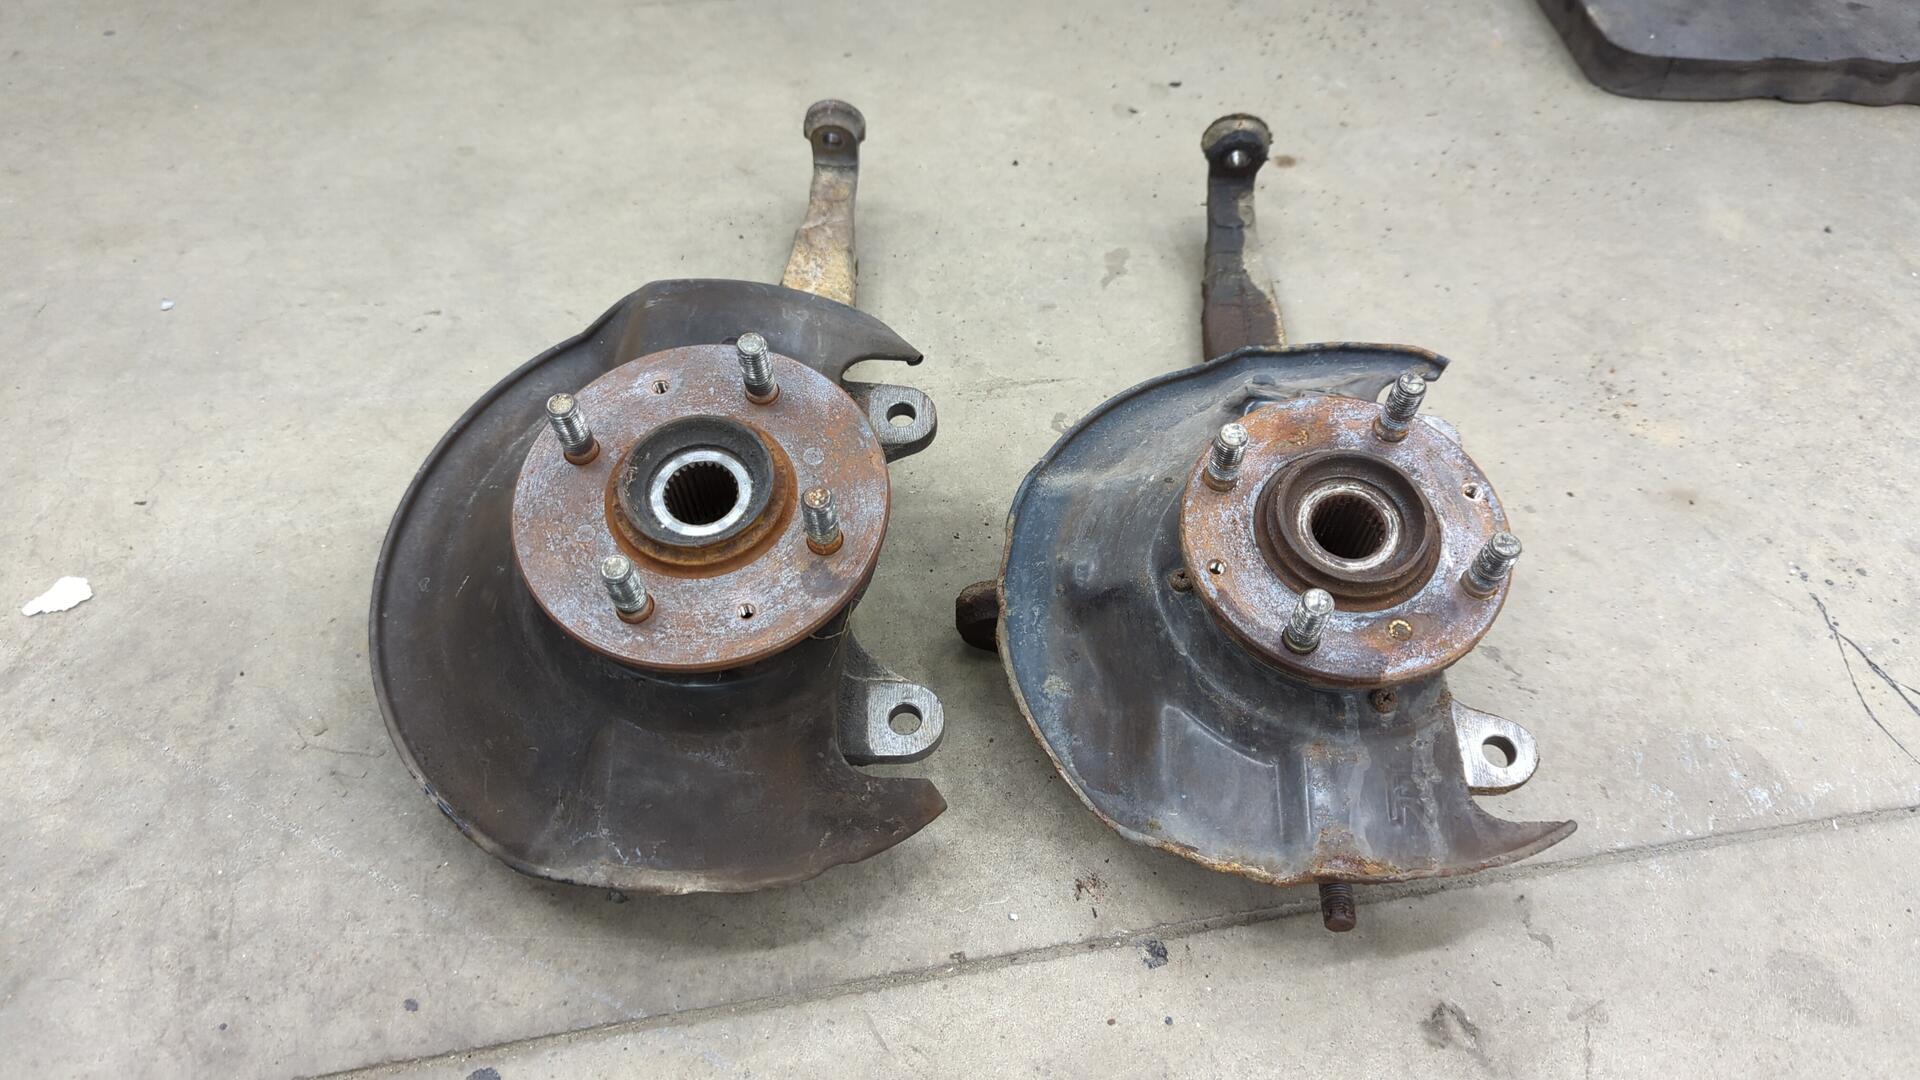
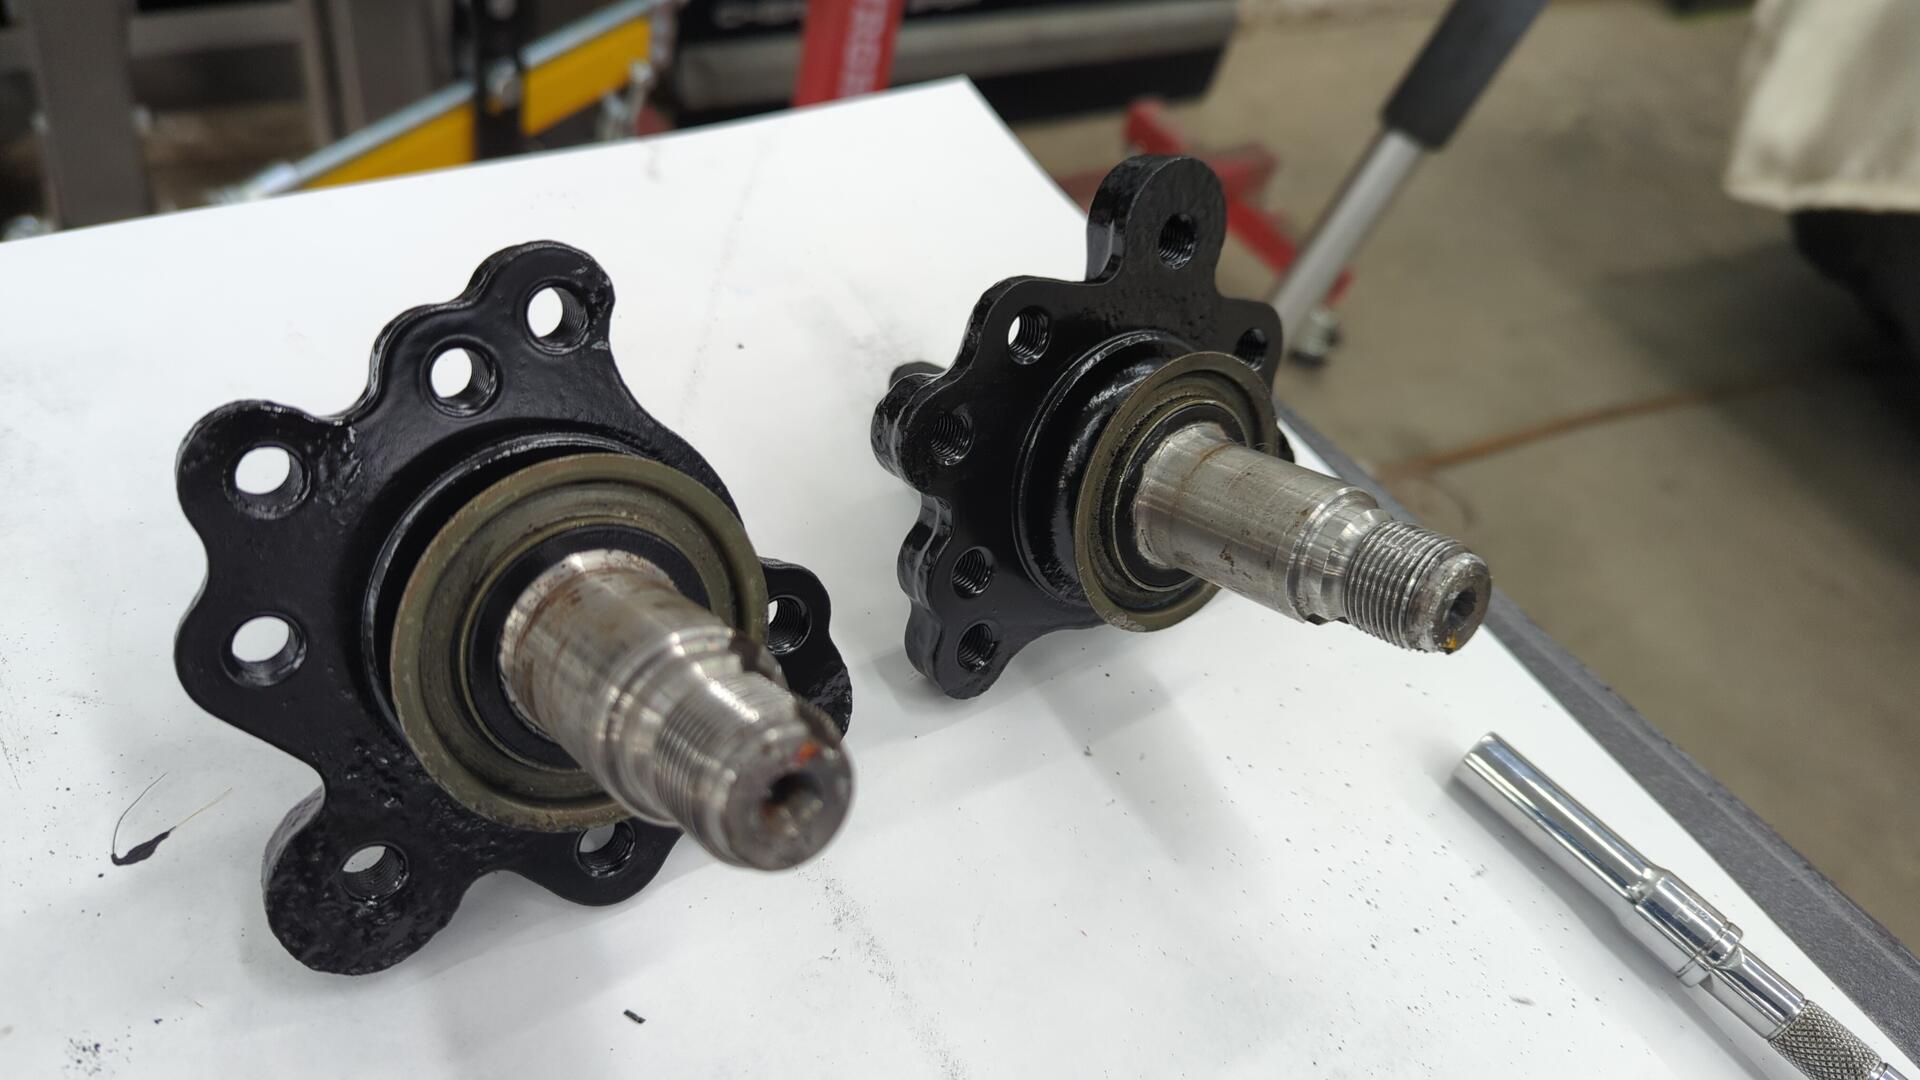
One of the upgrades I’ve always wanted to do to my civic was switch to EX brakes in the front. My hatch is a DX which means it has the smaller front rotors (9.4" diameter) whereas EXs have 10.3" rotors. Since I’m gonna be auto-crossing it pretty heavily next year I figured I’d jump the gun and upgrade it now.
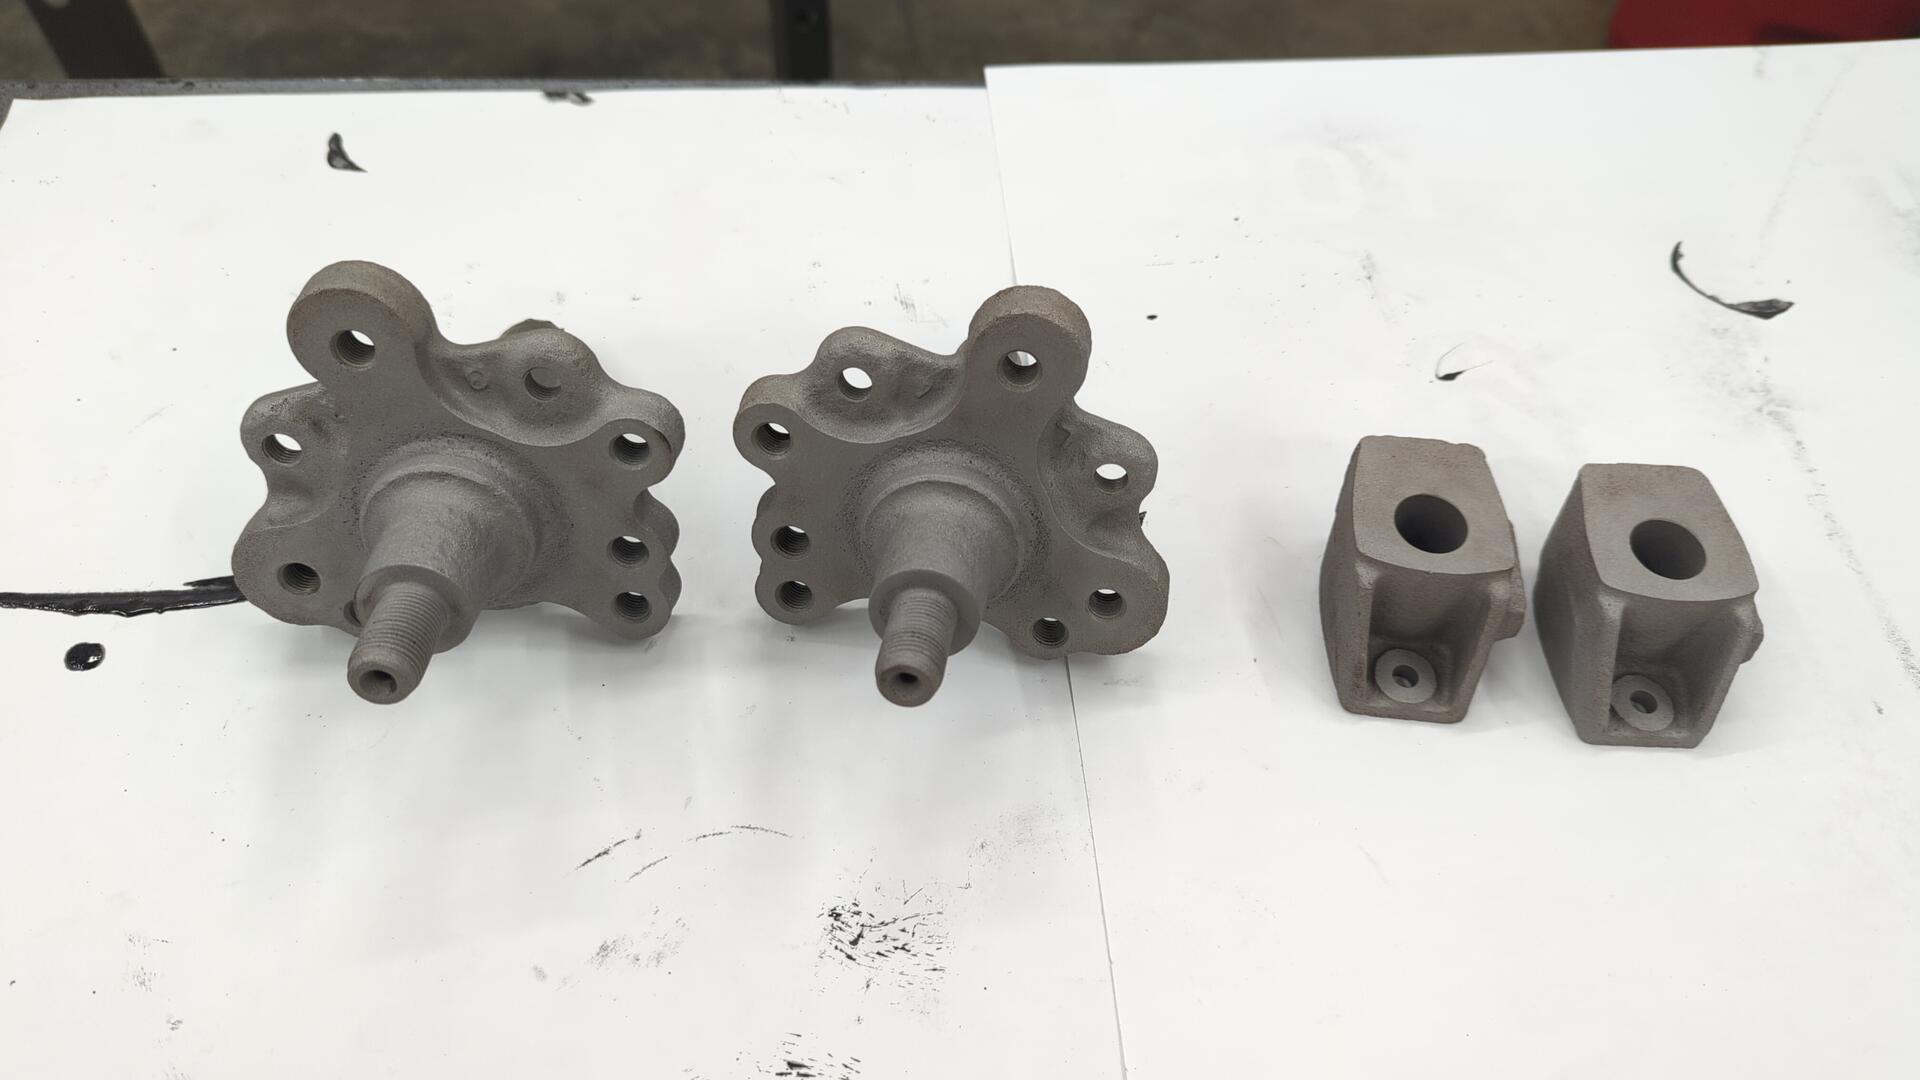
In order to switch the brakes you have to buy new knuckles because EX knuckles have a different wheel bearing + hub.
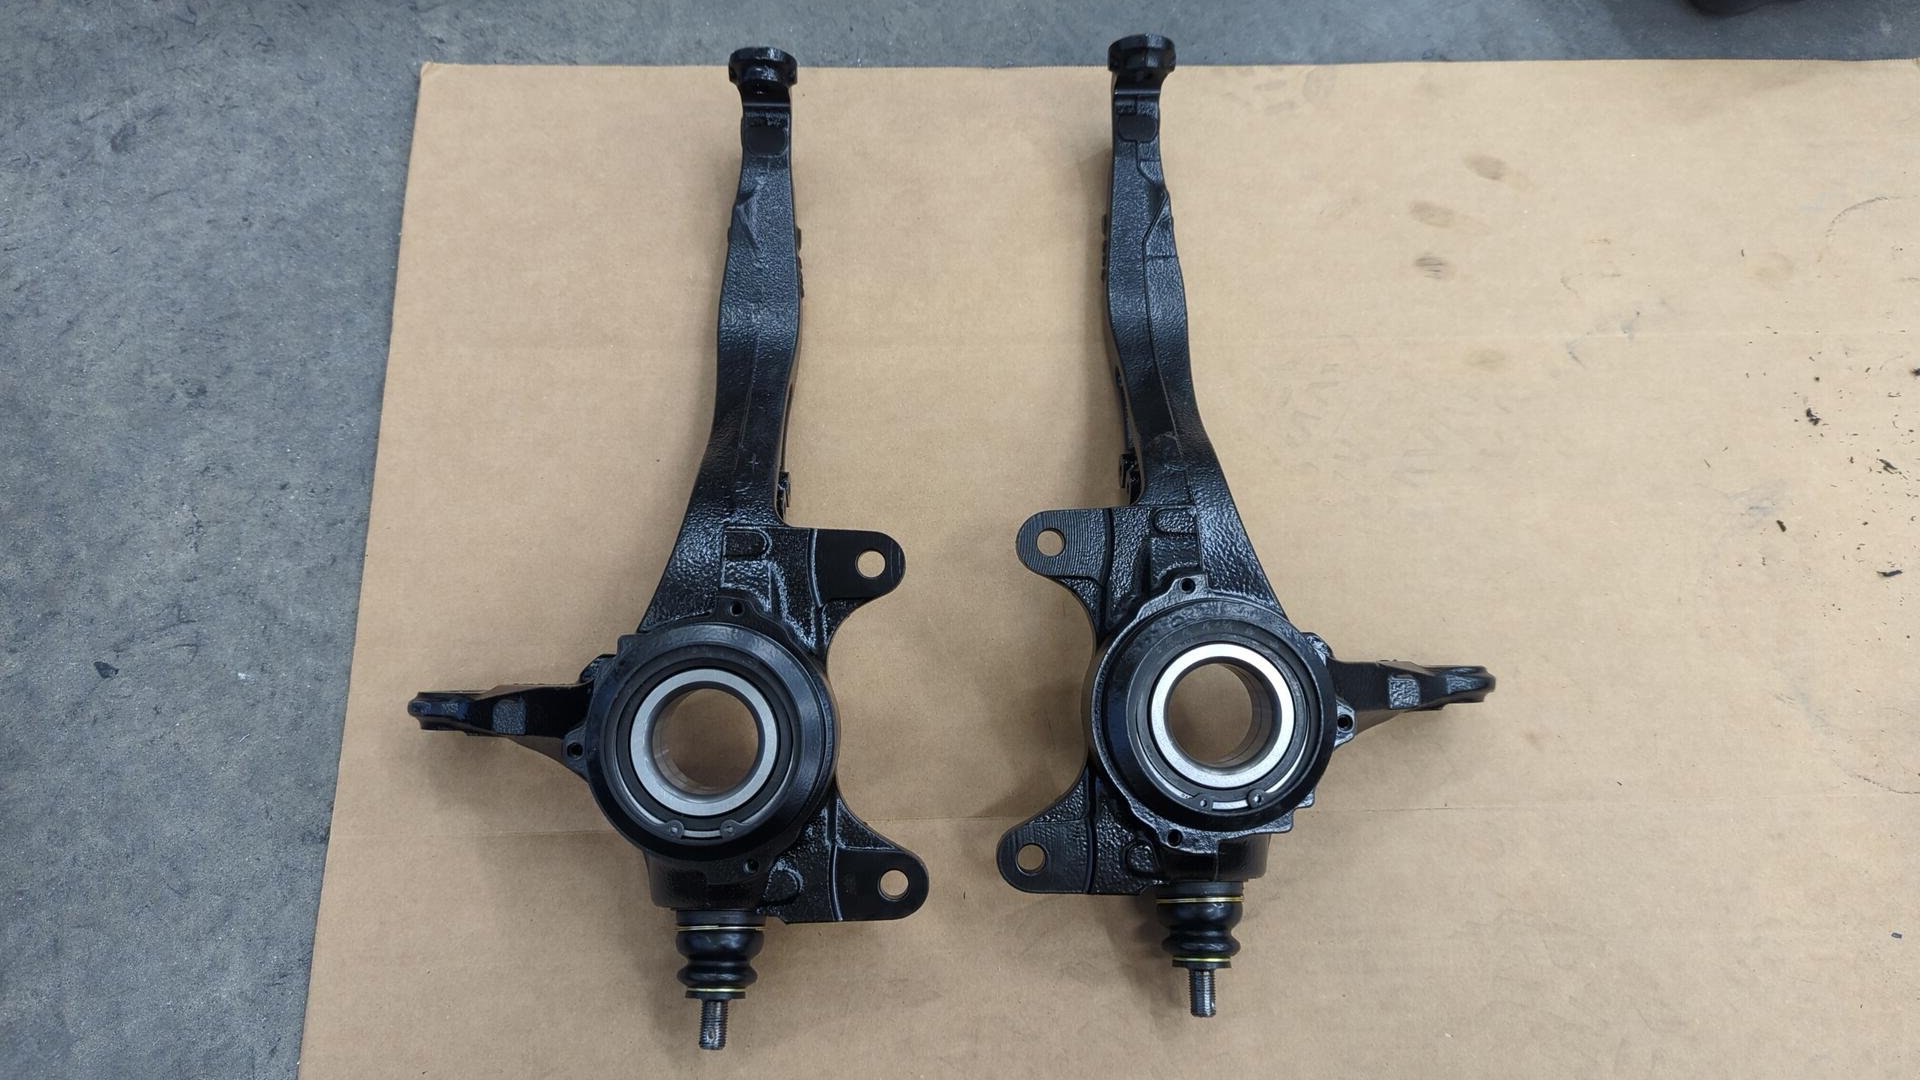
Size comparison of an EX knuckle (left) to DX knuckle (right). Note the larger dust shield + wheel hub.
These EX knuckles appear to be off an EK as they are slightly shorter than my EG knuckles so that should be help gain some suspension travel back since I’m lowered.


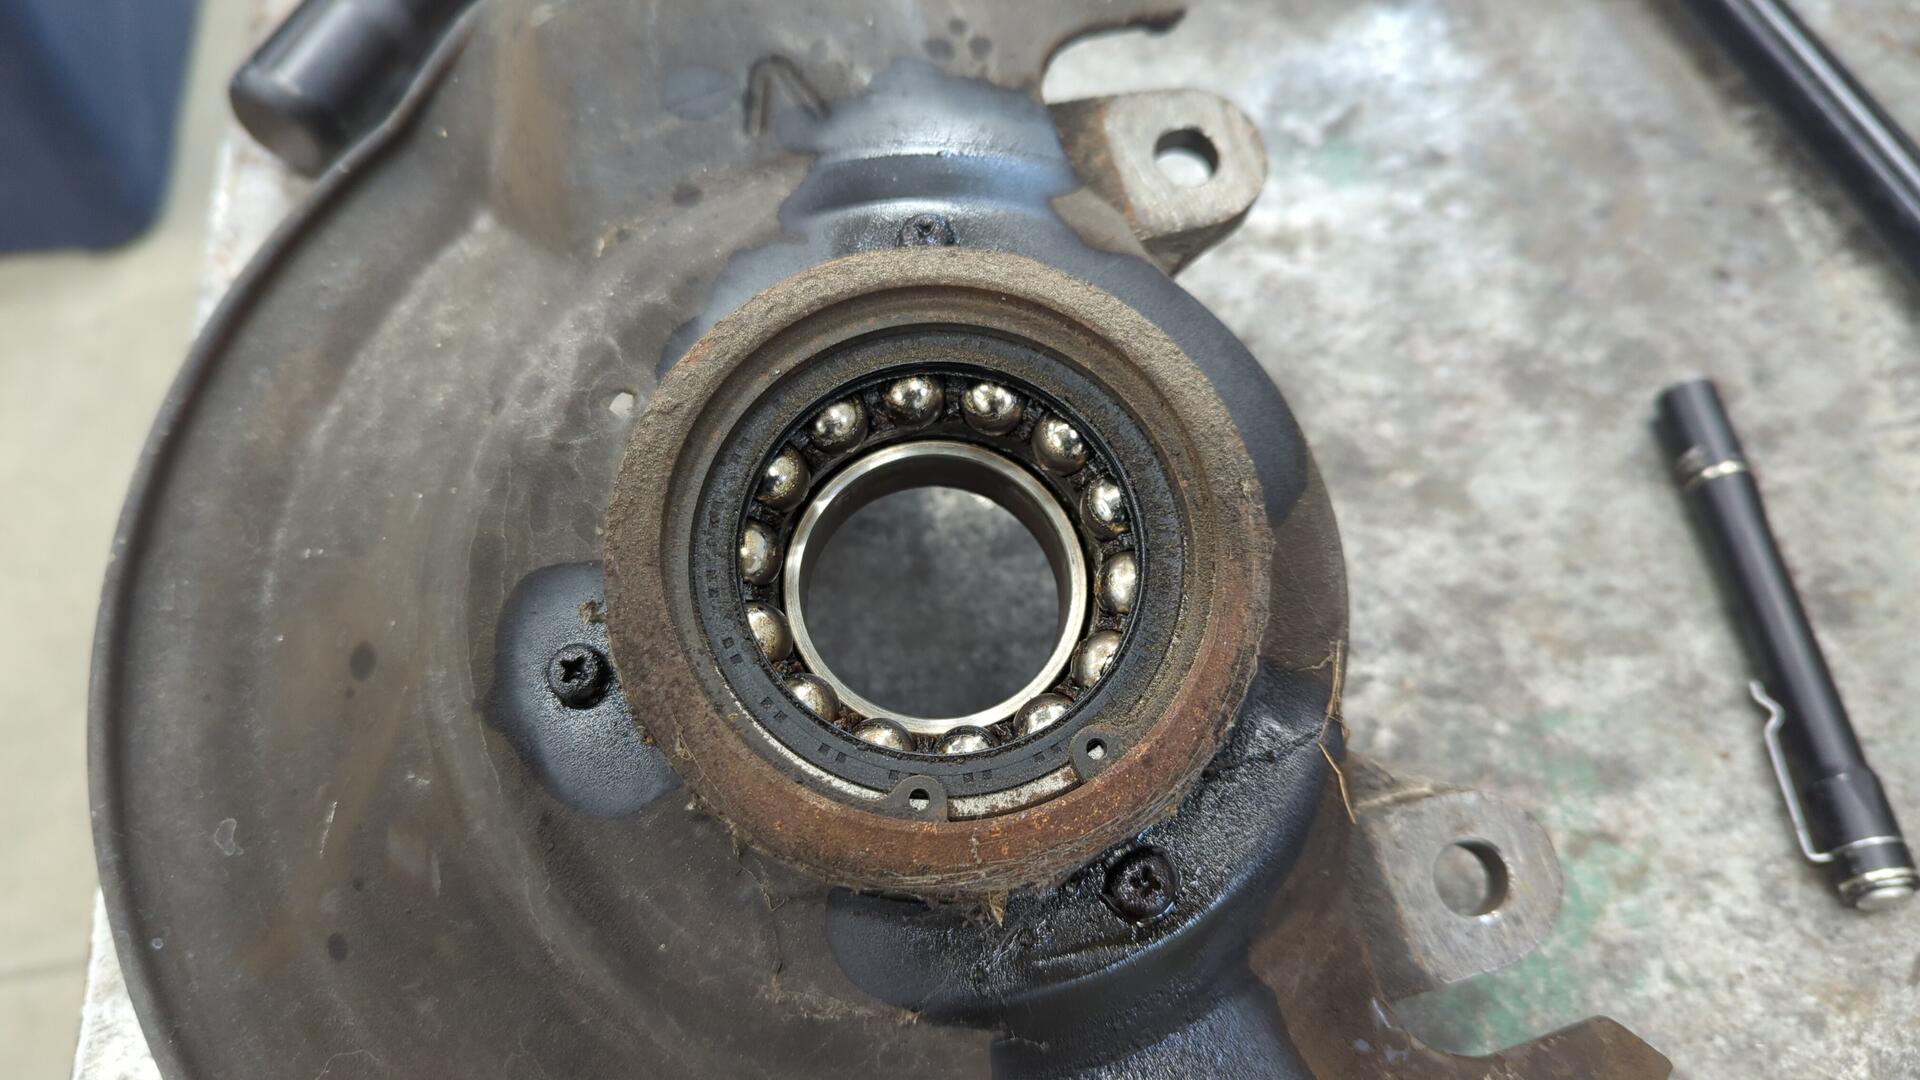
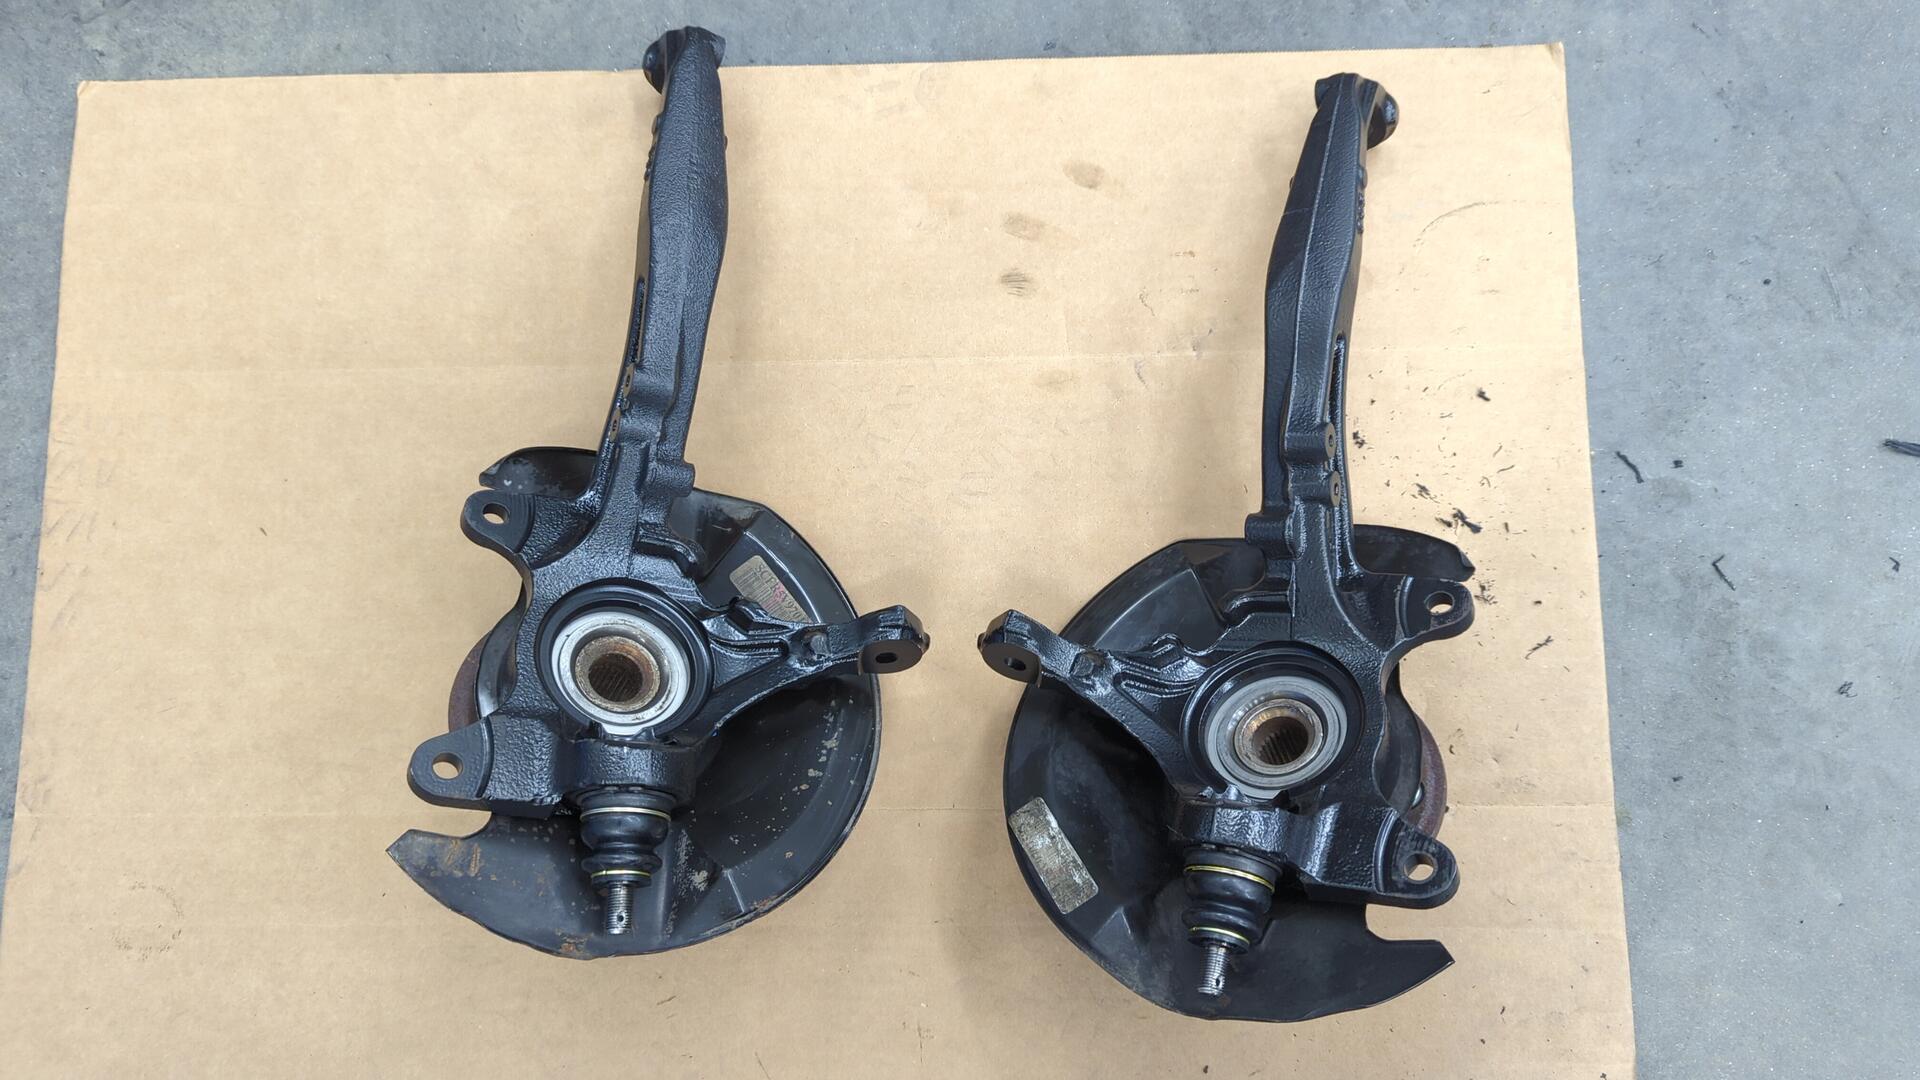
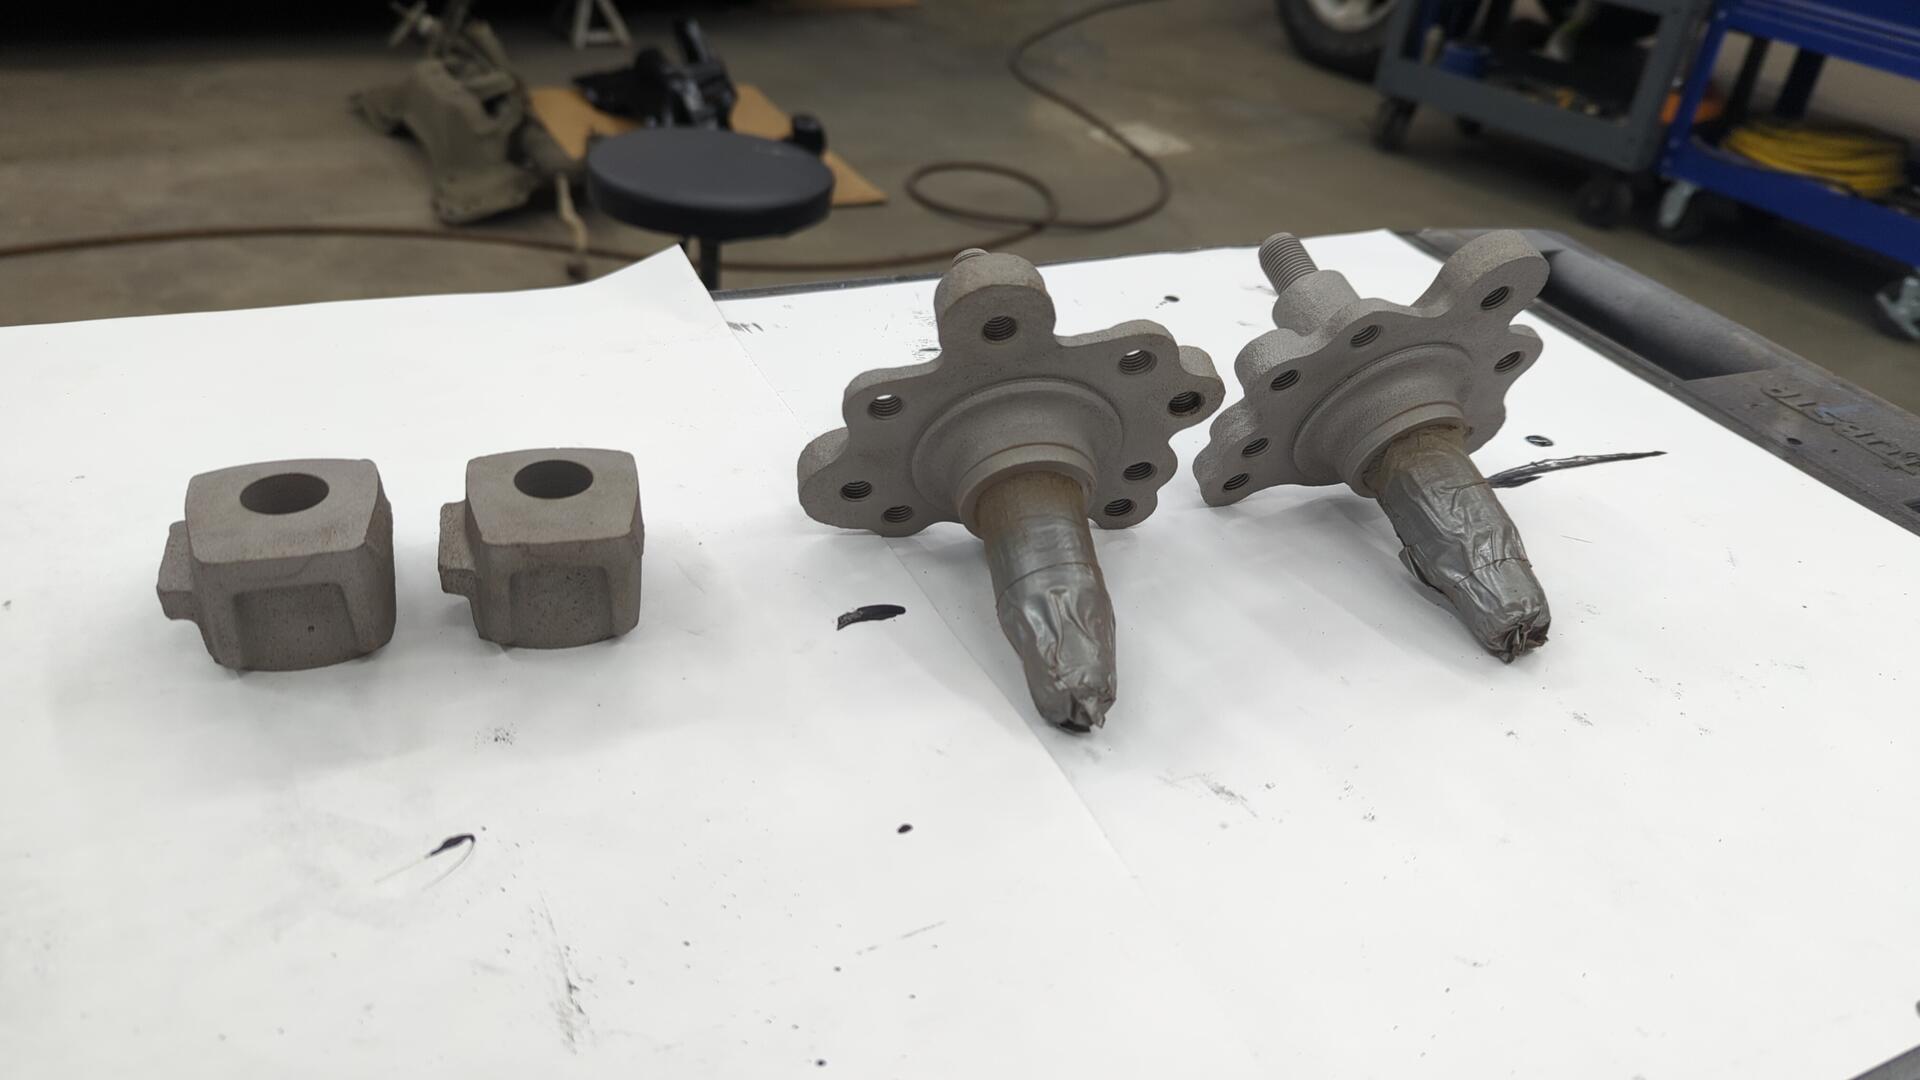
Using my hammer and a socket I knocked out the hub so I could remove the wheel bearing + shield on the EX knuckles.
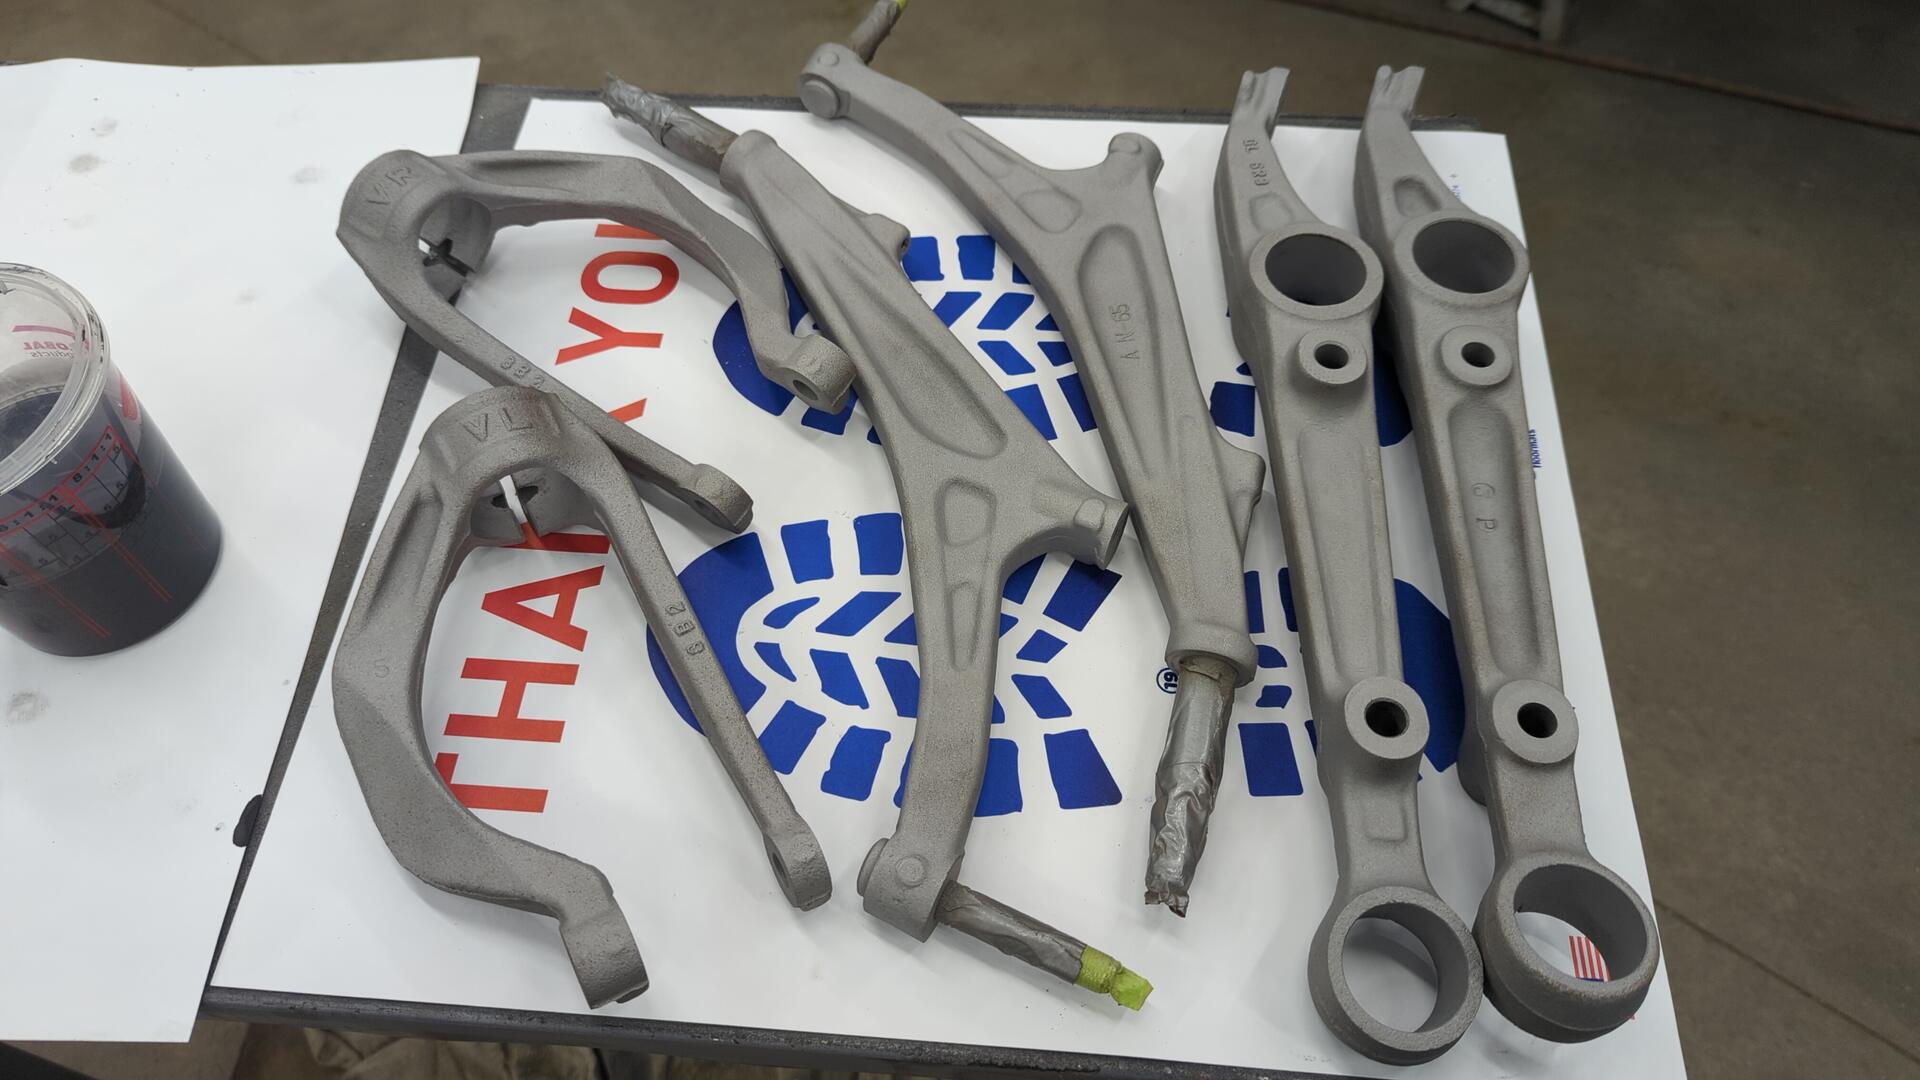
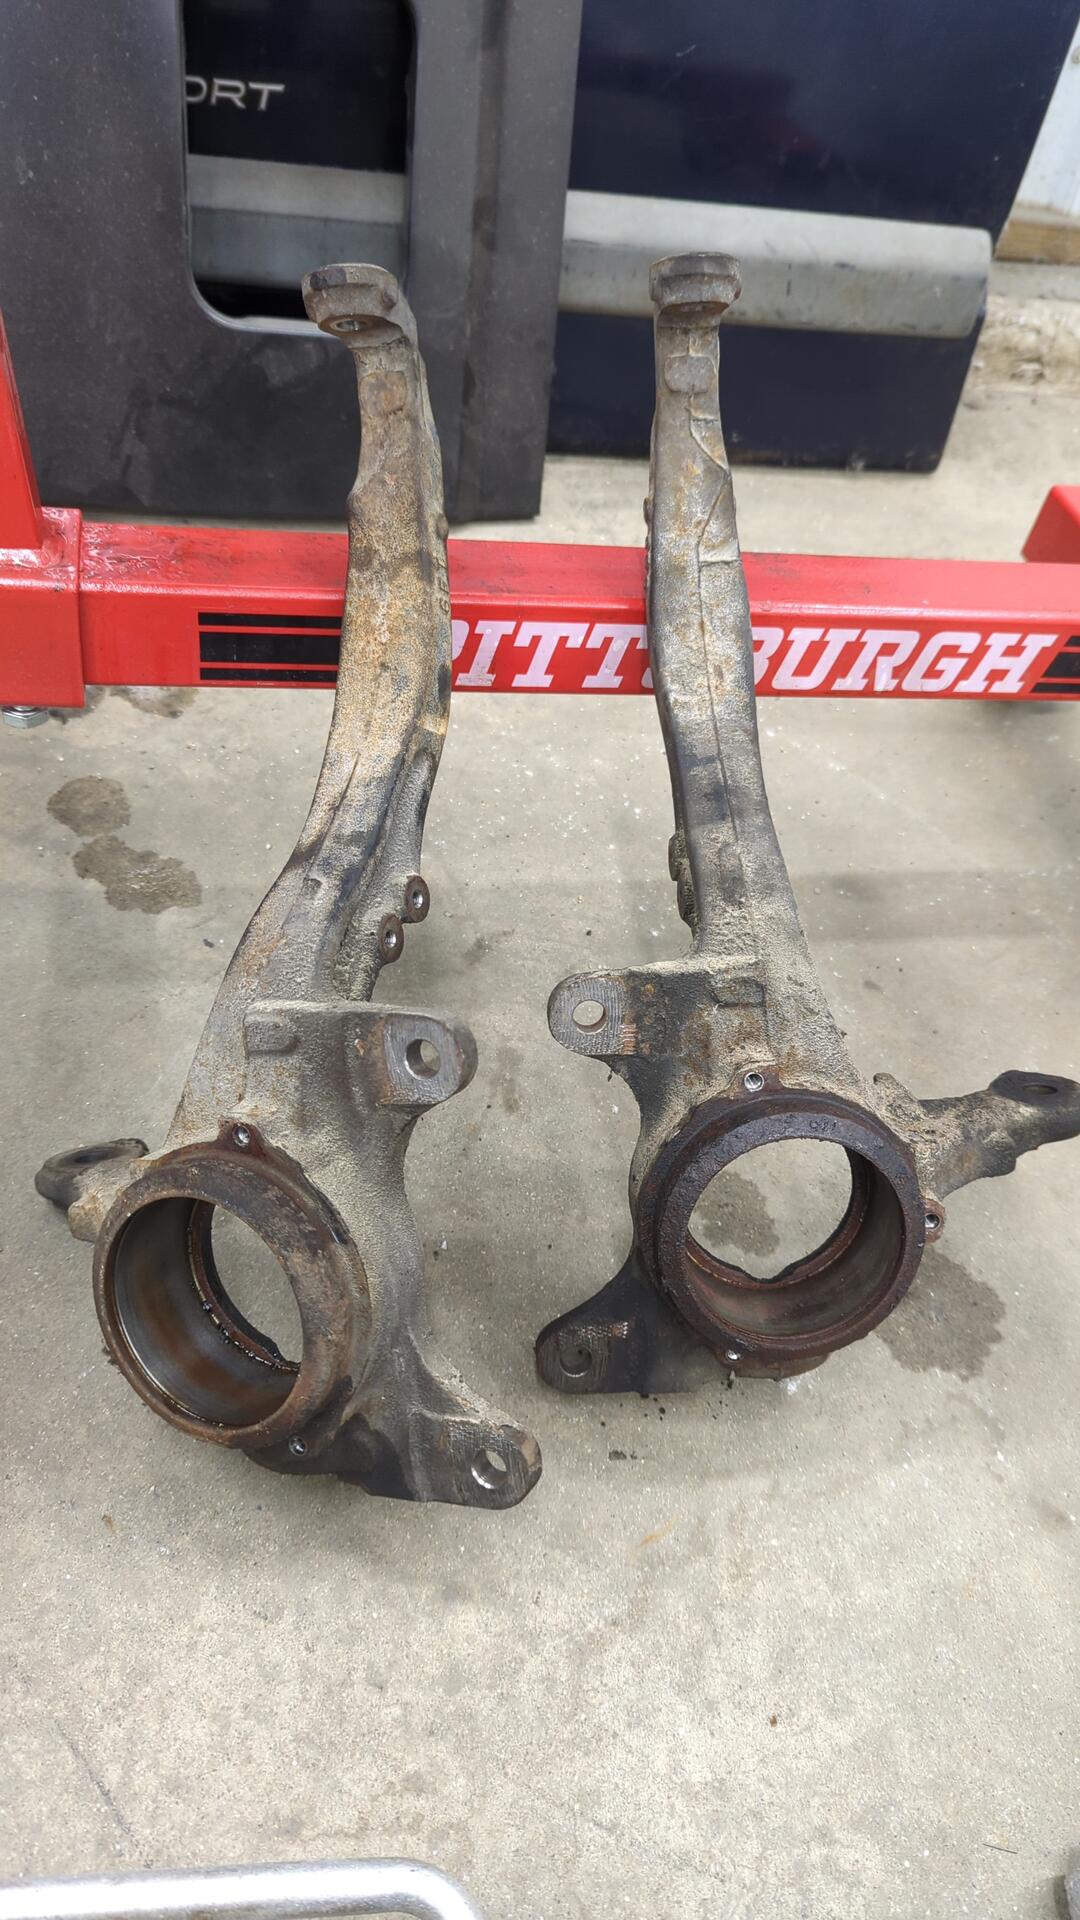
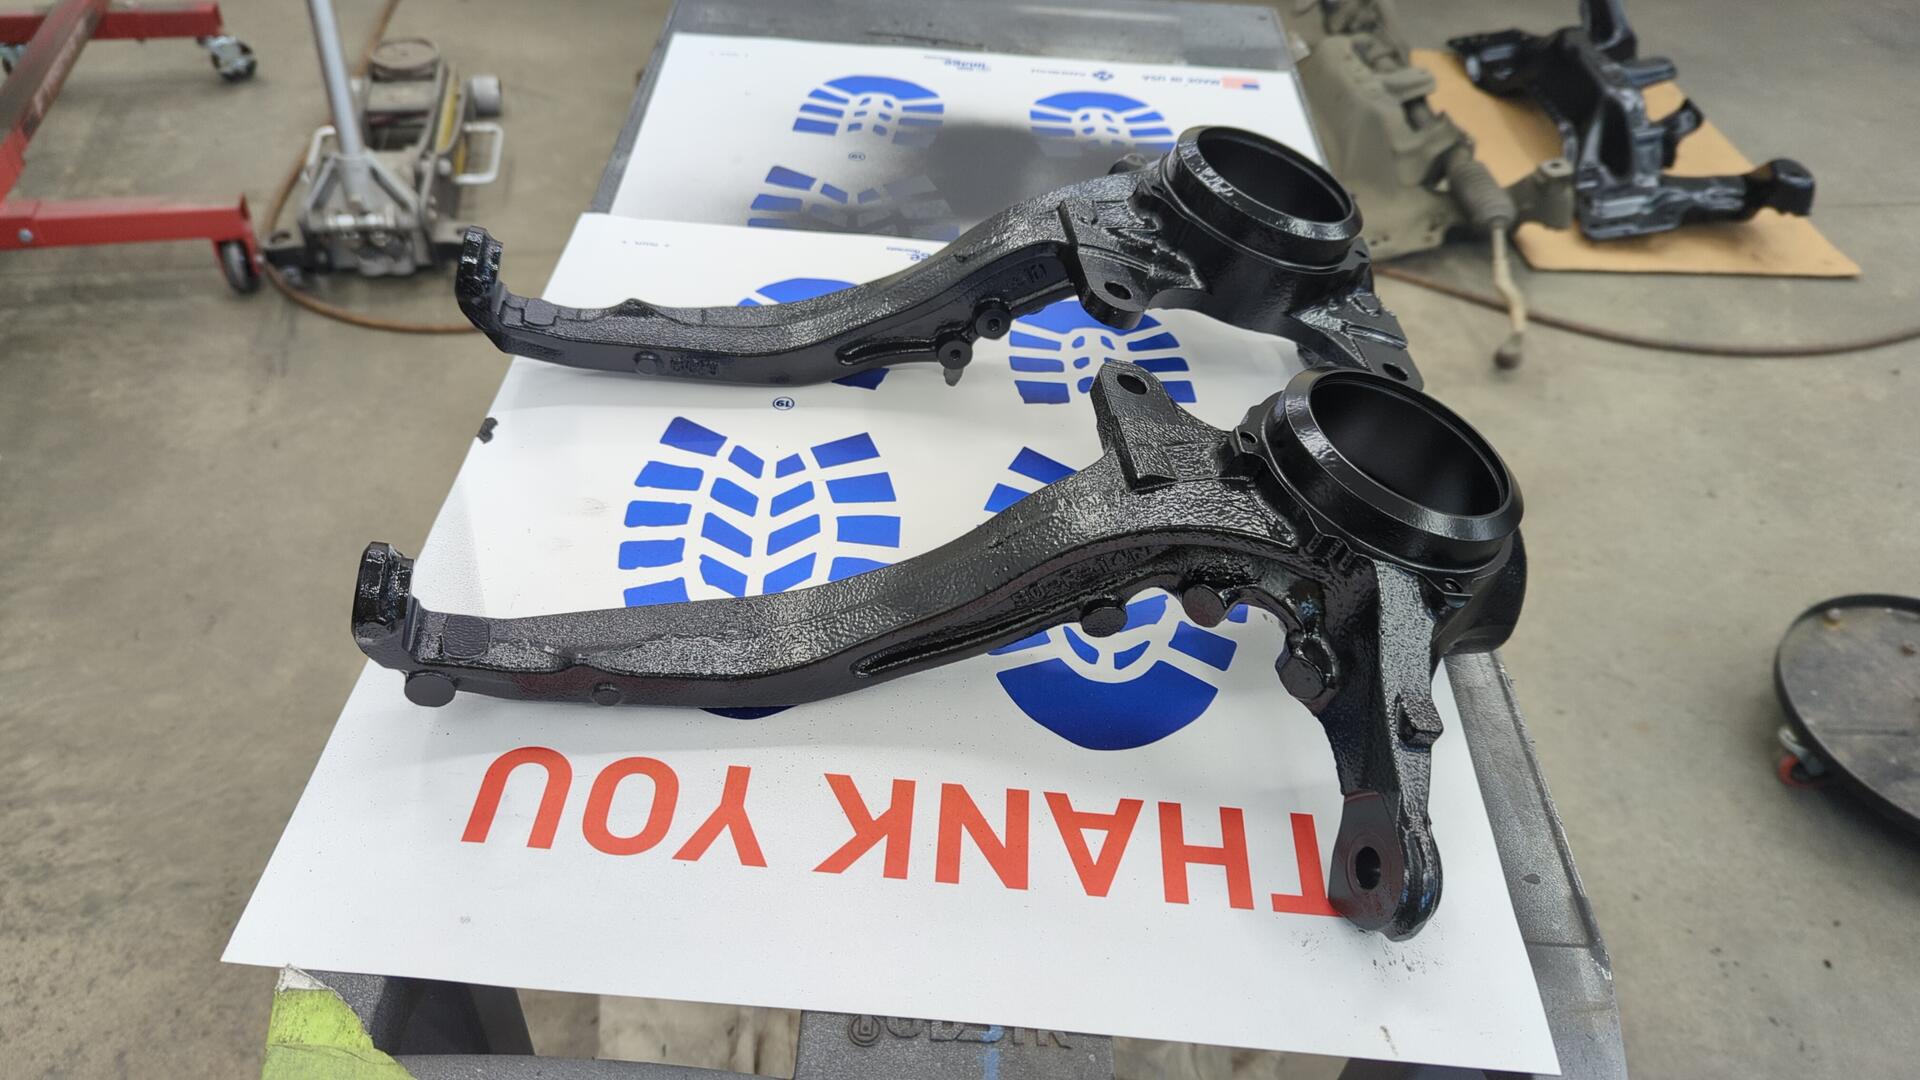
All stripped down and ready for sand blasting.
Good as new!
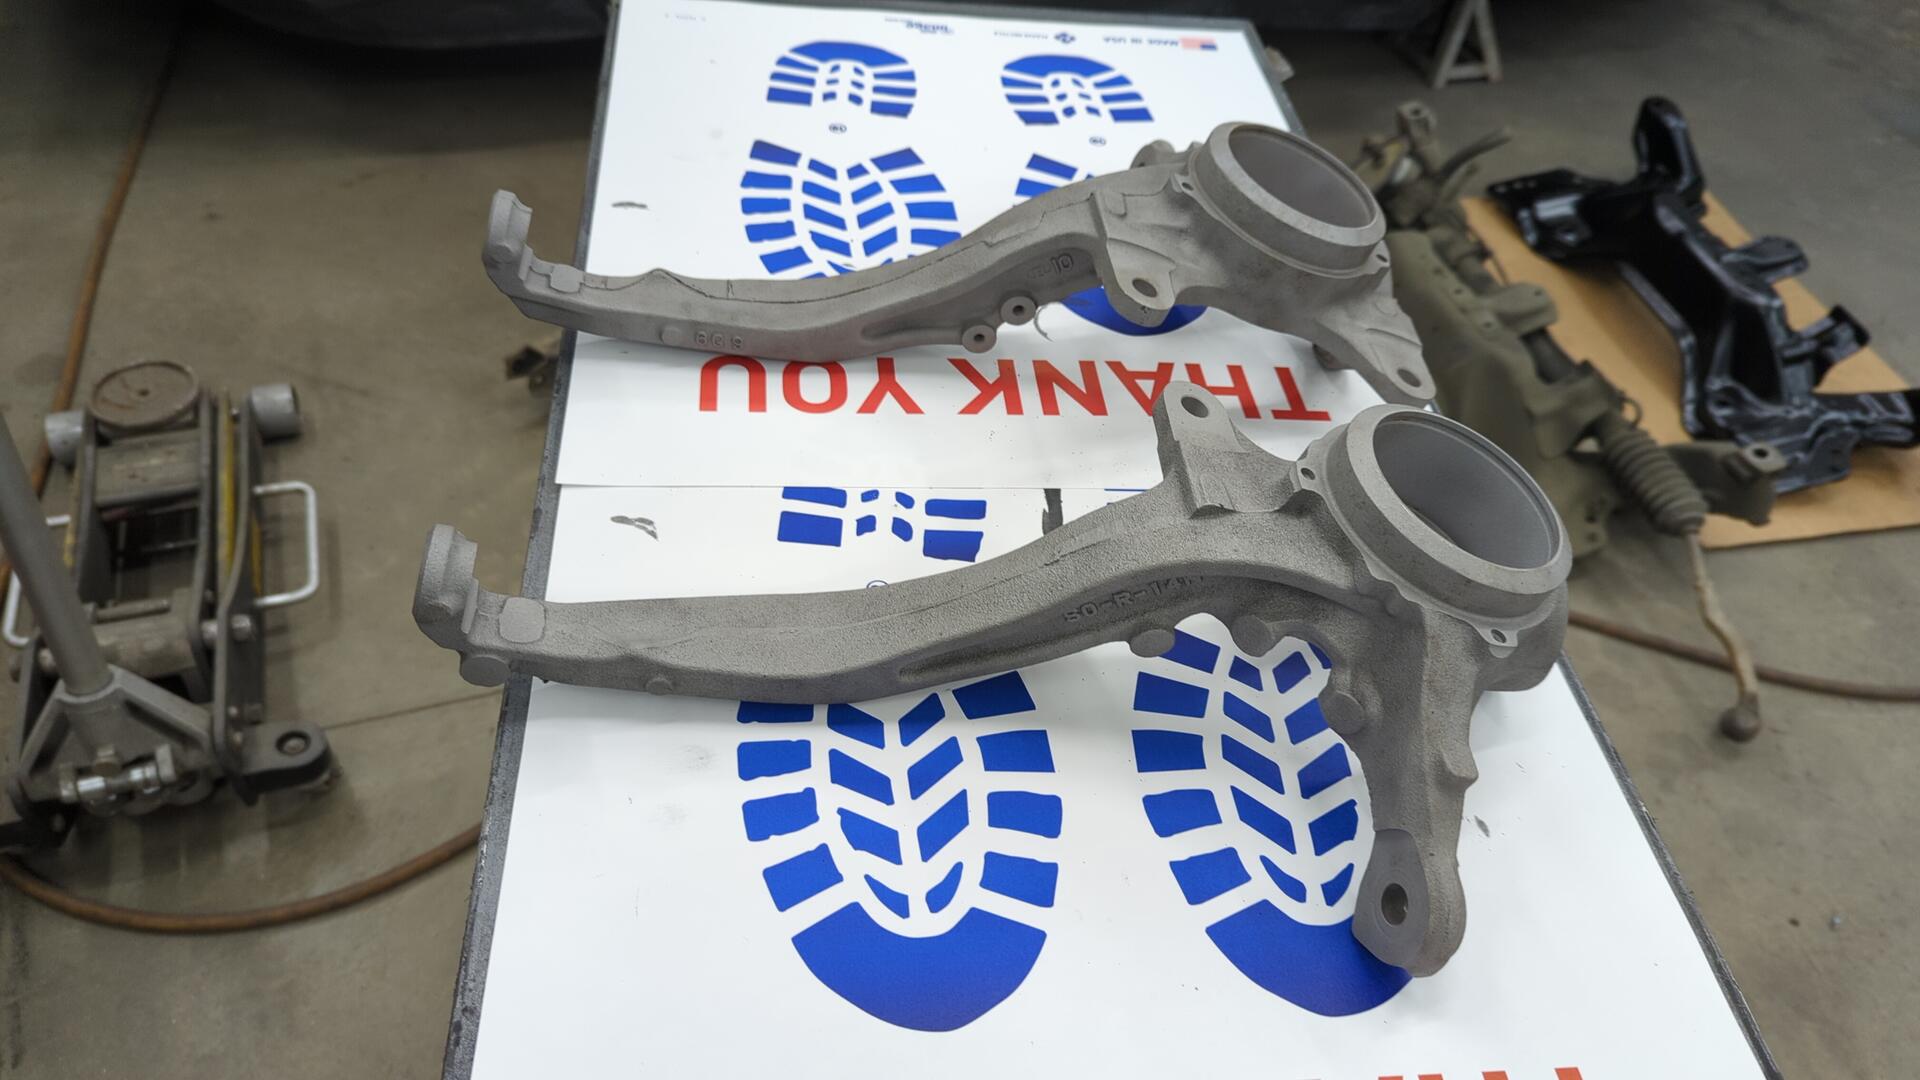
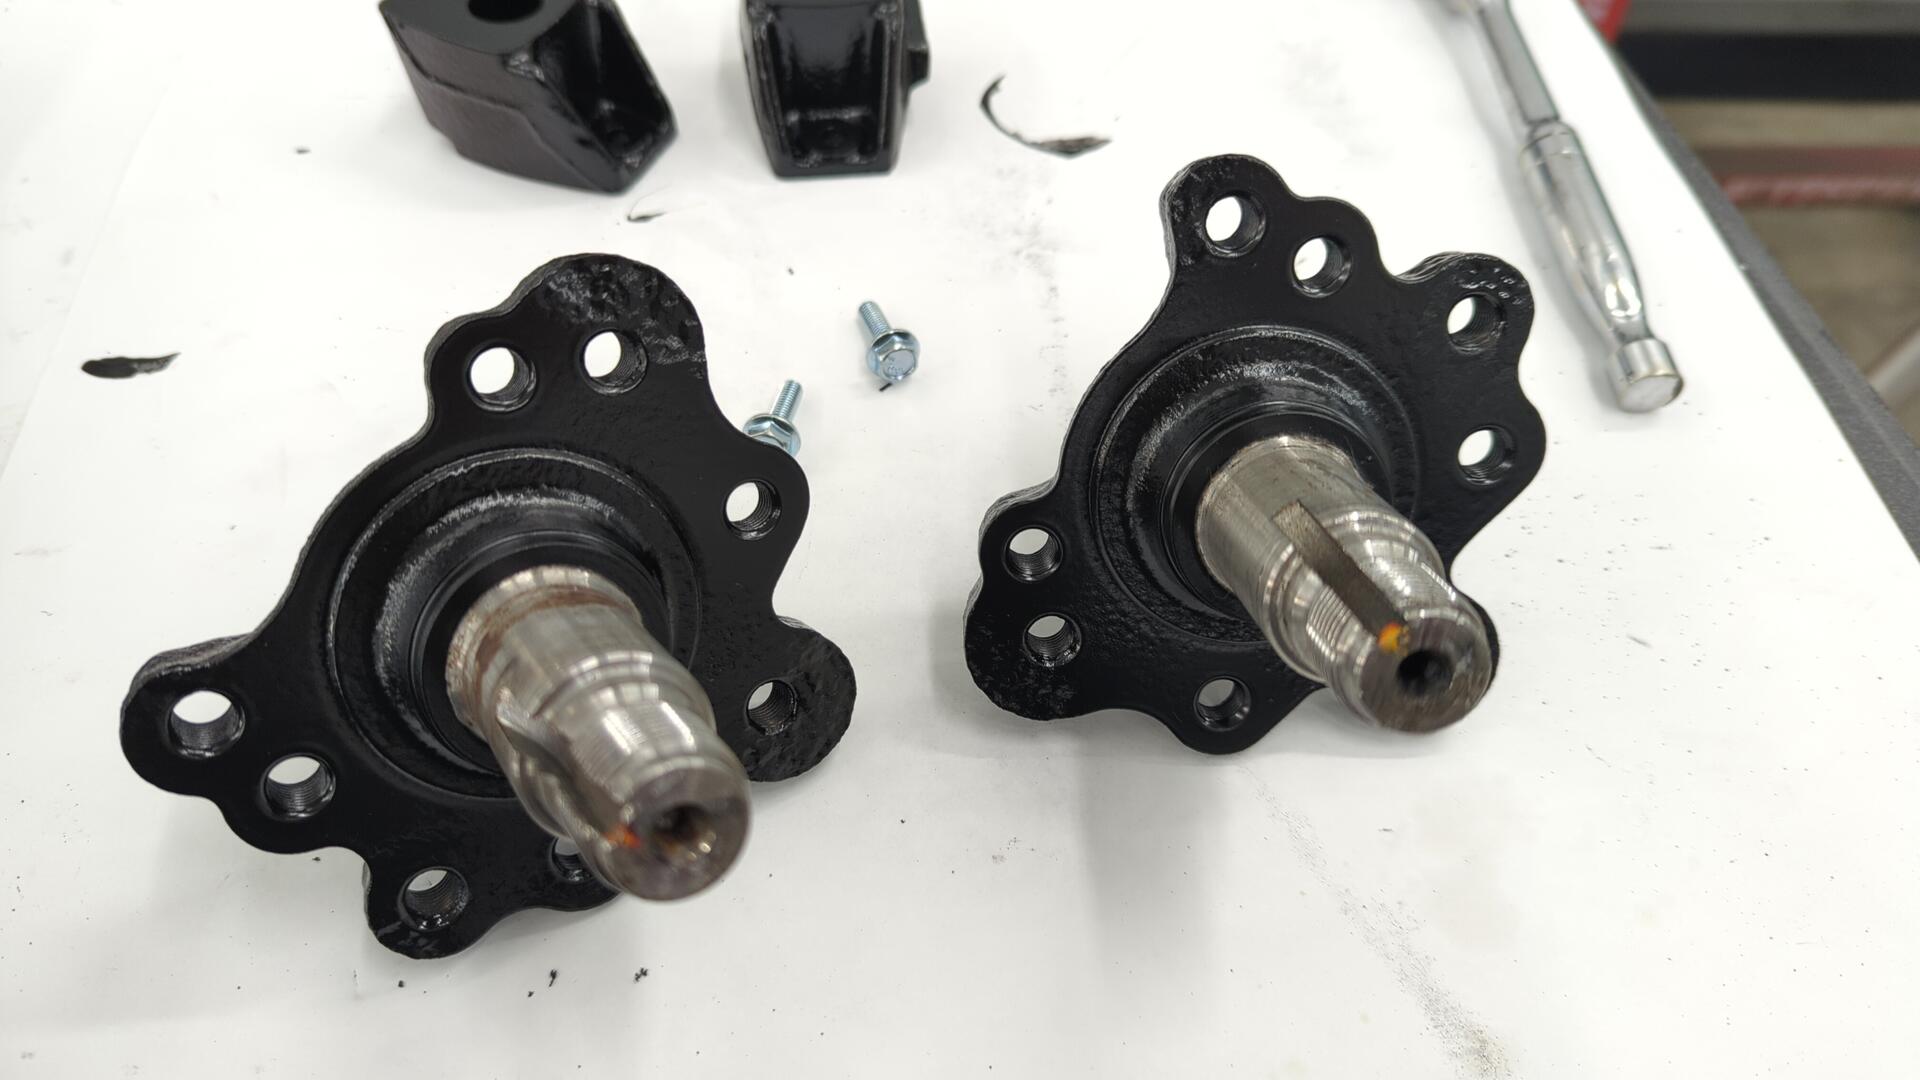
3 coats of epoxy later they were looking pretty sharp.
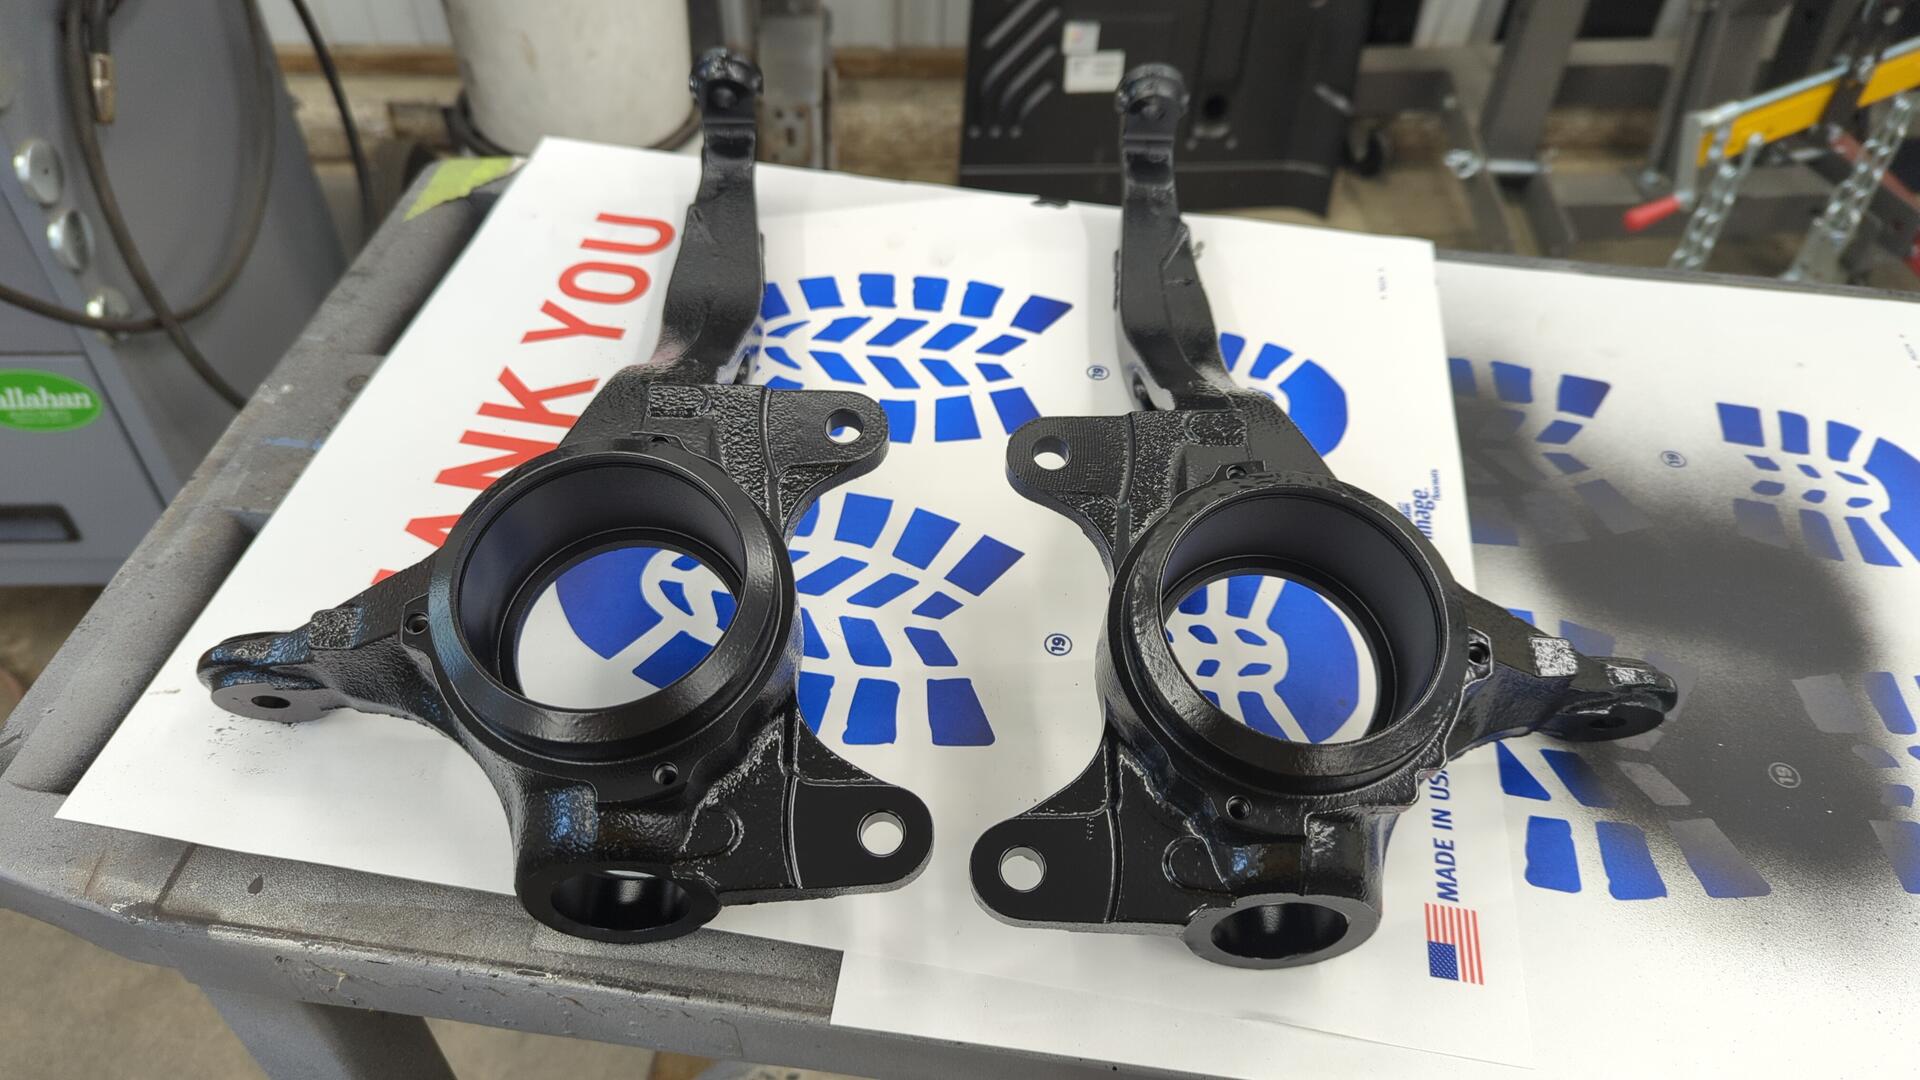
I avoided spraying too much paint in the bearing area as I was concerned about the thickness of the paint making it impossible to press the new wheel bearing in.
New wheel bearings installed along with new snap rings.
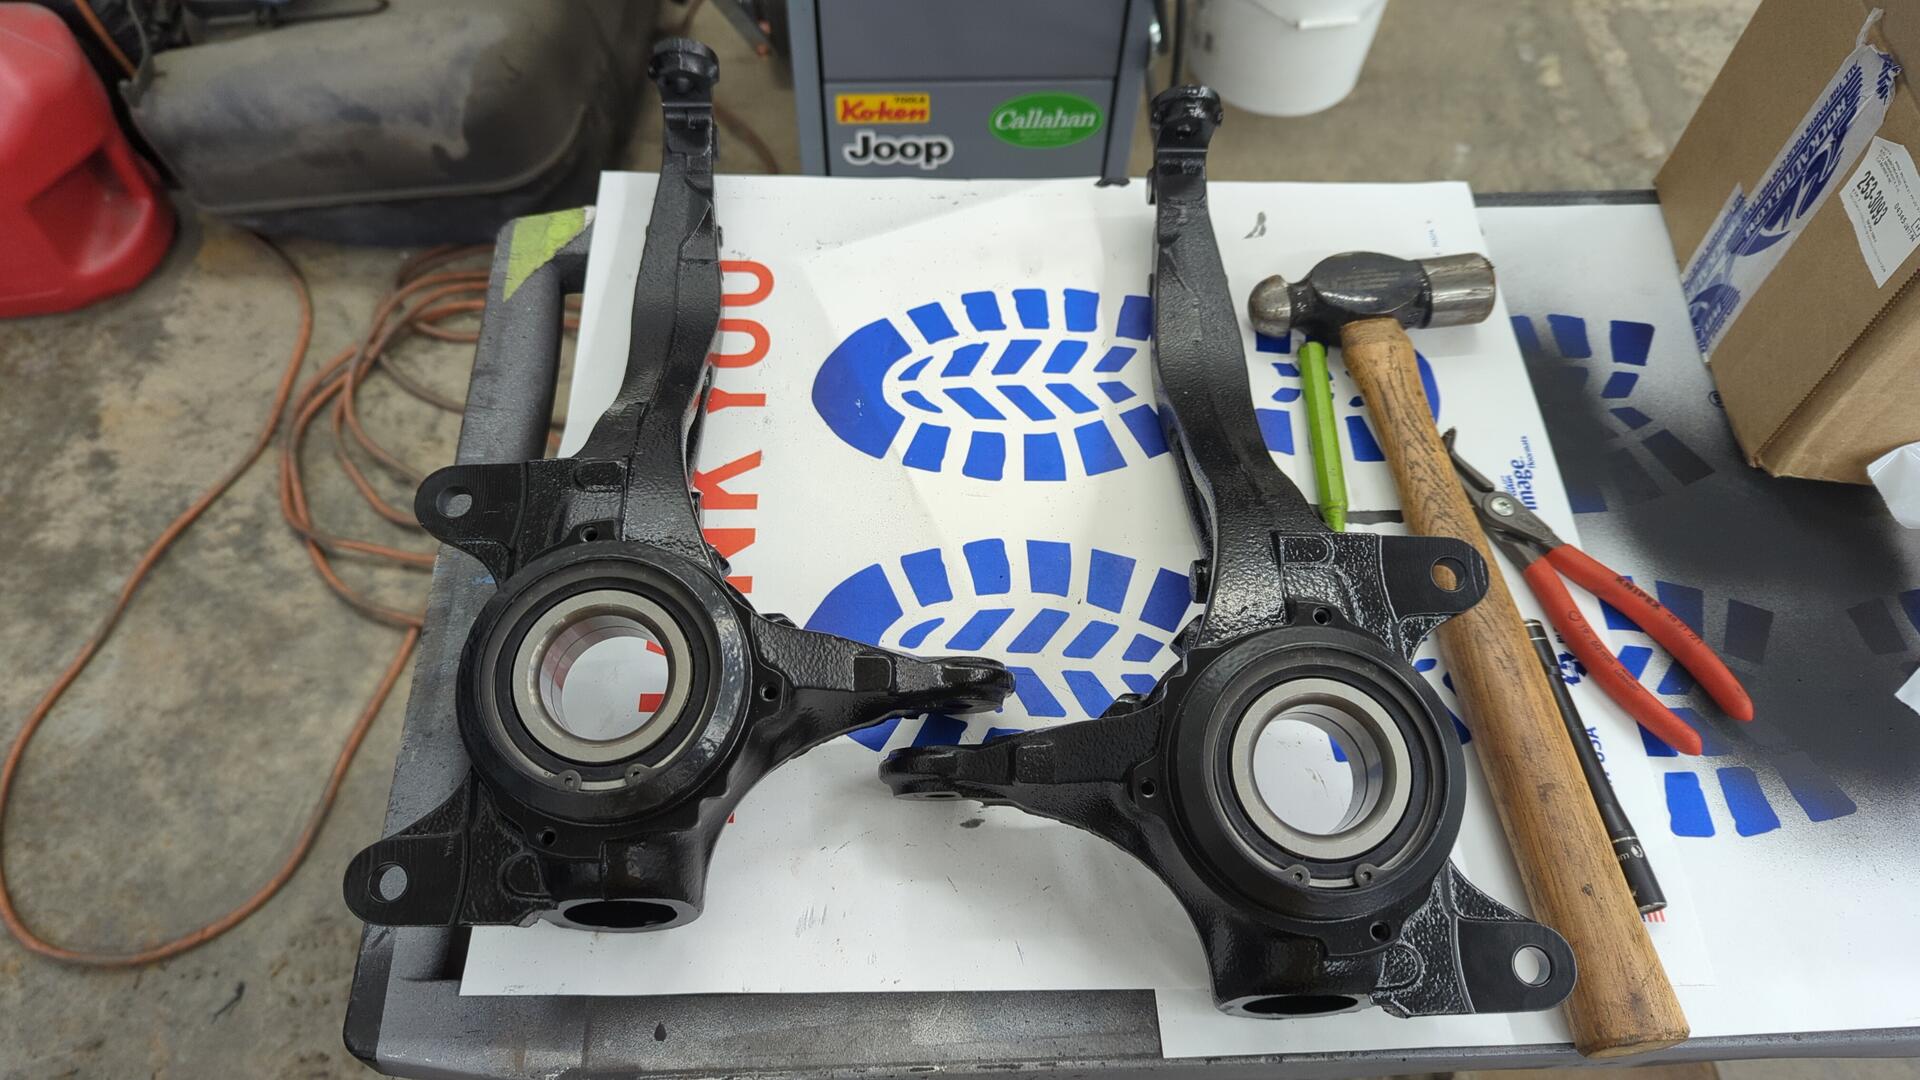
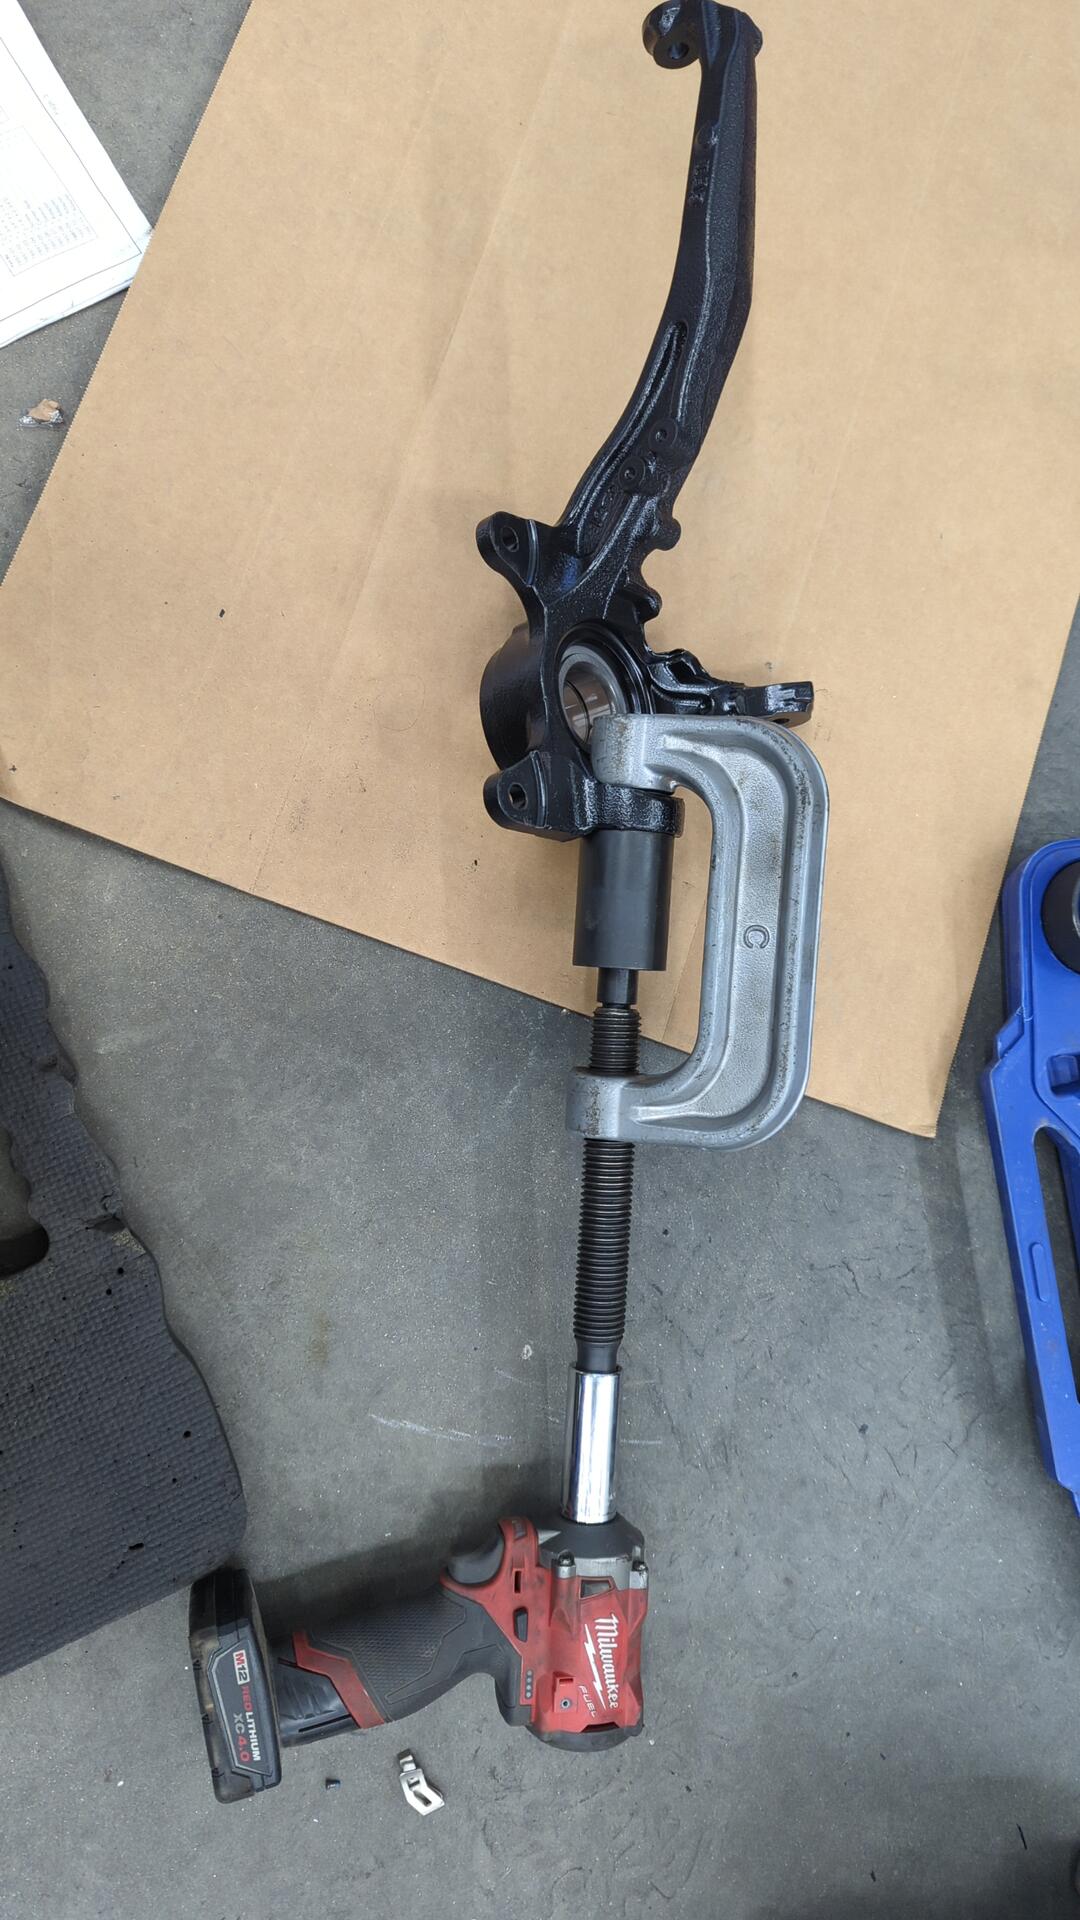
After that I pressed in some new lower ball joints. I’m super impressed my little impact pulled this off.
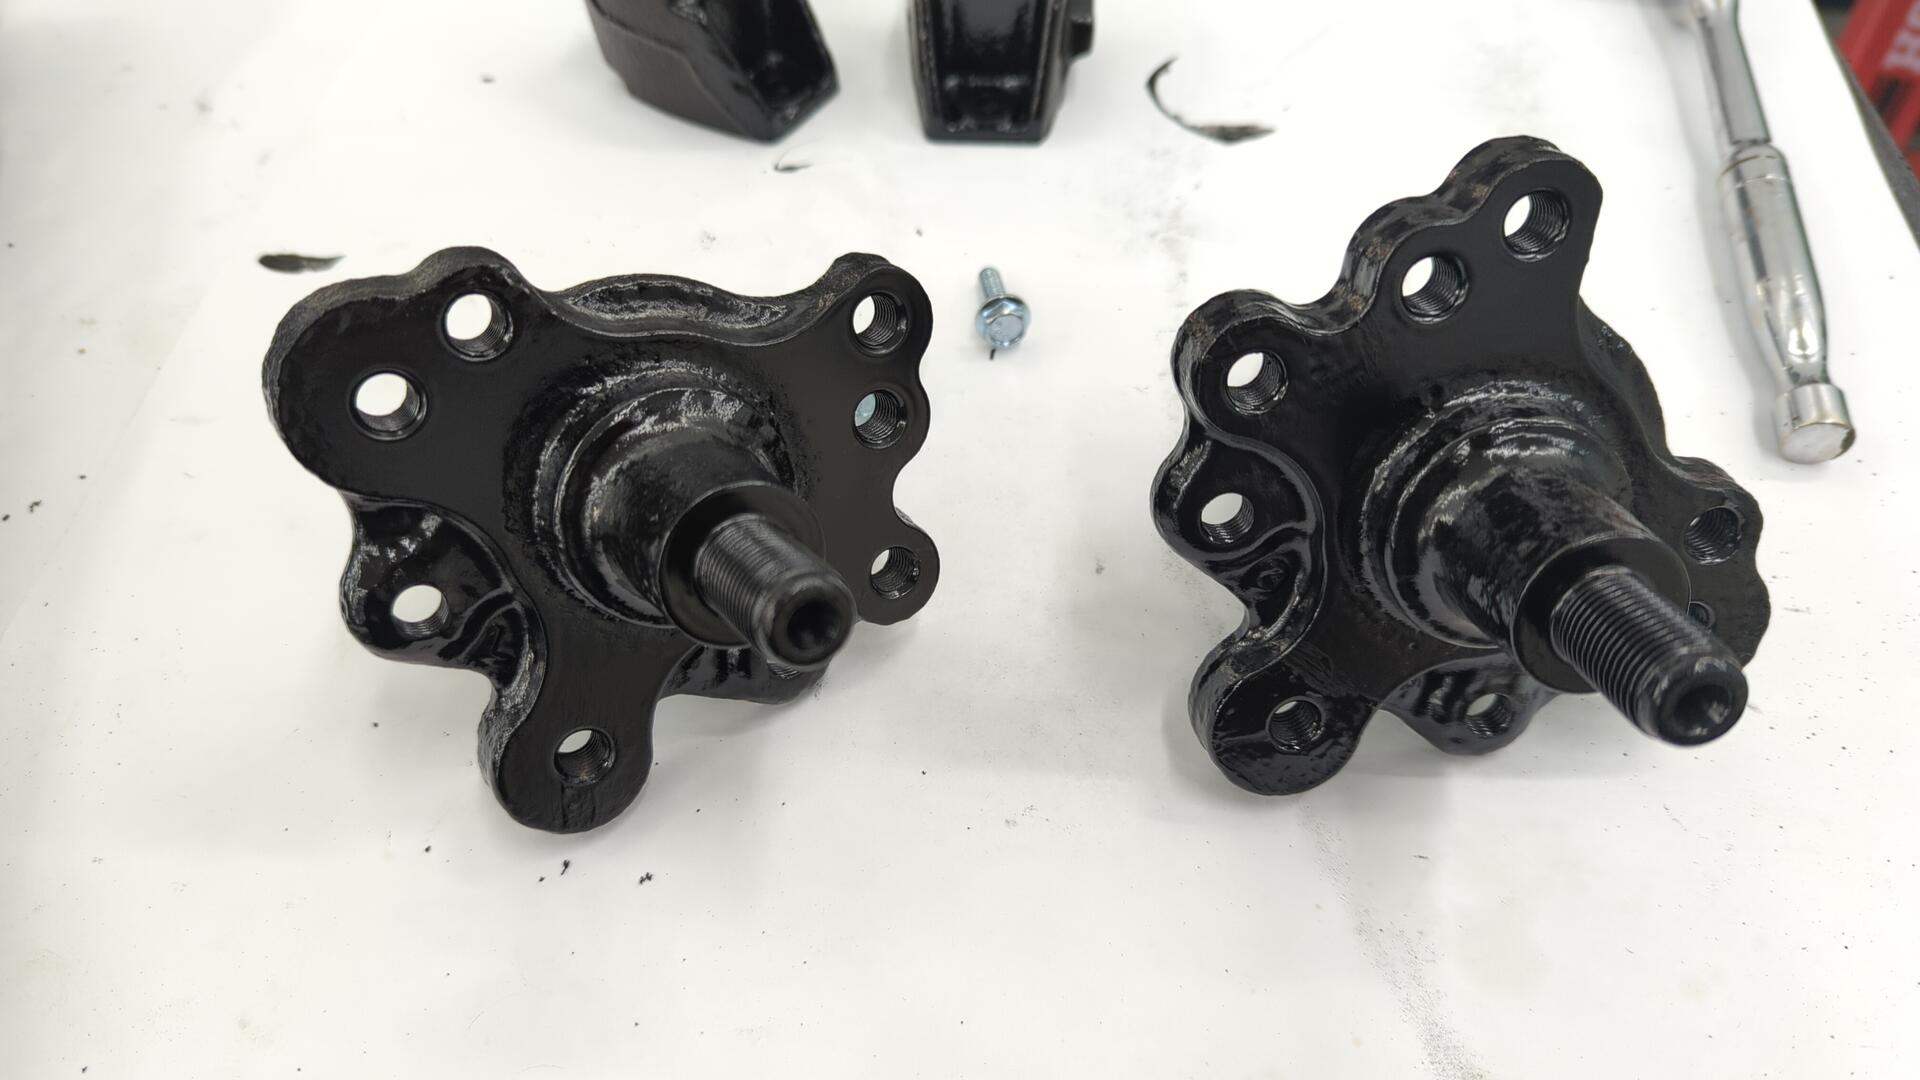
Dust shields re-installed with a few new screws. I think these were m5x0.8x10
And last but not least the wheel hubs were re-installed. While the hubs were out I took the time to press out the old wheel studs and put new ones in.

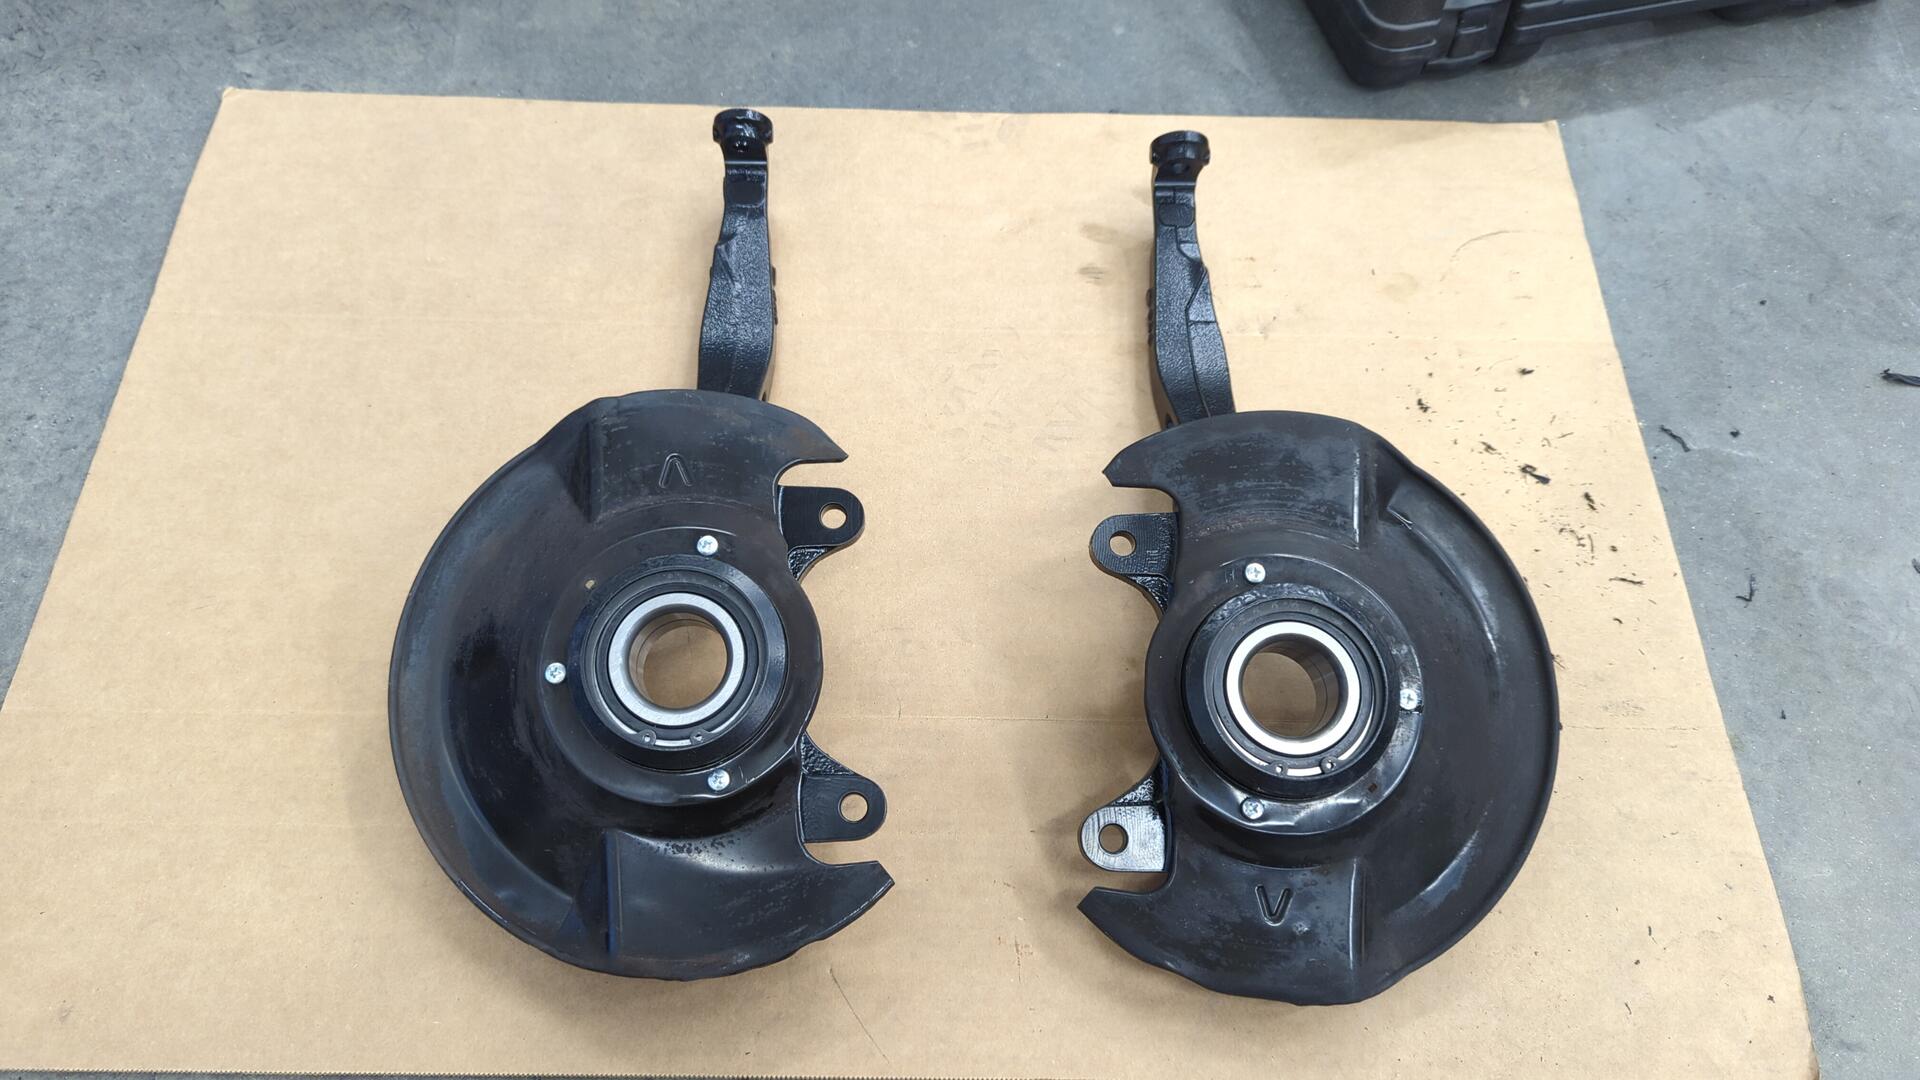
All done. It’s kinda cool the dust shields still have their stickers on them.
Parts List
- 2 Timken 510030 wheel bearings
- 2 Timken RET171 wheel bearing snap rings
- 2 Moog K9802 lower ball joints (these come with new snap rings)
- 8 Dorman 610269 wheel studs
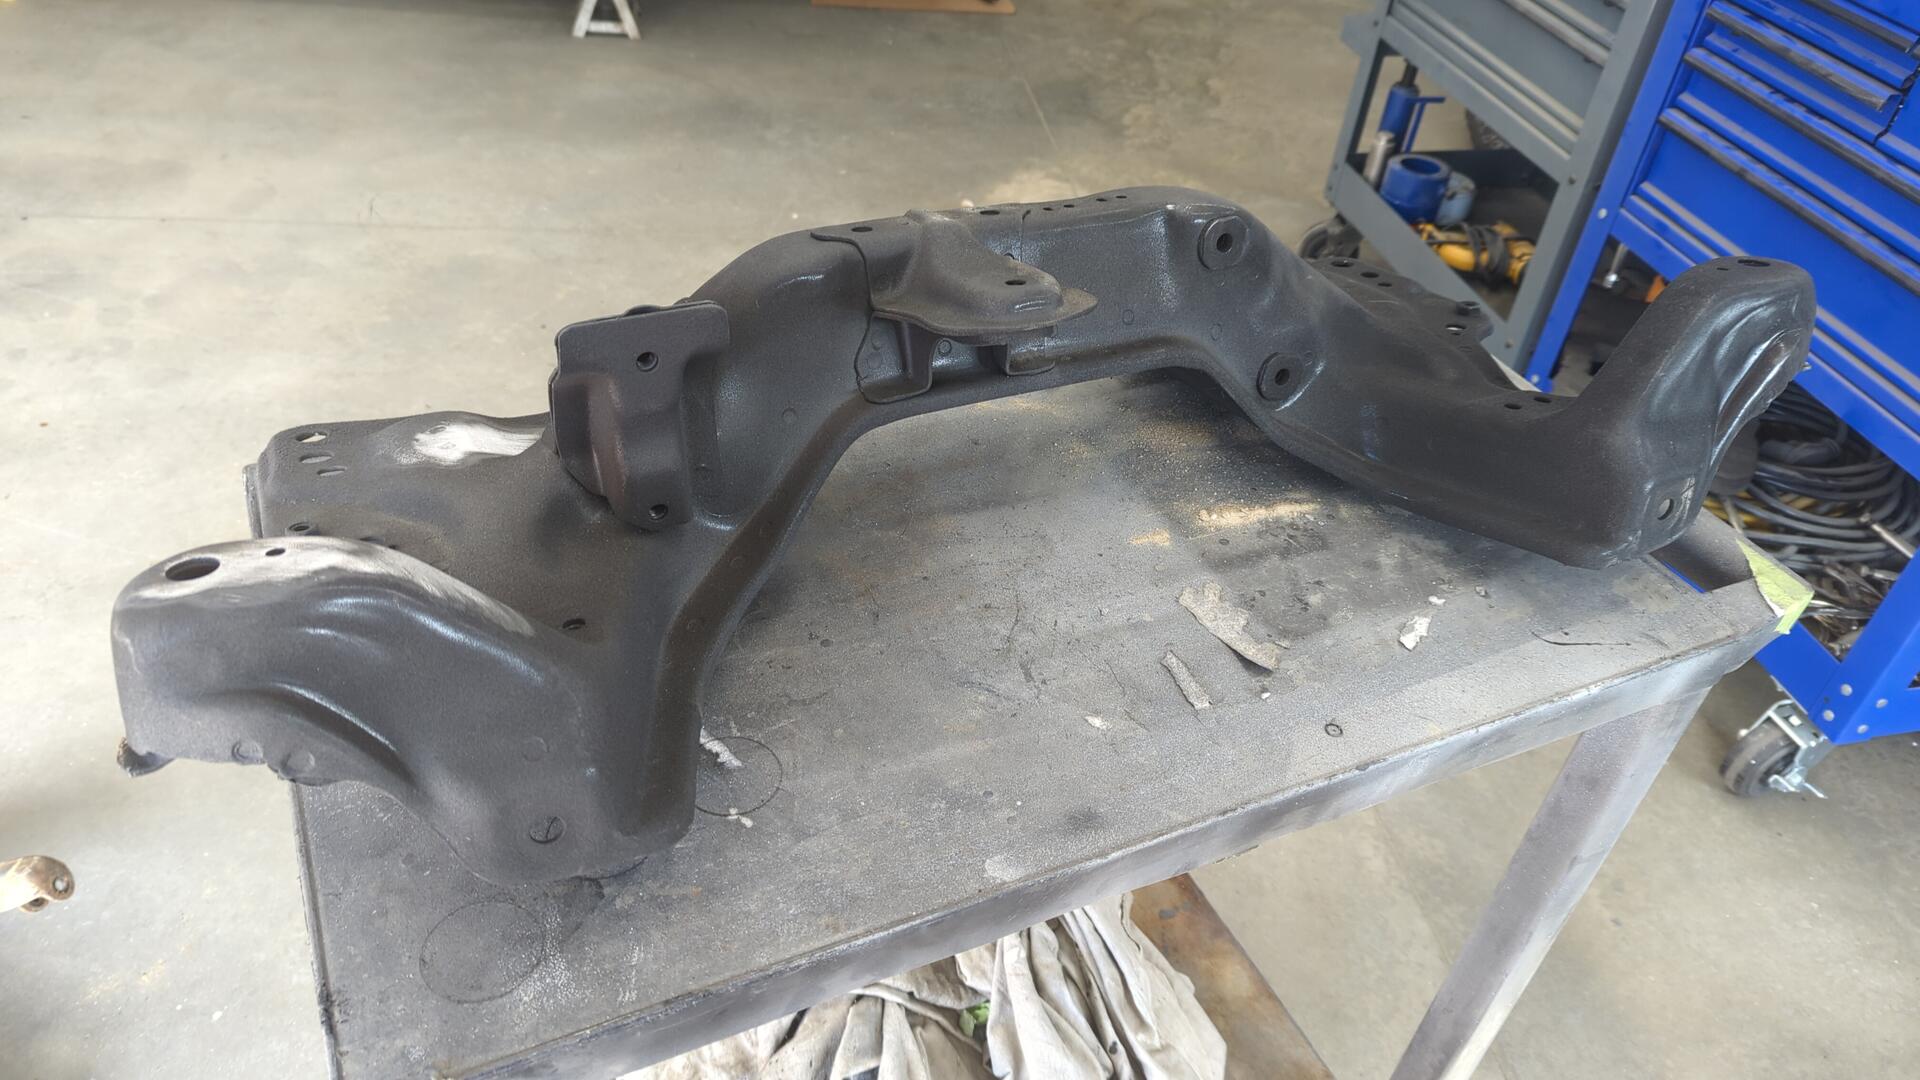
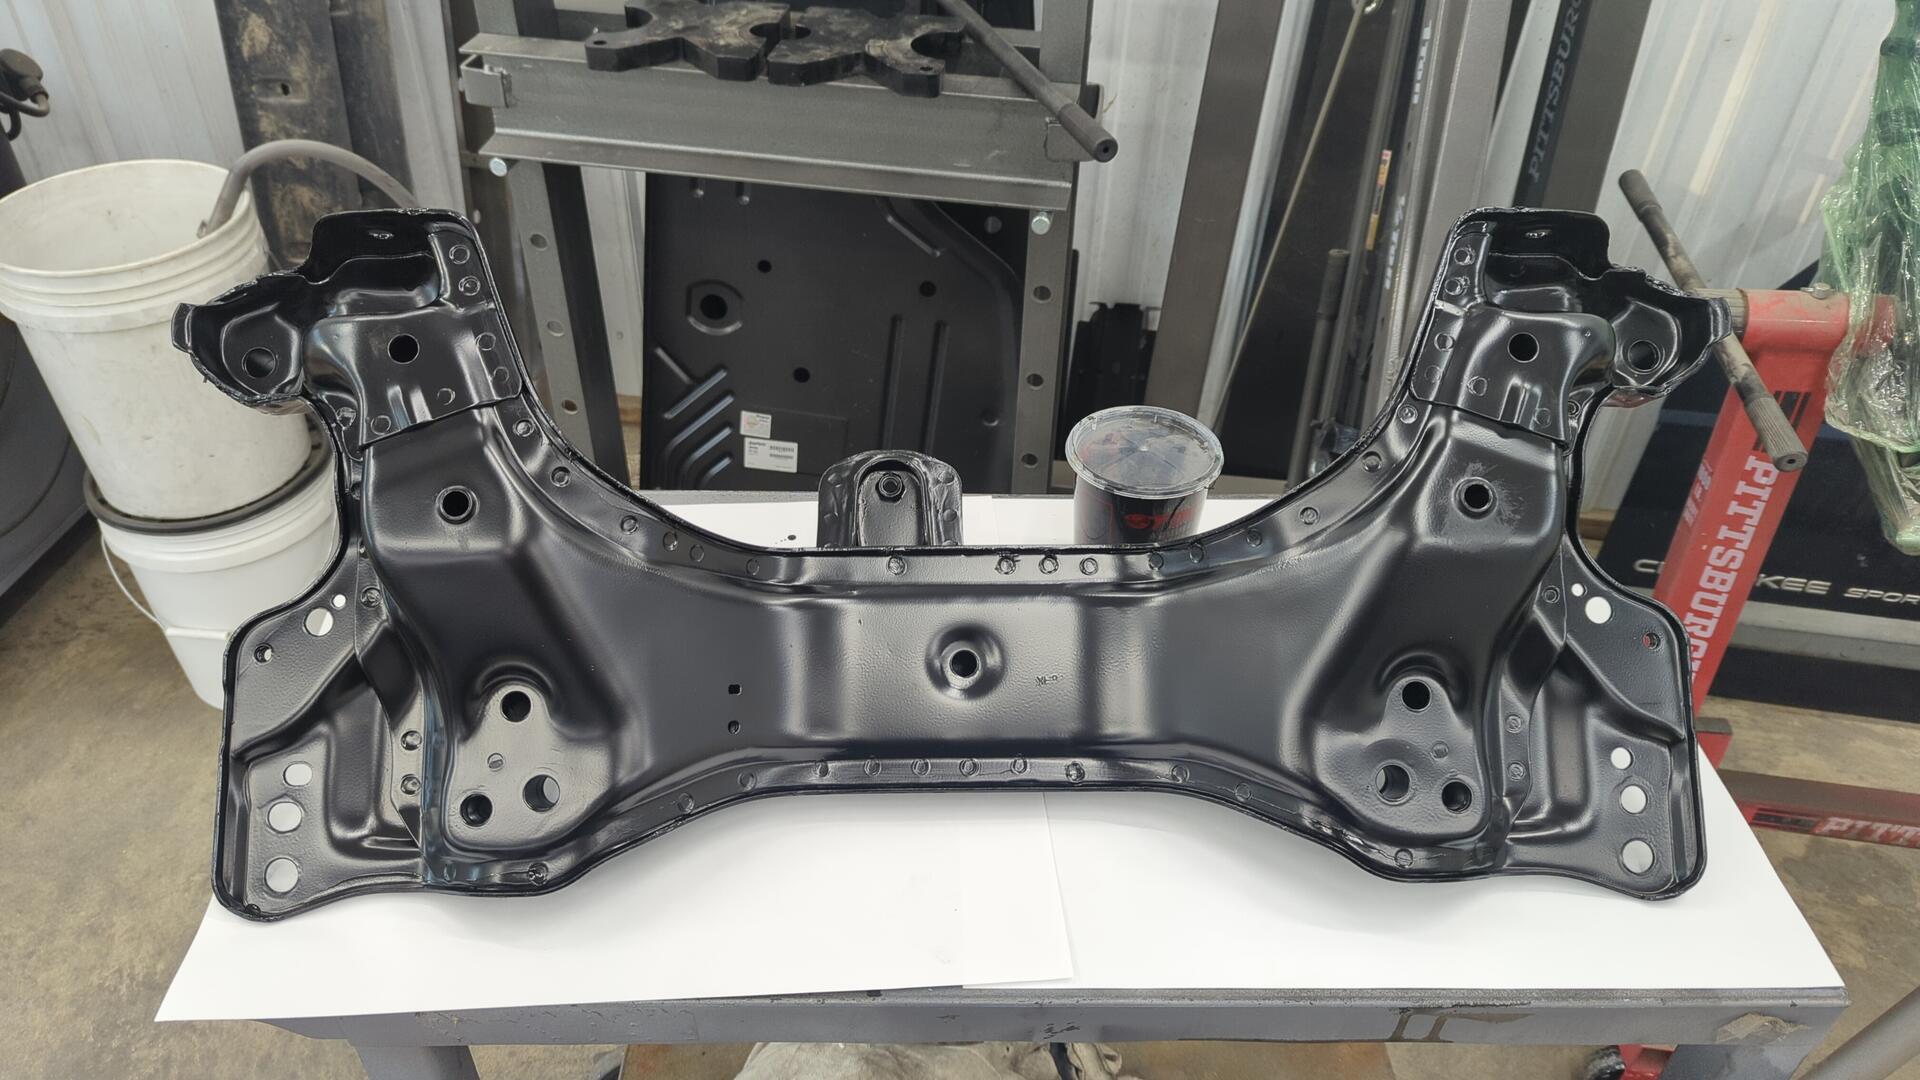
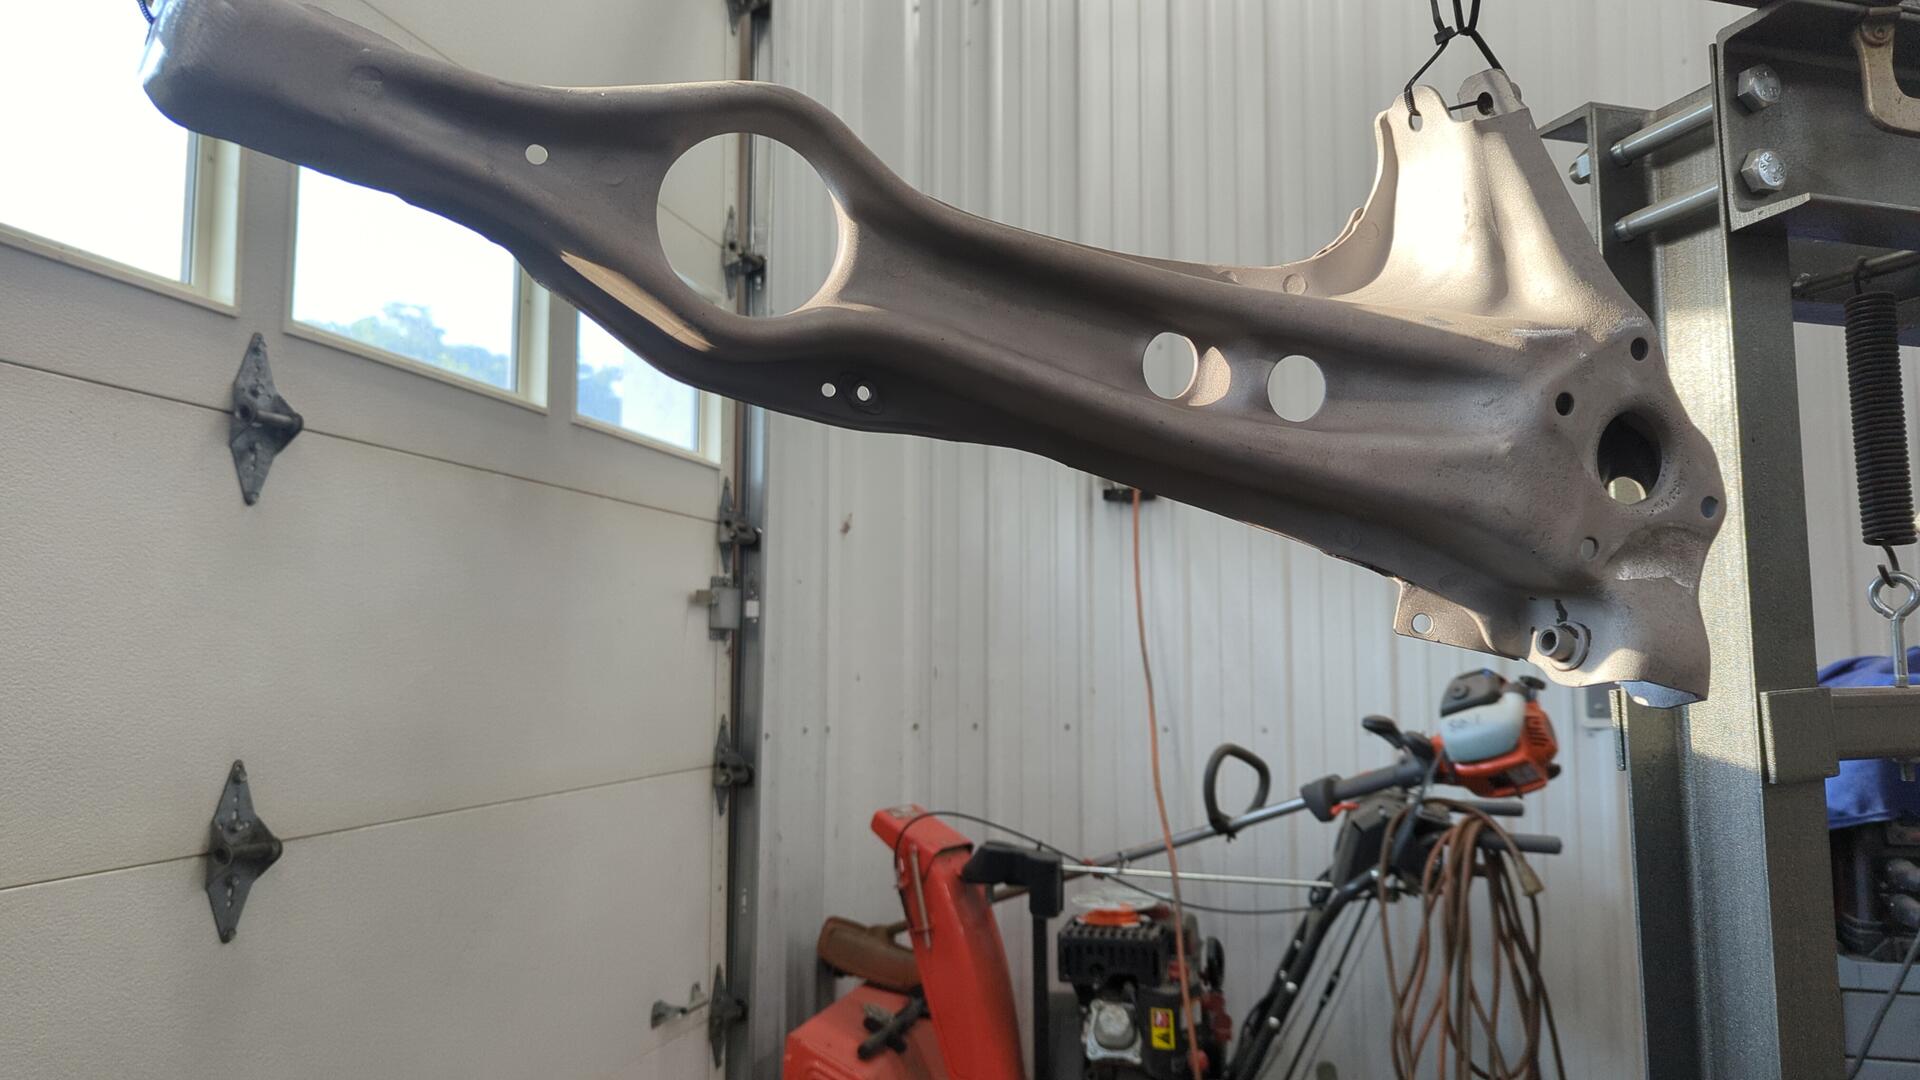
Prepping the New Front Subframe
The original subframe in my EG wasn’t overly rusty but I destroyed the threads for the rear engine mount years ago by using the wrong thread pitch bolts. I figured it was time to fix that mistake and I ended up picking up a new used subframe.
The seller I bought it off of restores them with fresh paint but I wasn’t a fan of what they used as it was very dusty / thin in spots and came off easily. I figured I’d be best off stripping all the paint off and respraying it with my tried and true SPI epoxy.
All in all it took me roughly 6 hours to remove all the paint.
I sandblasted as much of it as I could with coal slag but eventually I ran out of blasting media and finished off the job with a wire wheel.
The subframe was slightly too large to fit in my blasting cabinet so I had to use my portable blaster outside. It was pretty unpleasant and not something I want to do again.
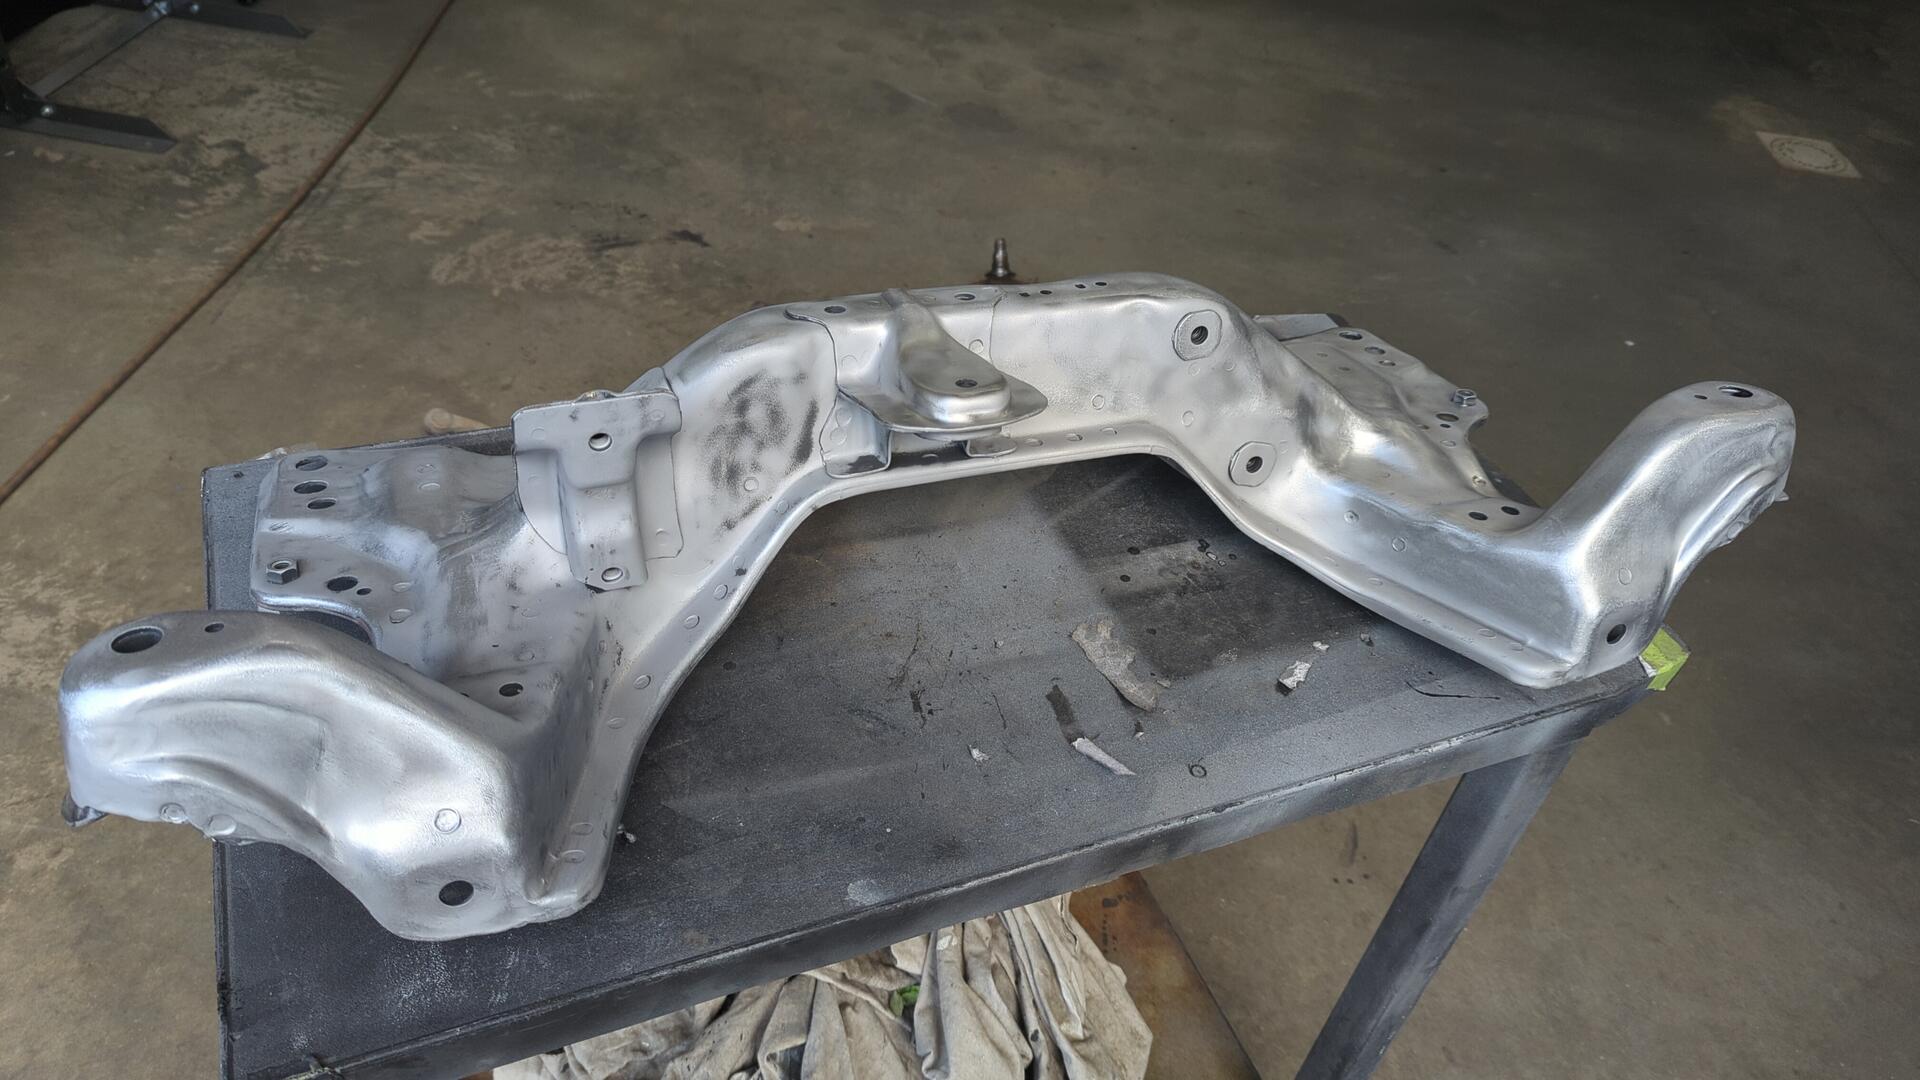
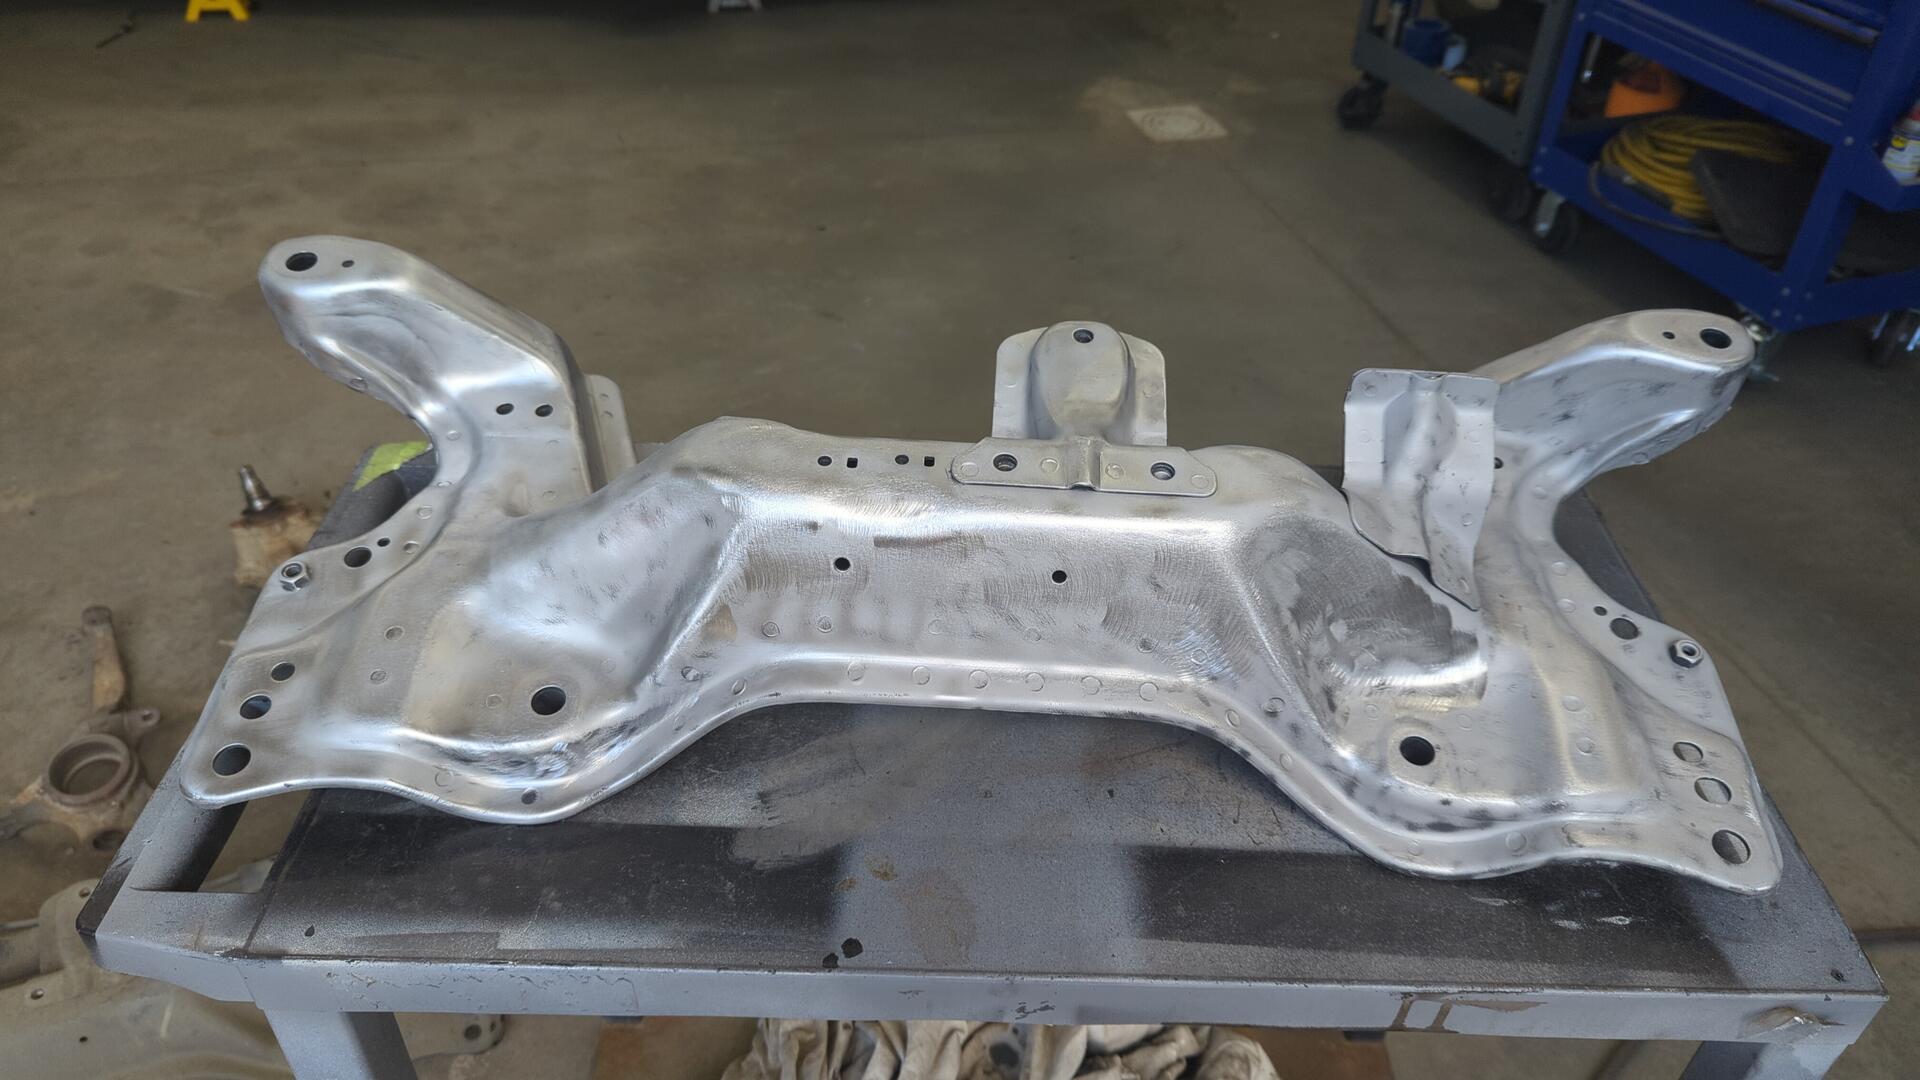
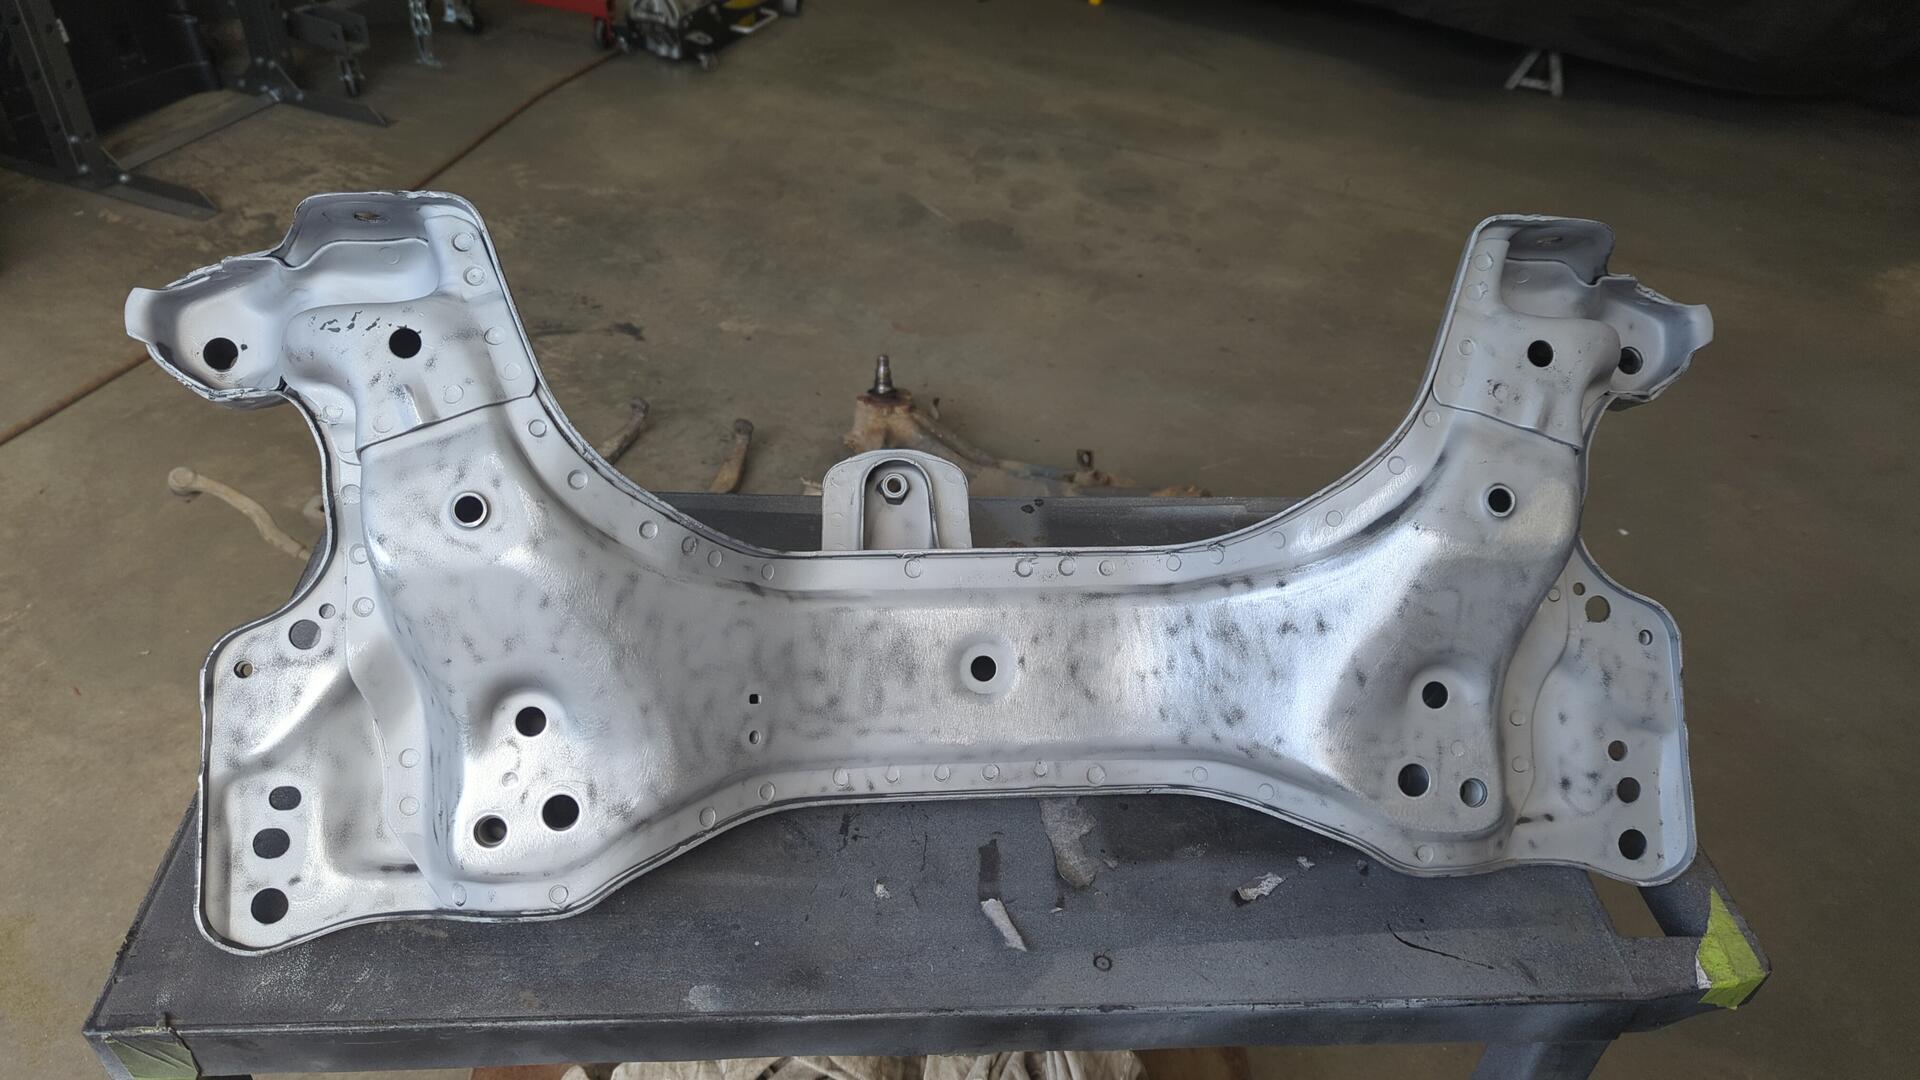
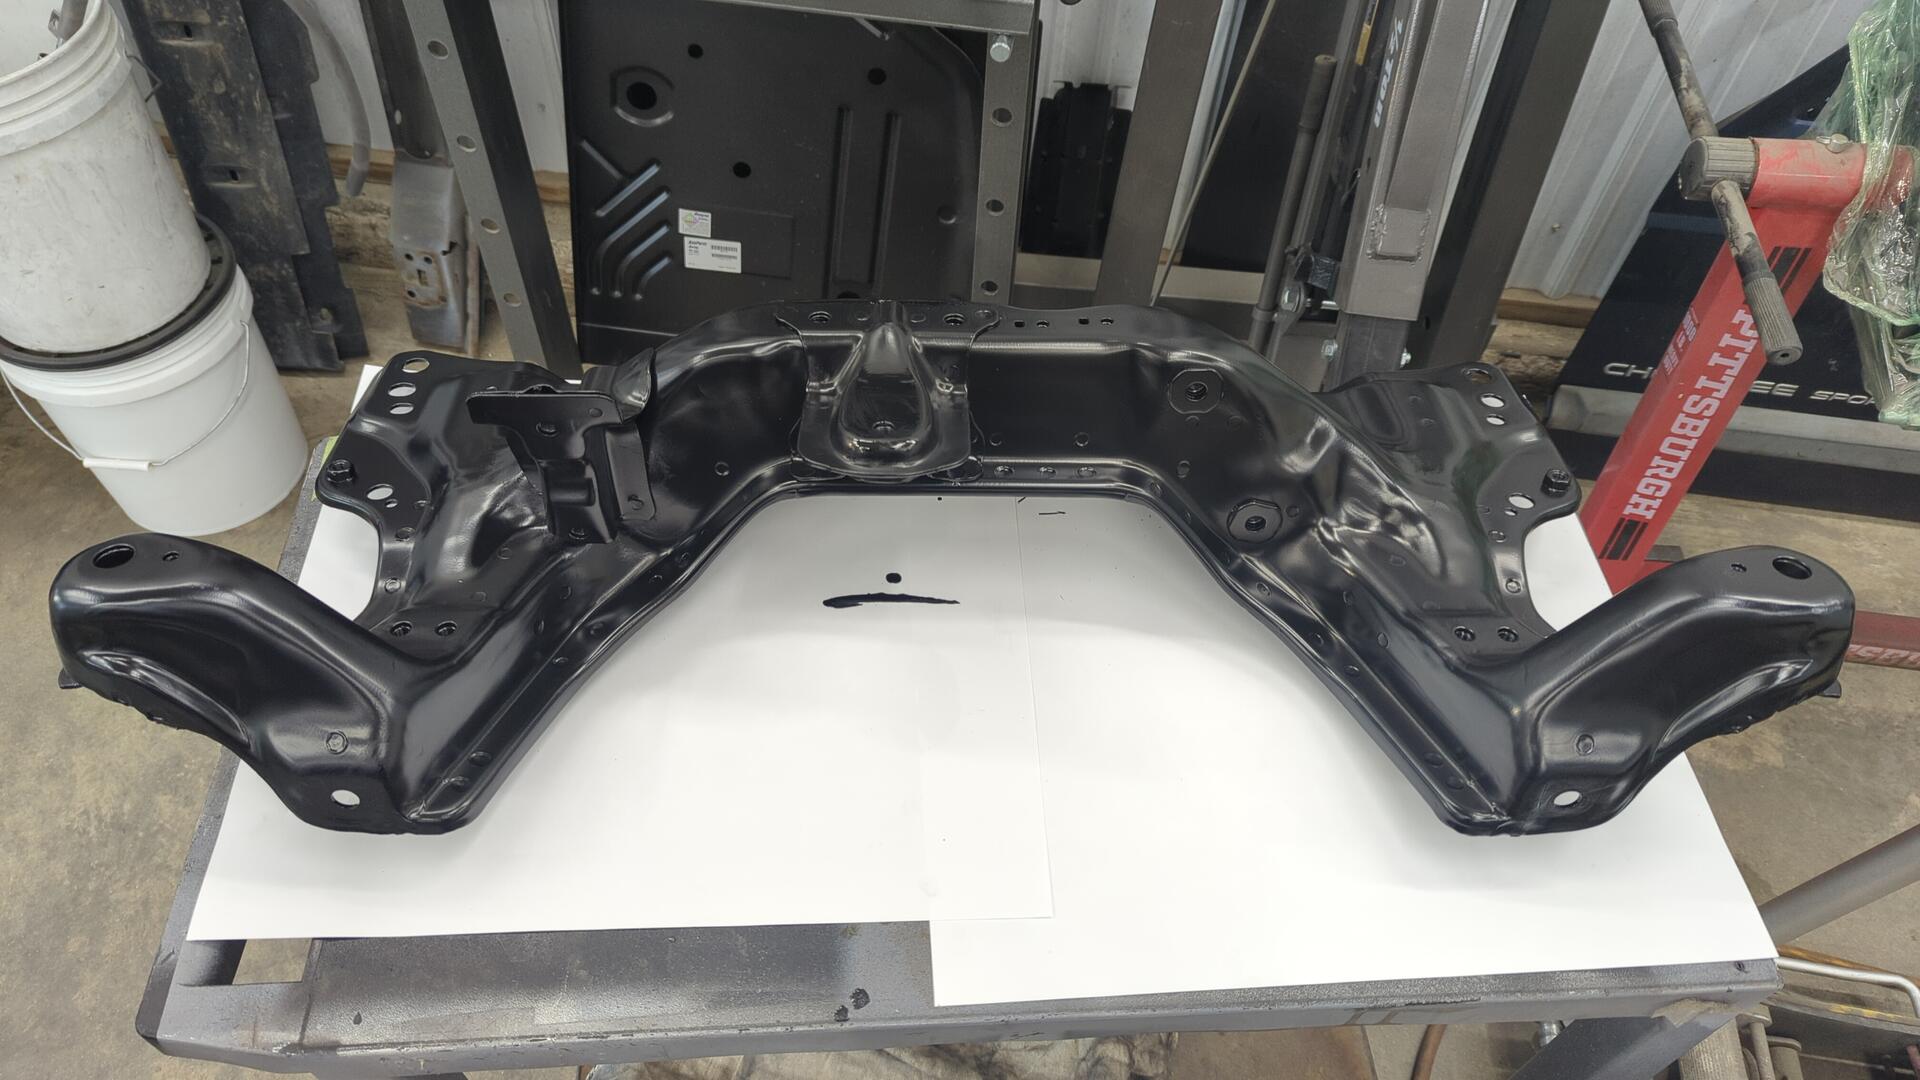
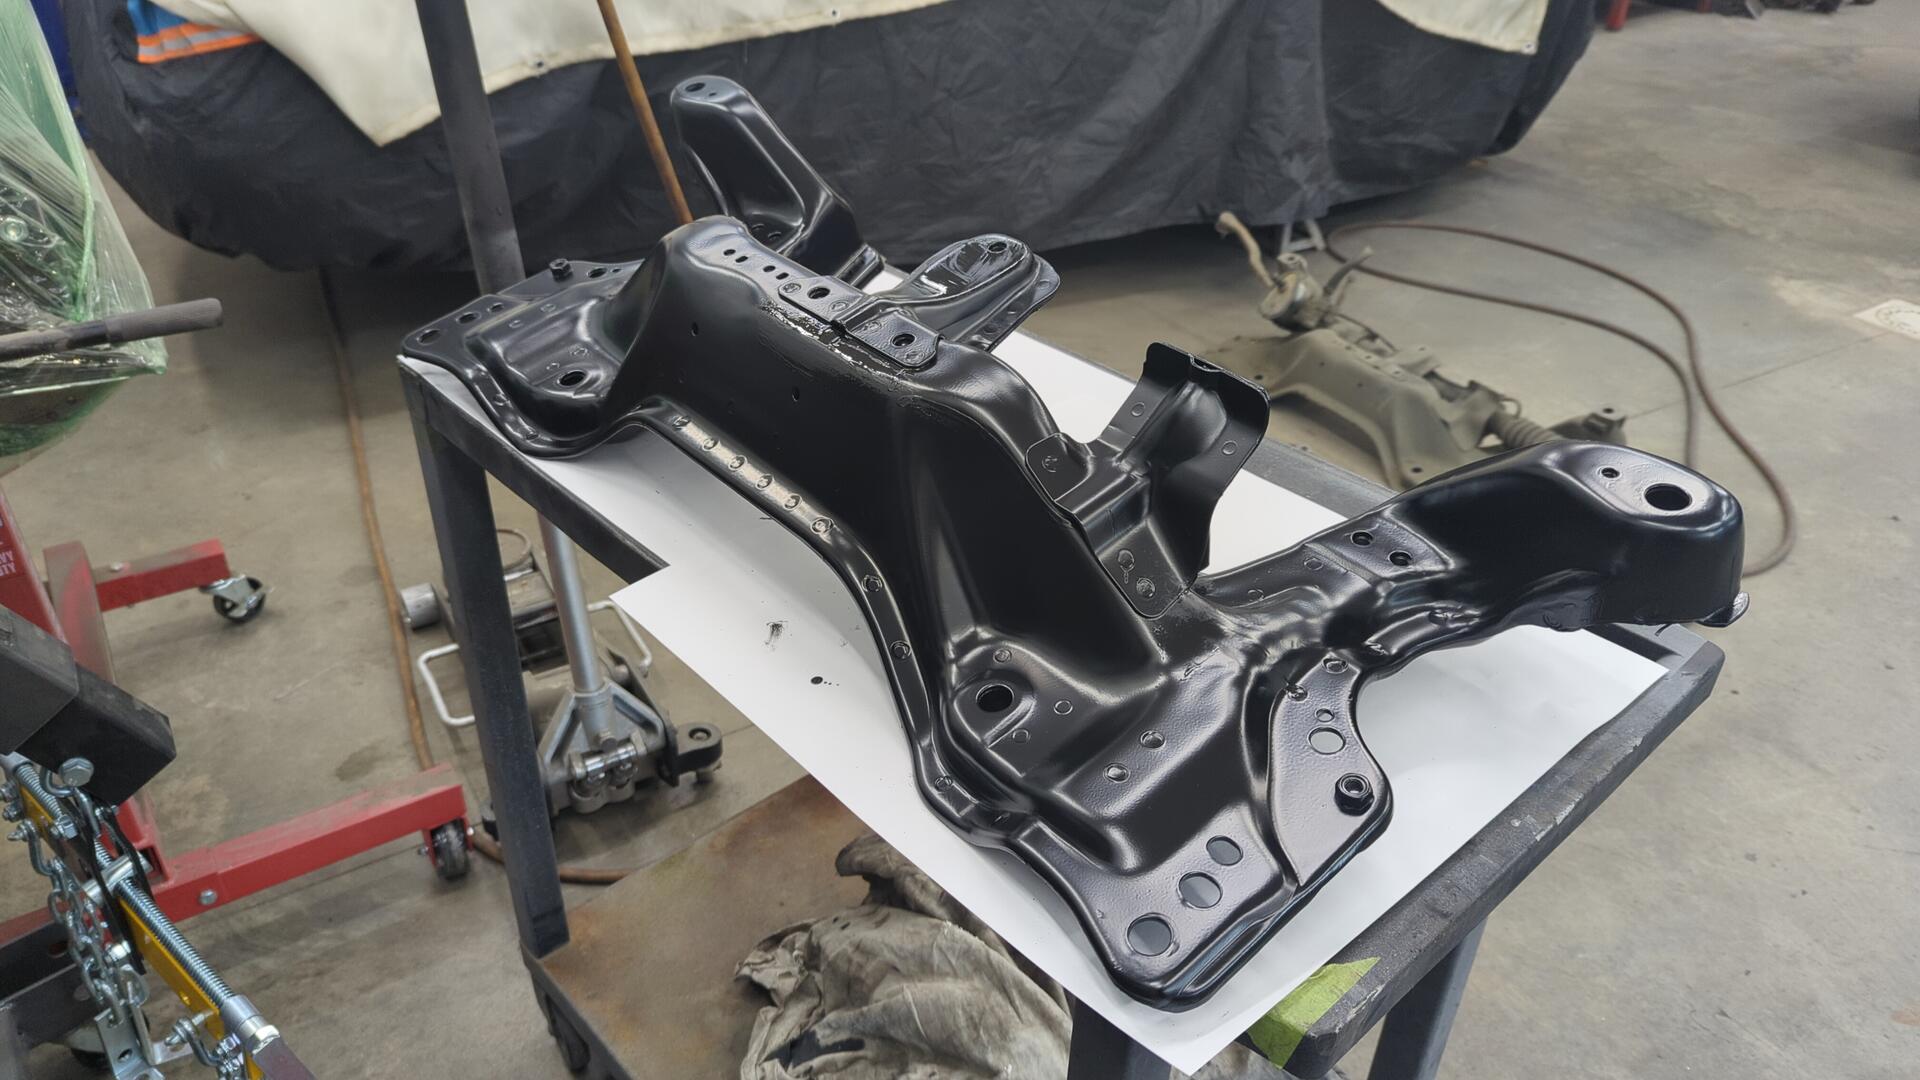
But the results were well worth it as the frame looks awesome now.
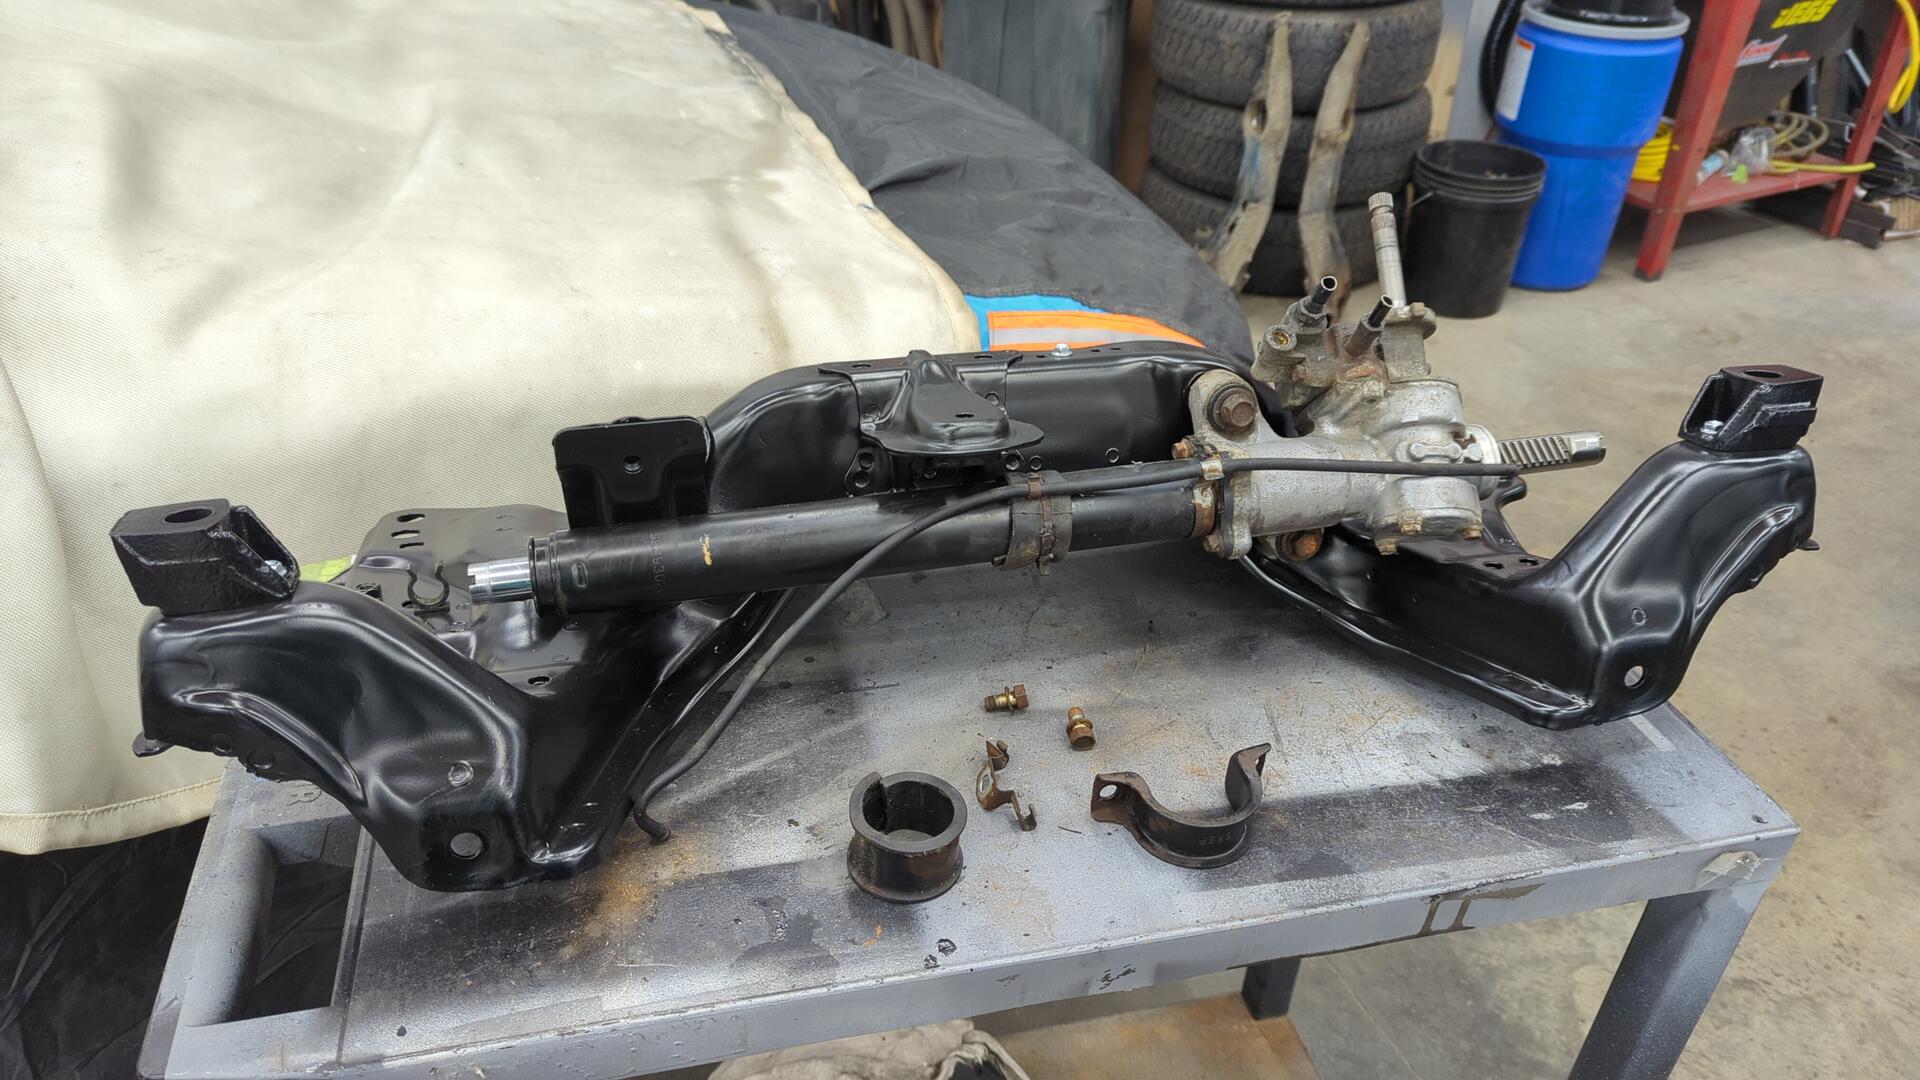
Something else that I regretted doing years ago was deleting power steering. At the time I keep the powered rack and looped it’s lines but I was never 100% happy with it. It felt good when driving at speed but I was getting tired of the arm work outs when parking.
Since the rack was still in good shape I popped it off my old frame (after thoroughly scrubbing it down).
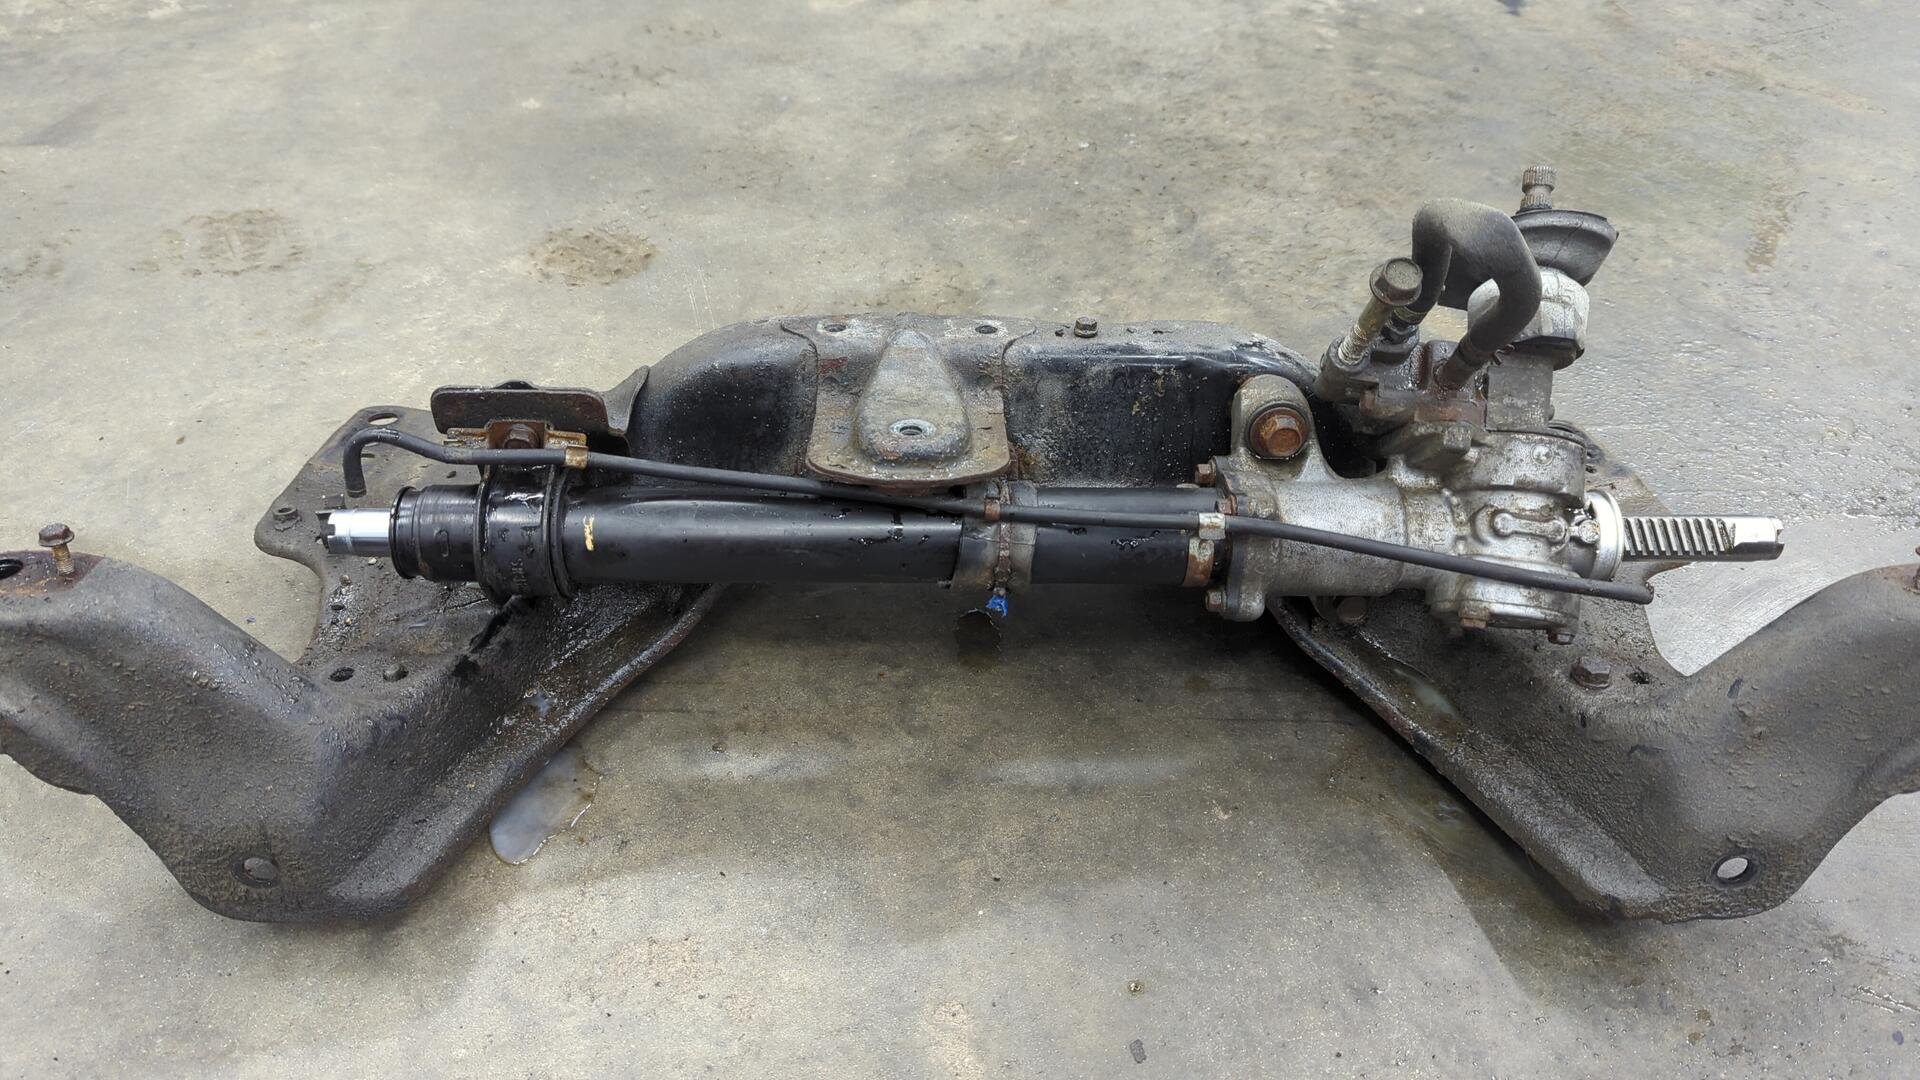
Test fit on the new frame.
The mounting brackets were a little rusty so I sand blasted and painted them.
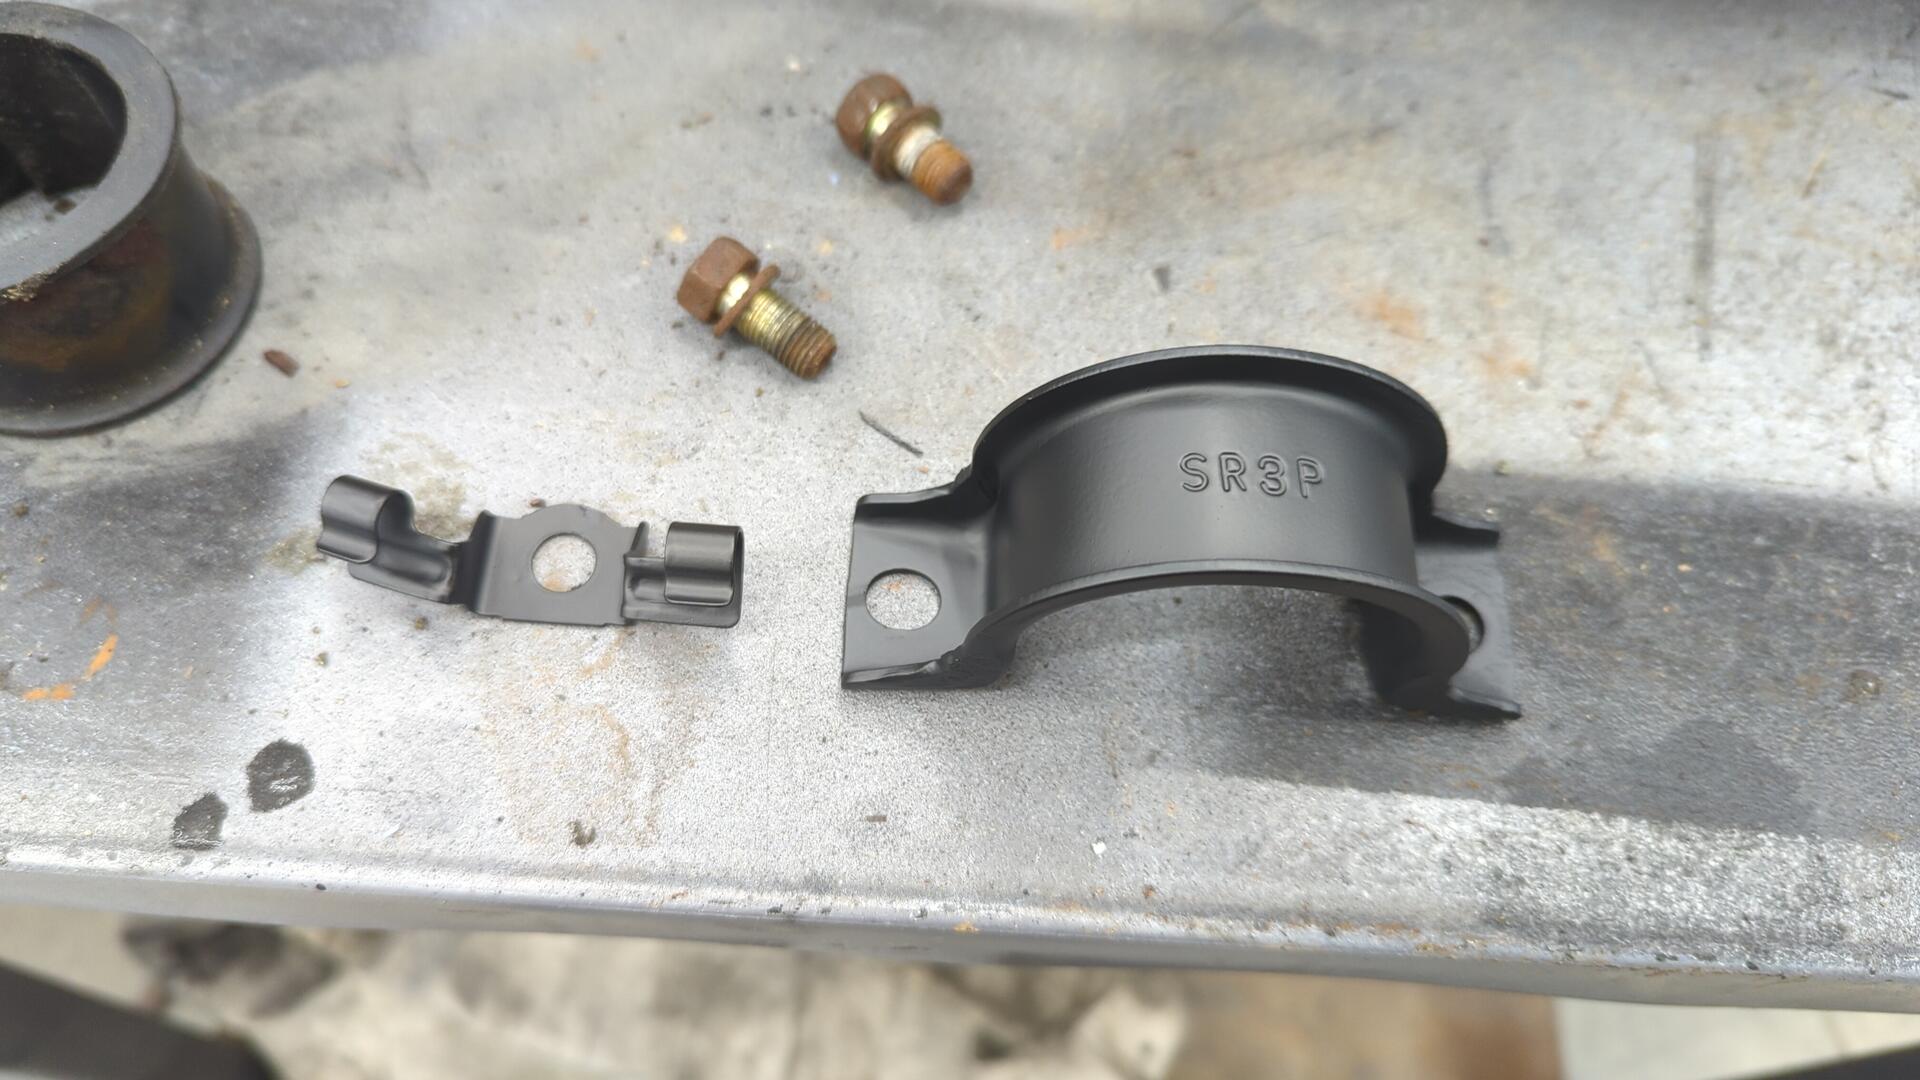
Bolted up.
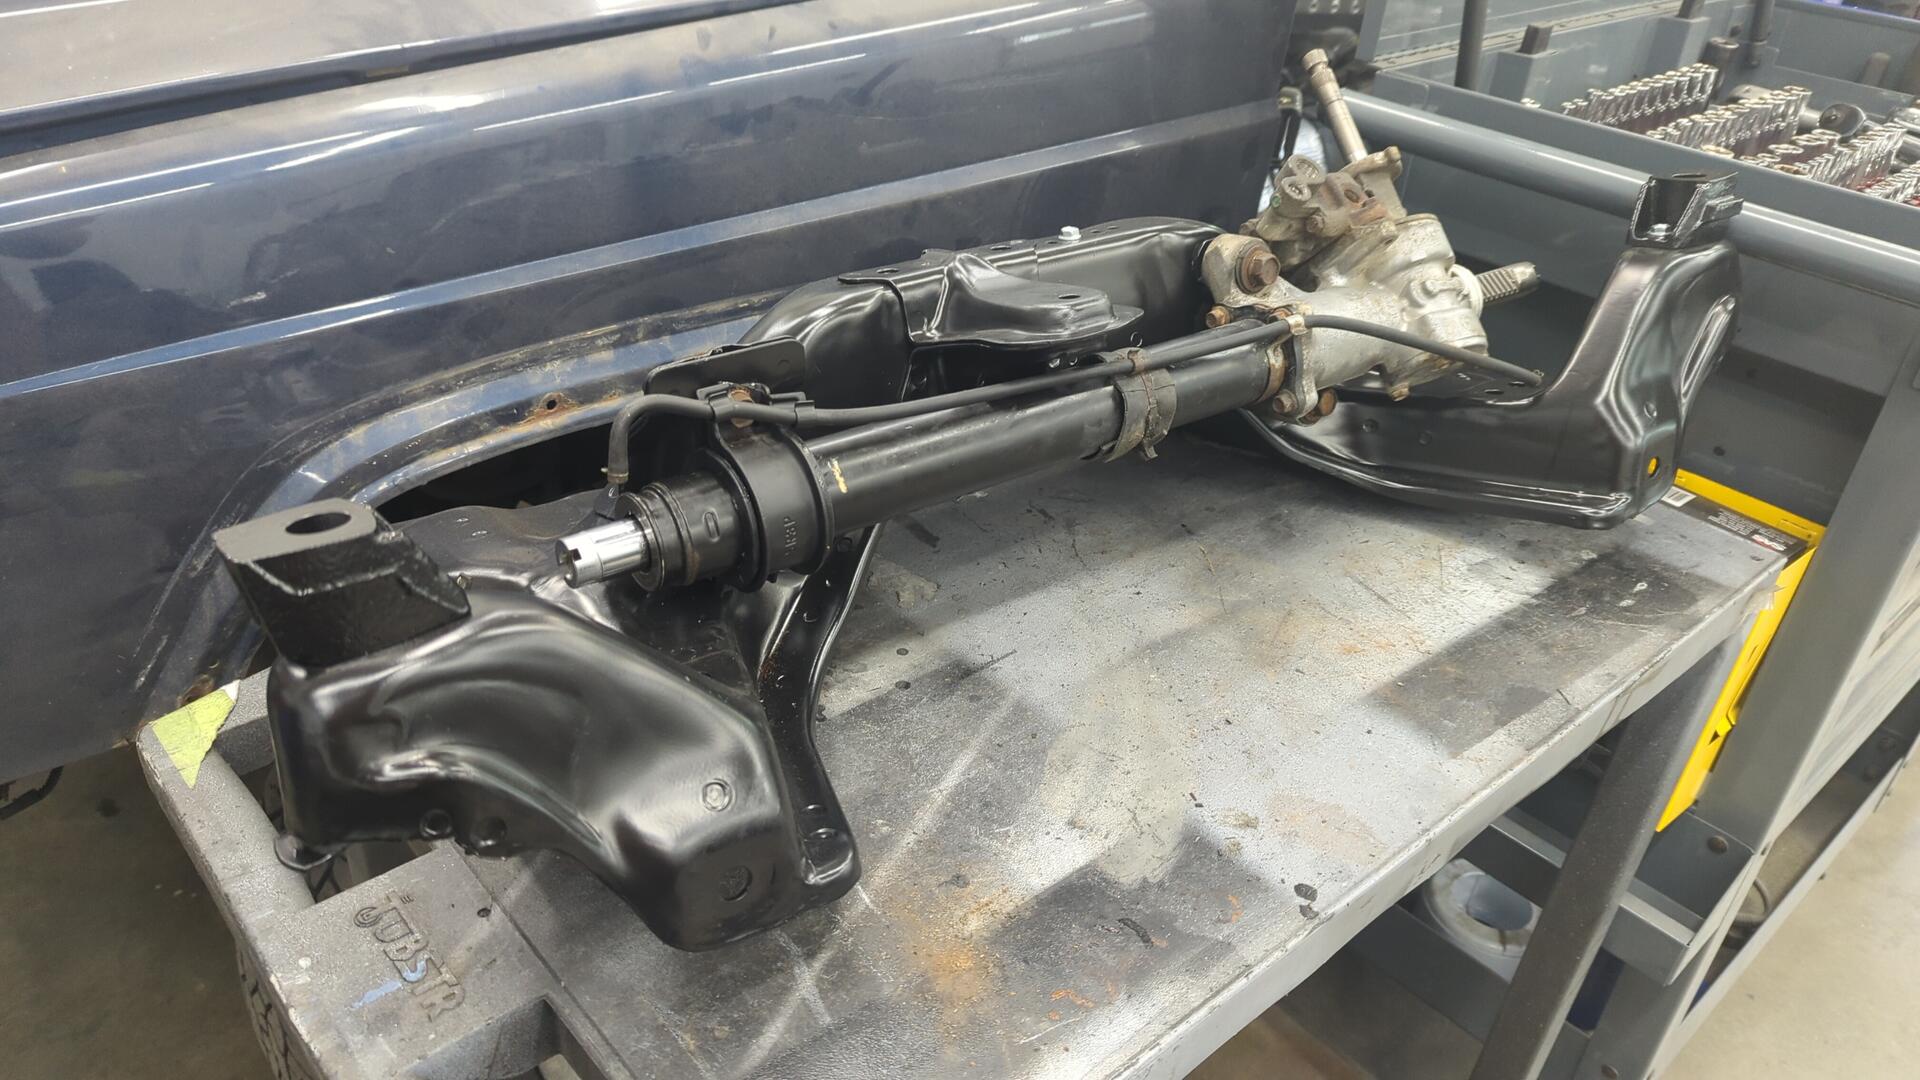
All done!
I also replaced both inner and outer tie rods + new boots and the rack bushings too.
Parts List
- 1 Moog ES3331R outer tie rod
- 1 Moog ES3332R outer tie rod
- 1 Energy Suspension steering rack bushing set 16.10102
- 2 Mevotech MEV299 inner tie rods
- 2 Mevotech MK9863 tie rod bellows
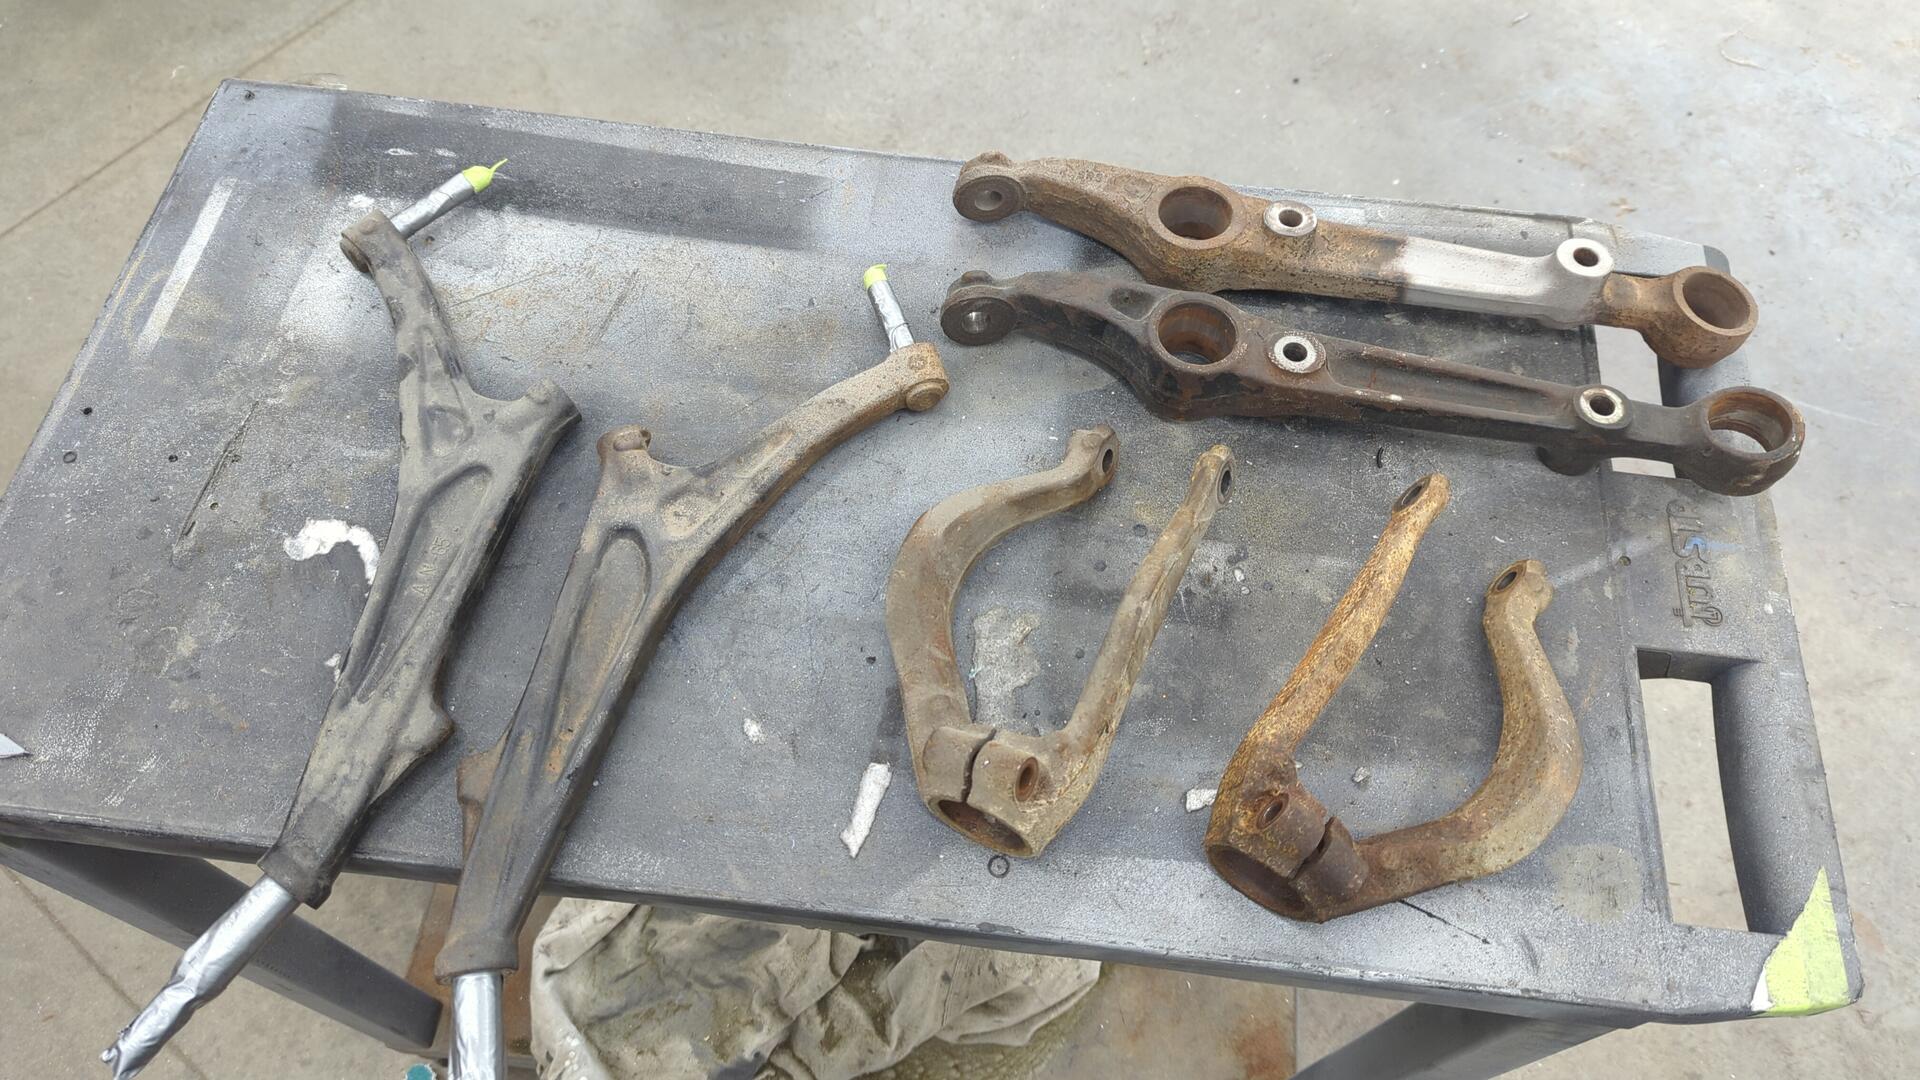
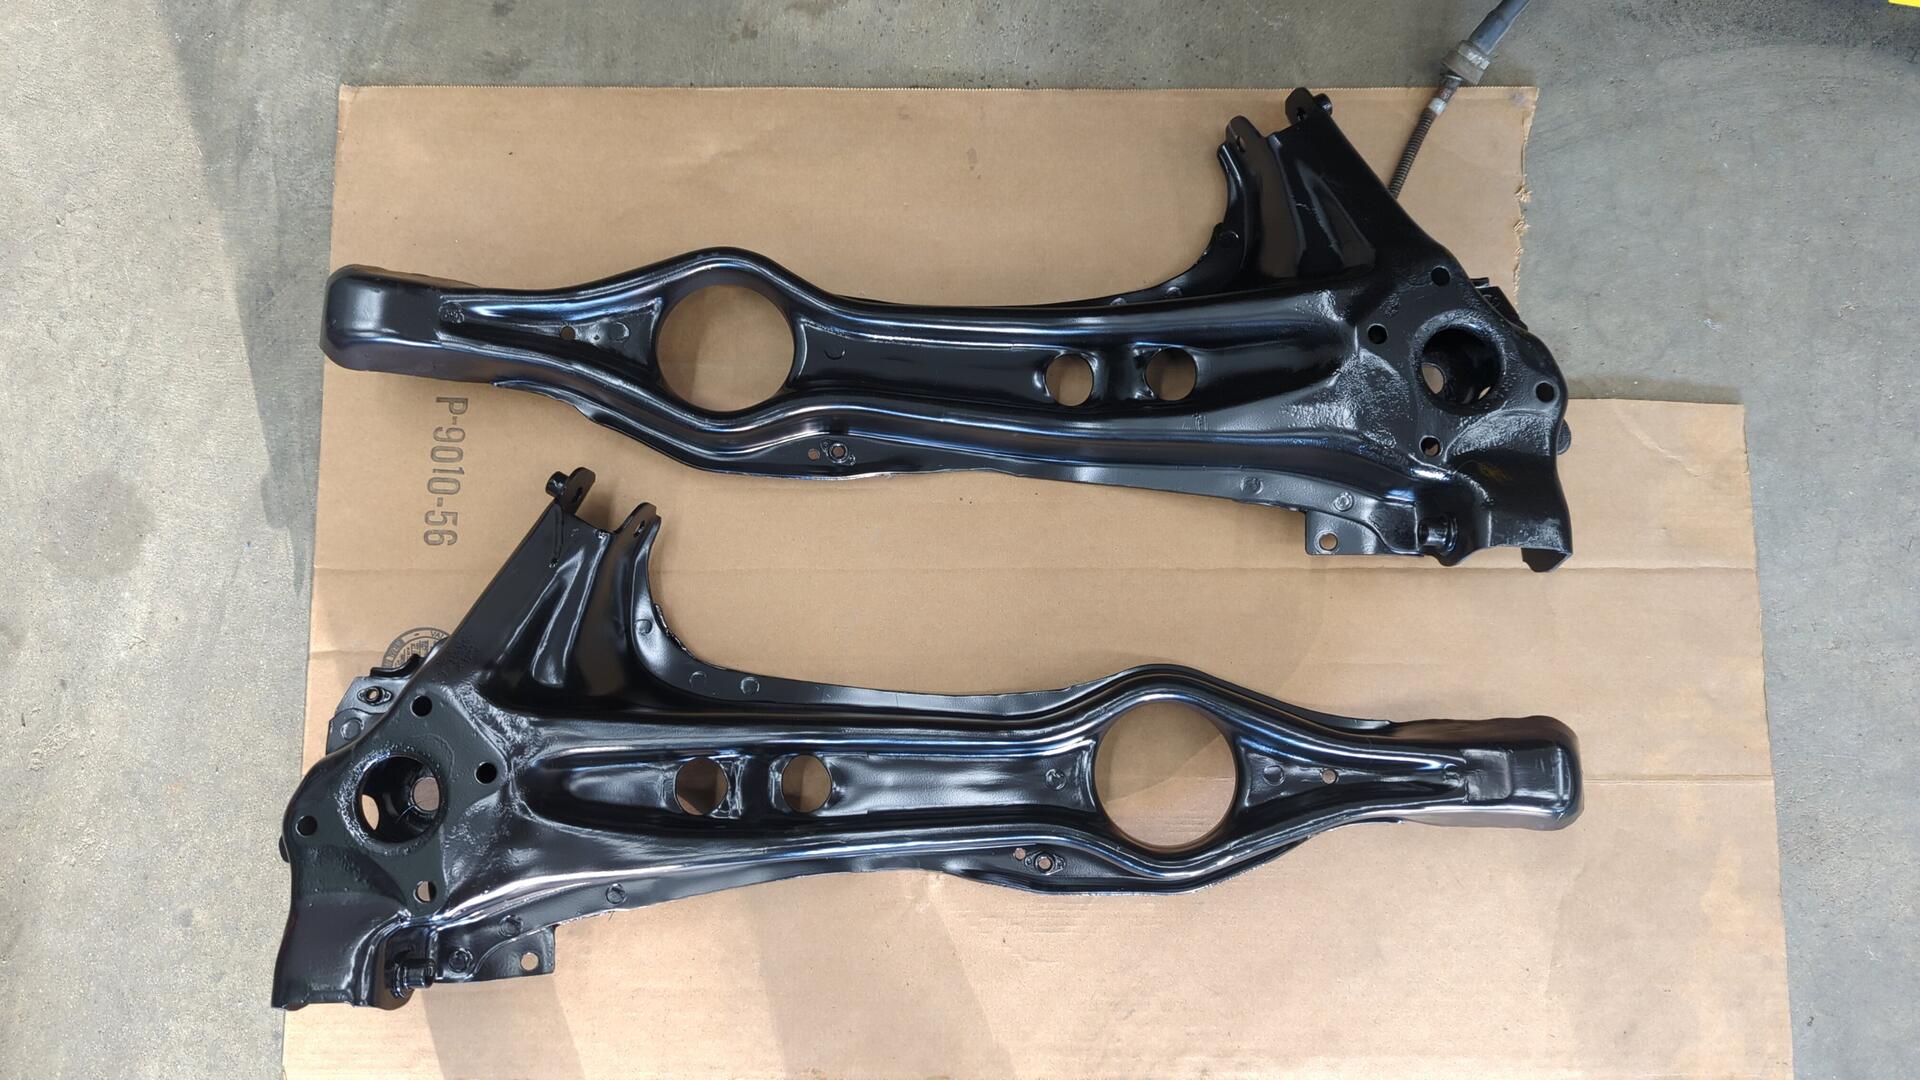
All the Various Suspension Arms
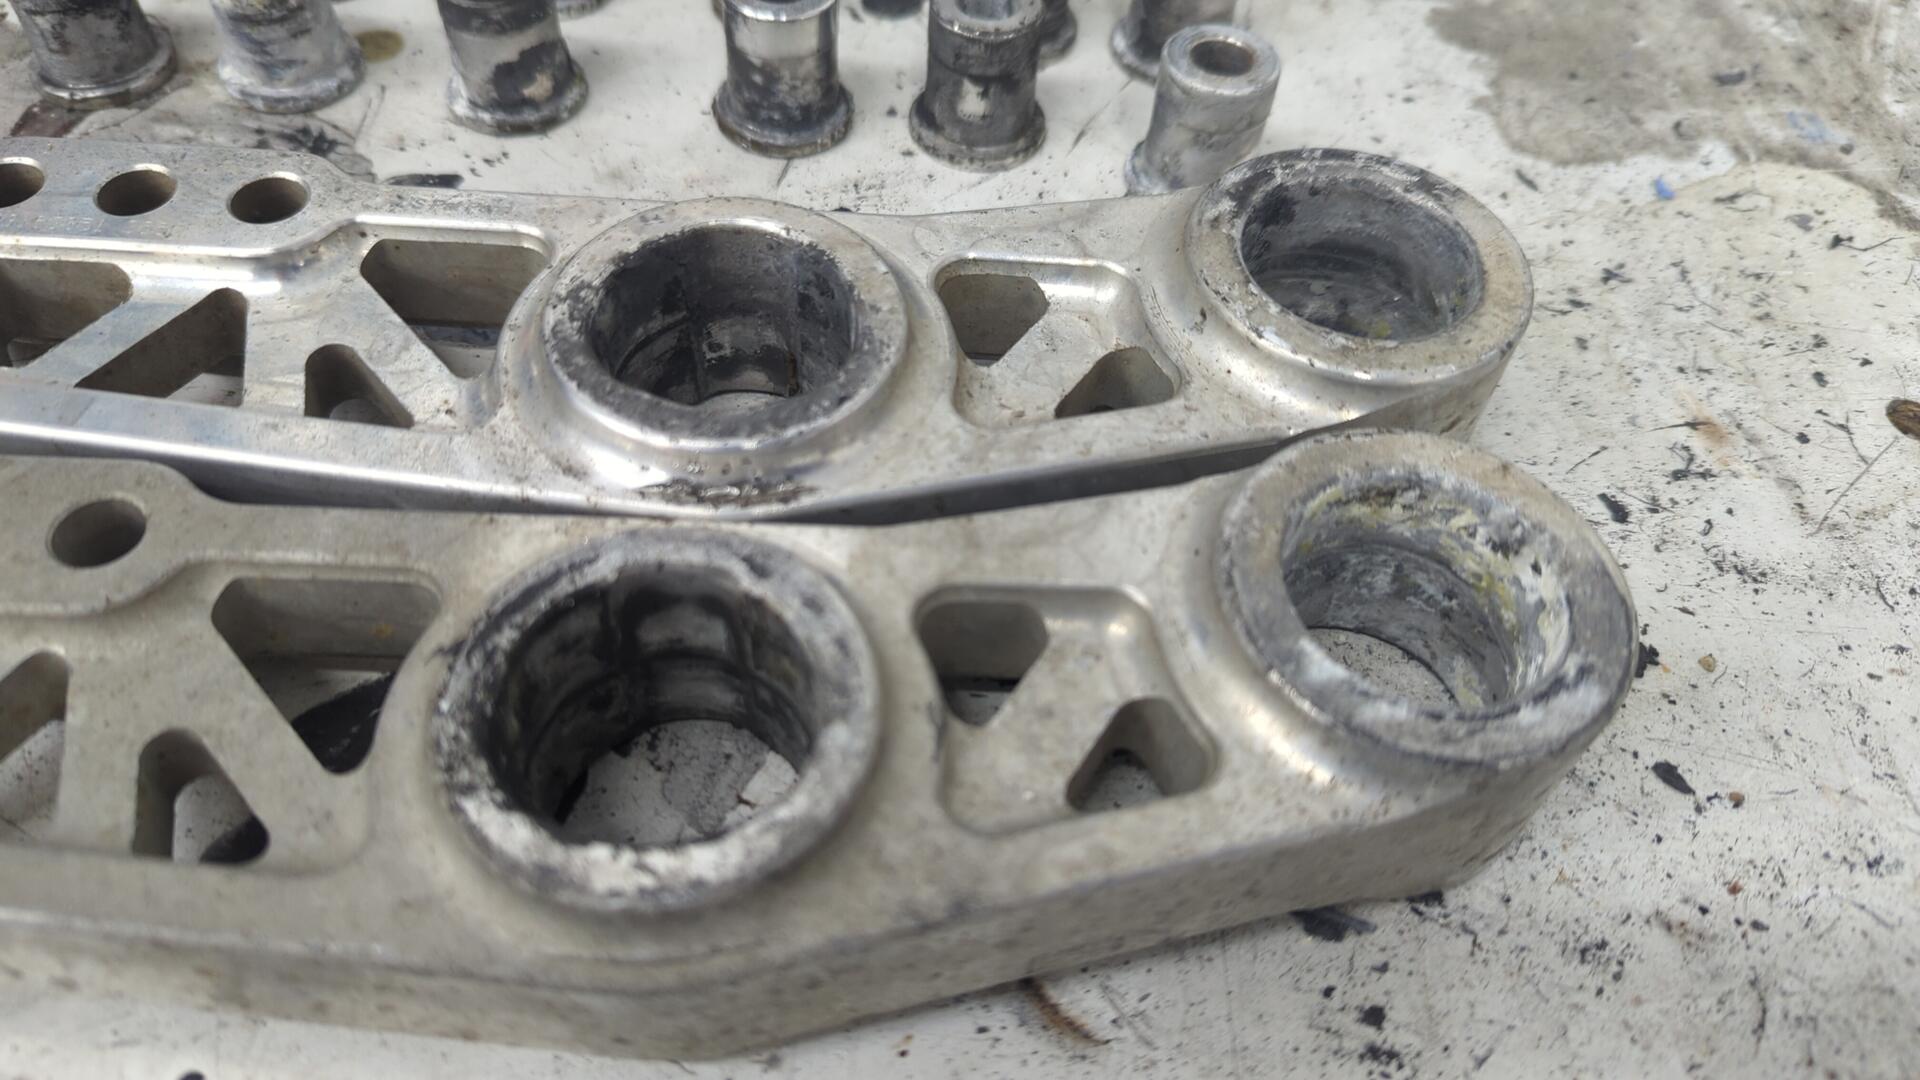
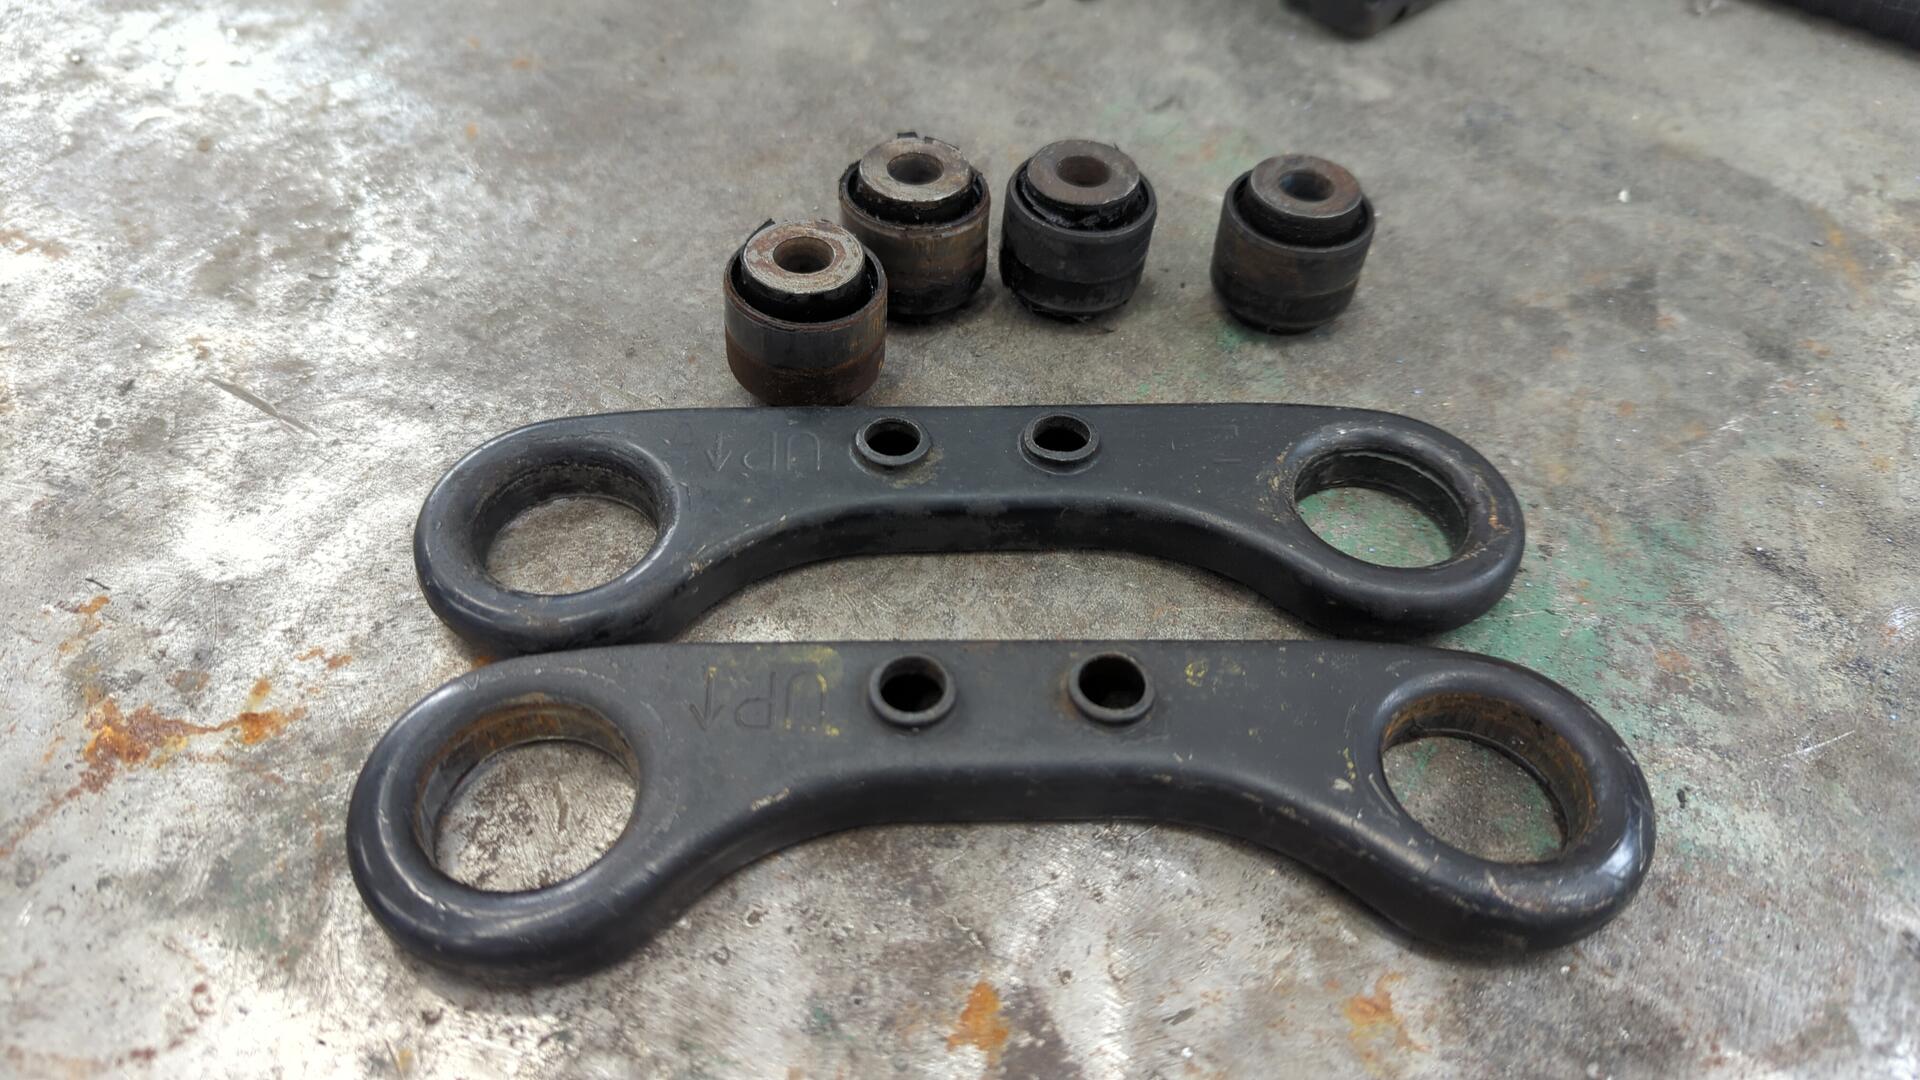
The hatch already had Function 7 rear lower control arms but they were fairly corroded on the front side from several years of use.

All stripped down so I could replace the bushings and repaint them.

There was a lot of corrosion in the bushing areas.
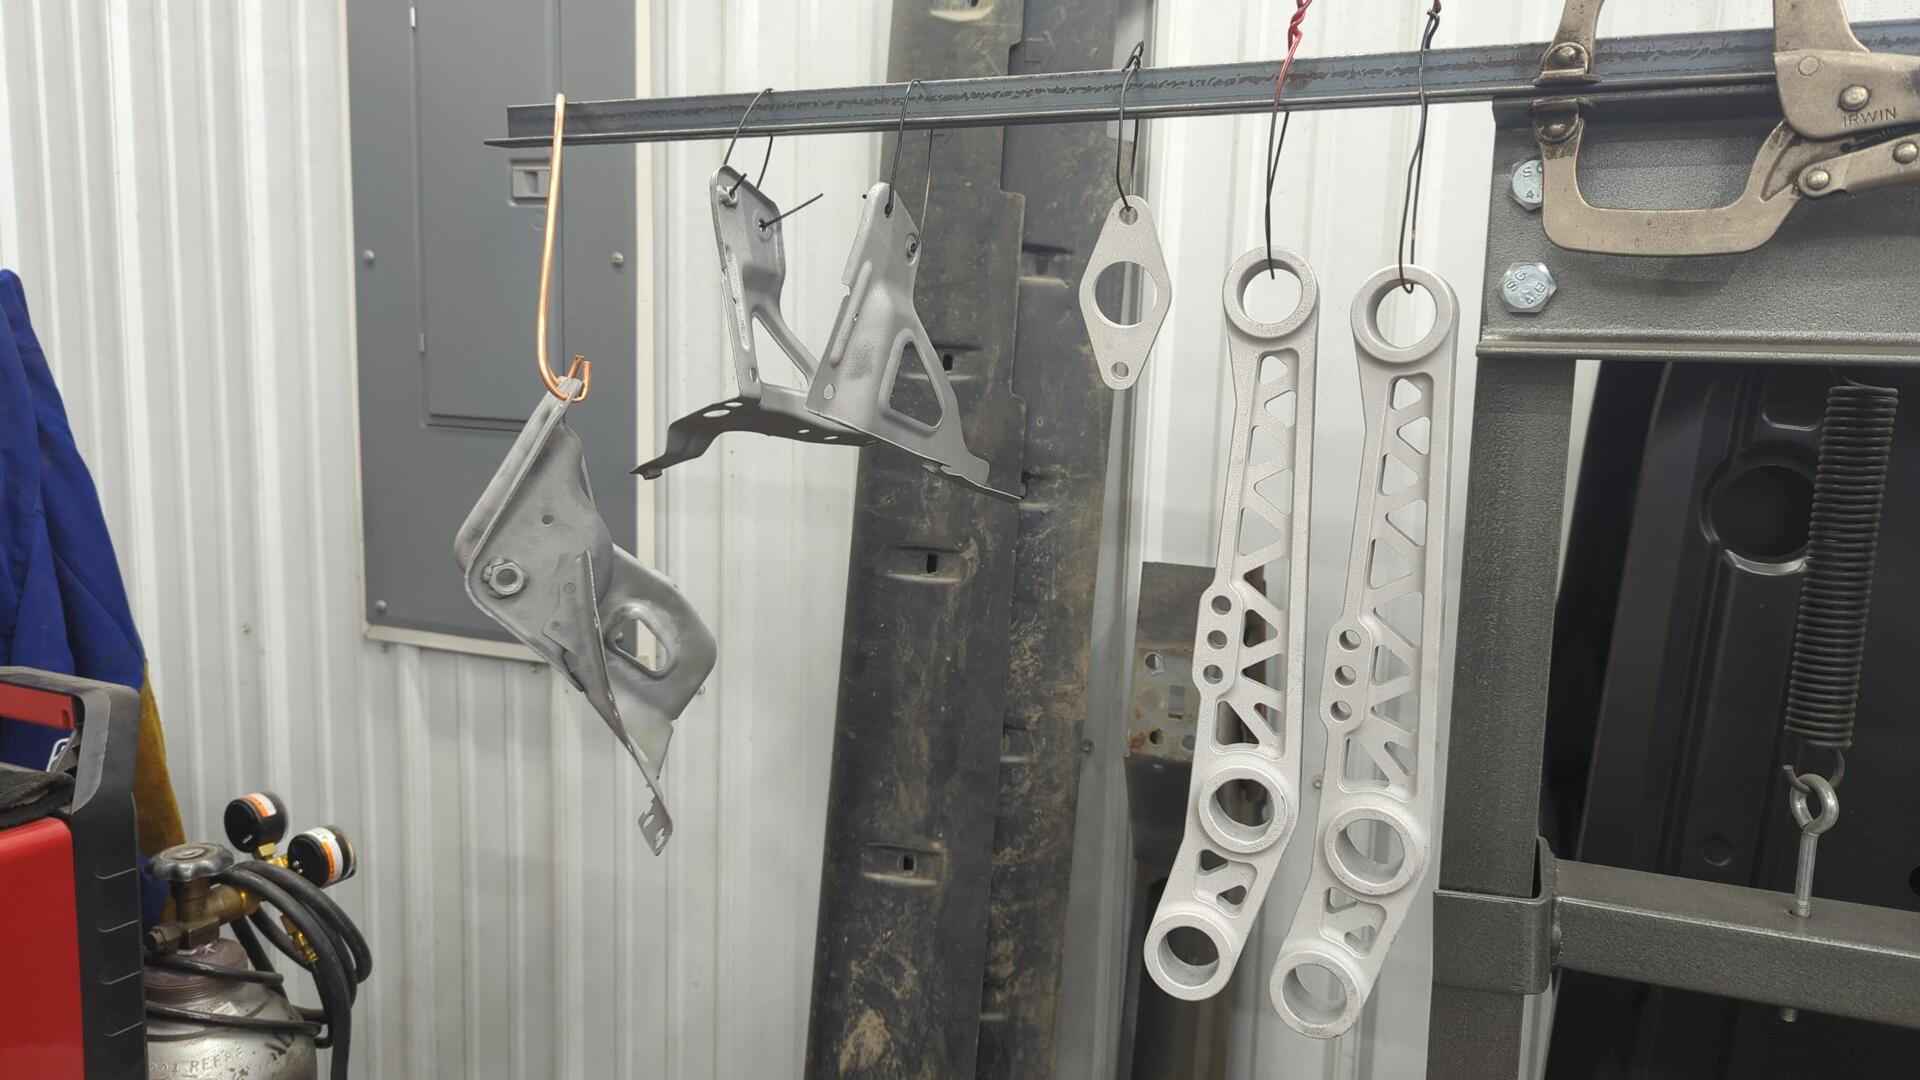
Sandblasted.
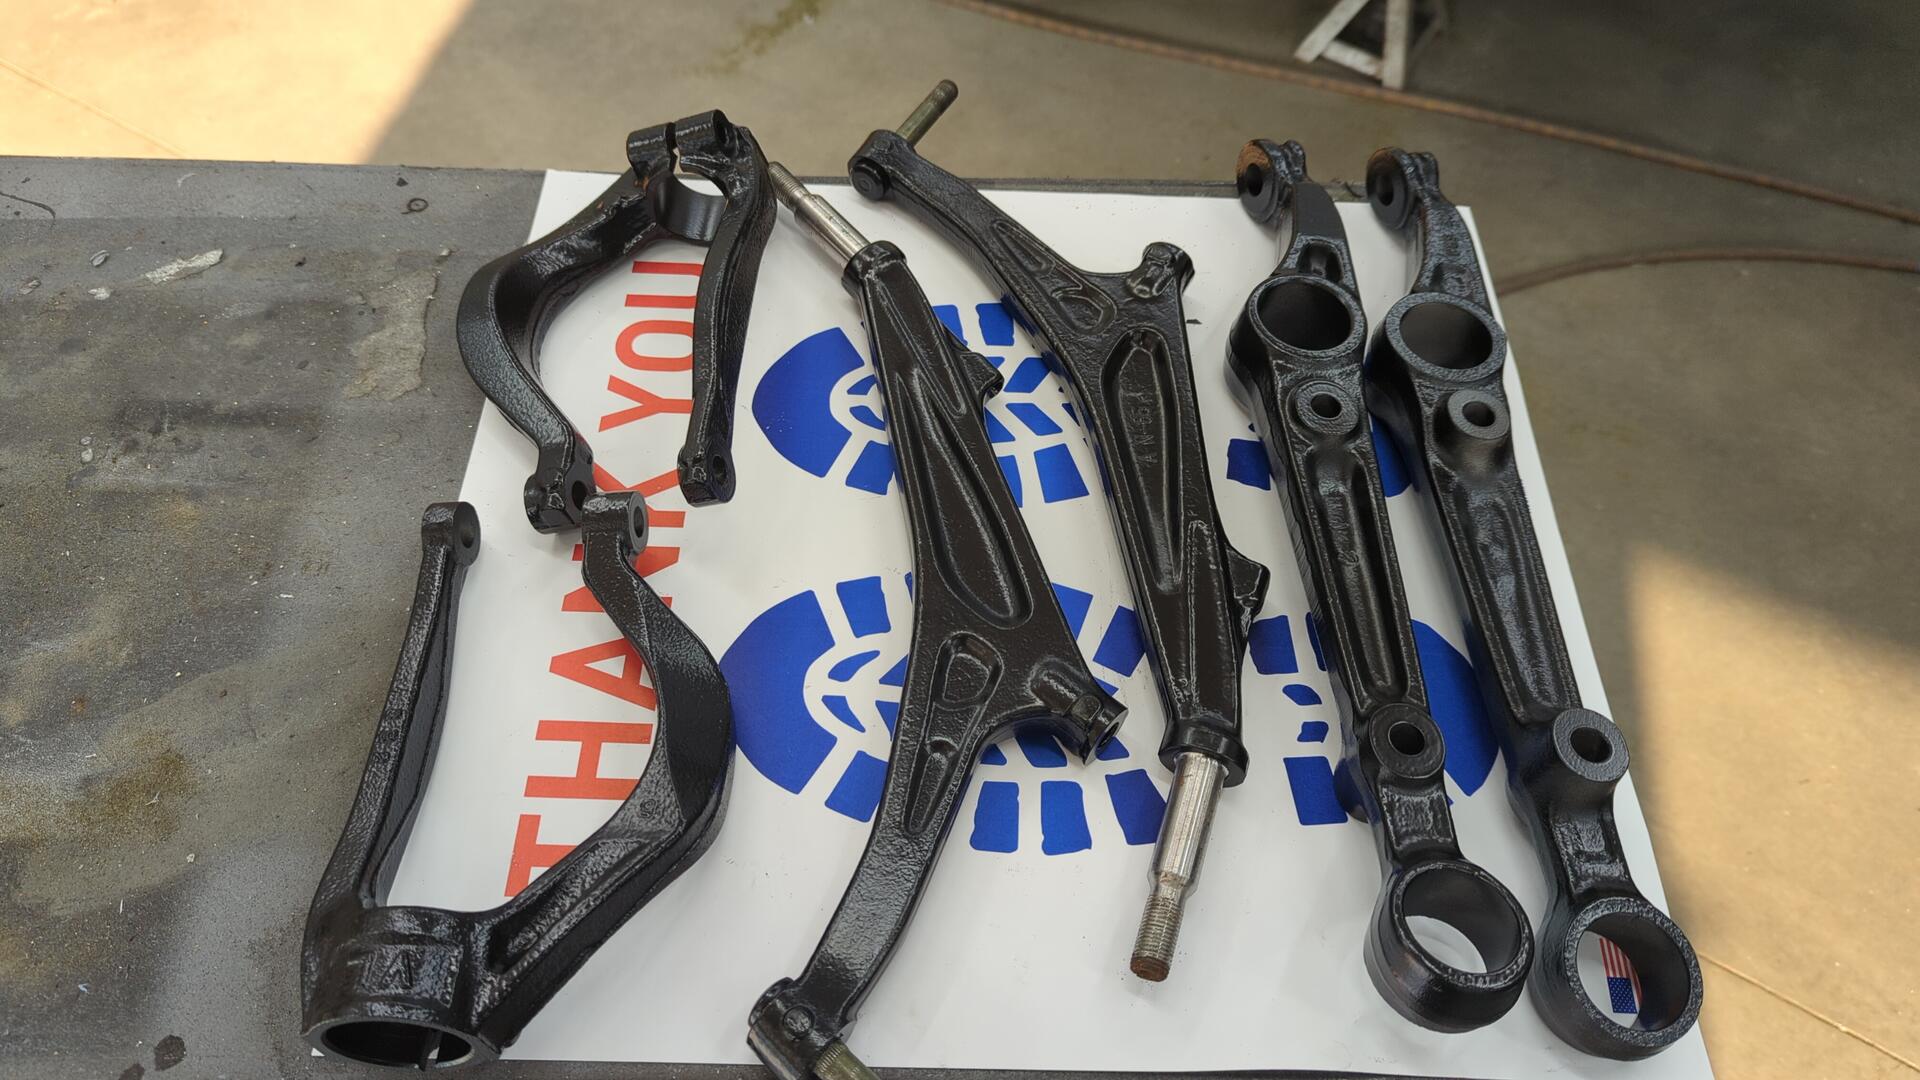
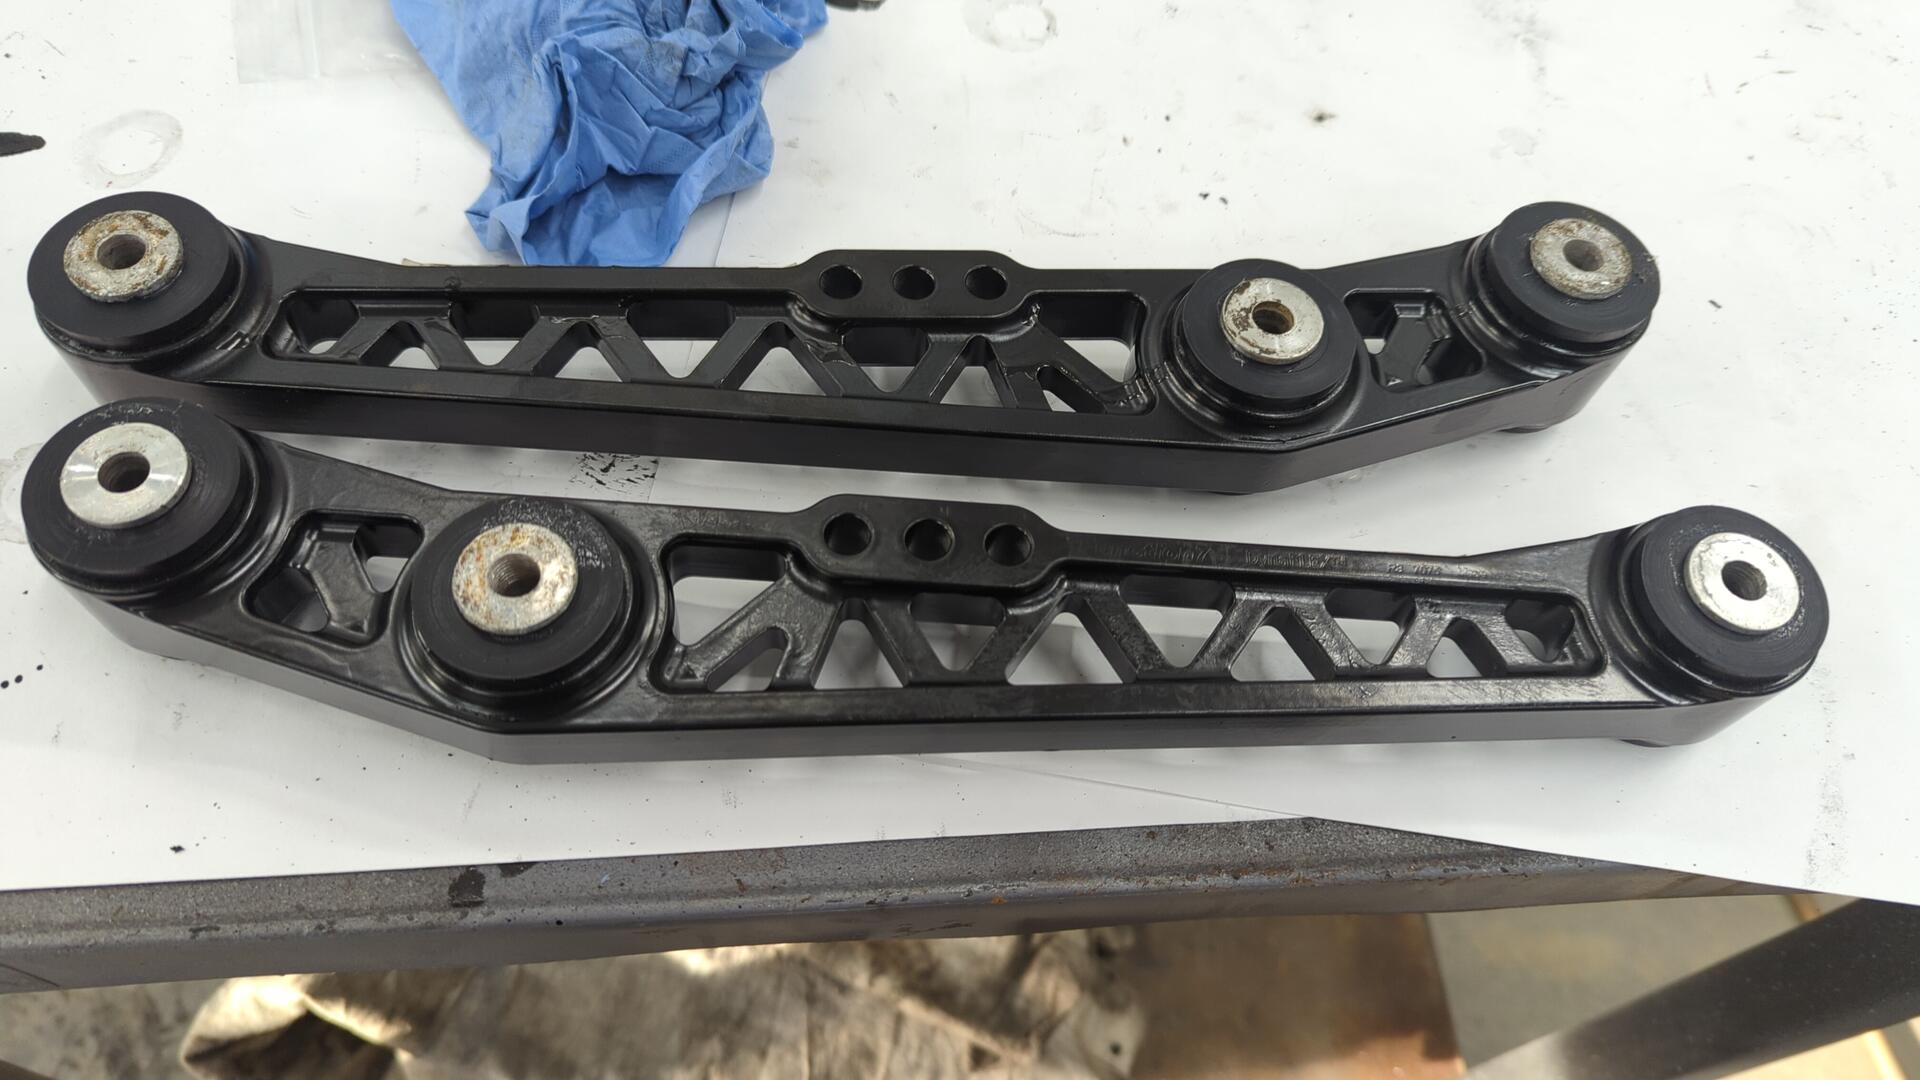
Painted and re-assembled.
Fun fact, the bushings Function 7 uses are Energy Suspension 9002G universal bushings. I ended up ordering a pack of 20 off Ebay for pretty cheap. The arms only need 12 total but now I have spares!
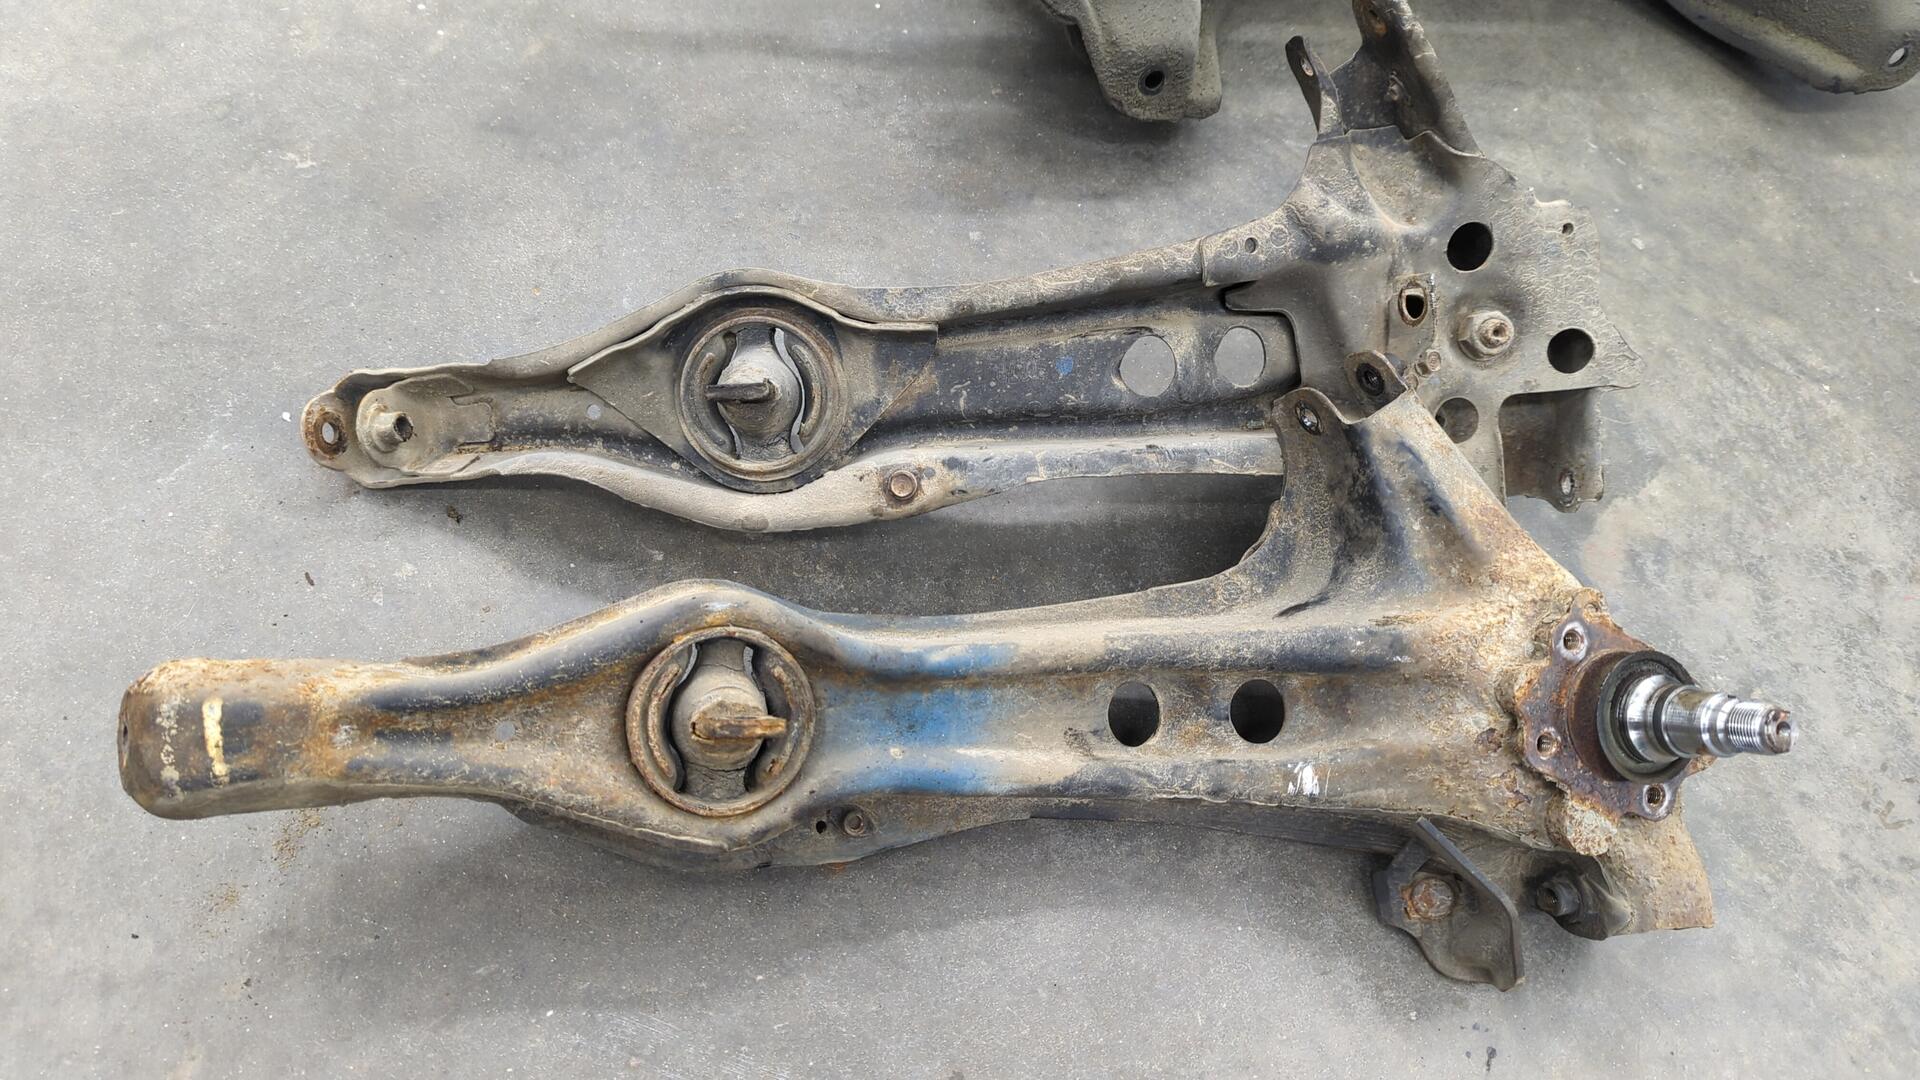
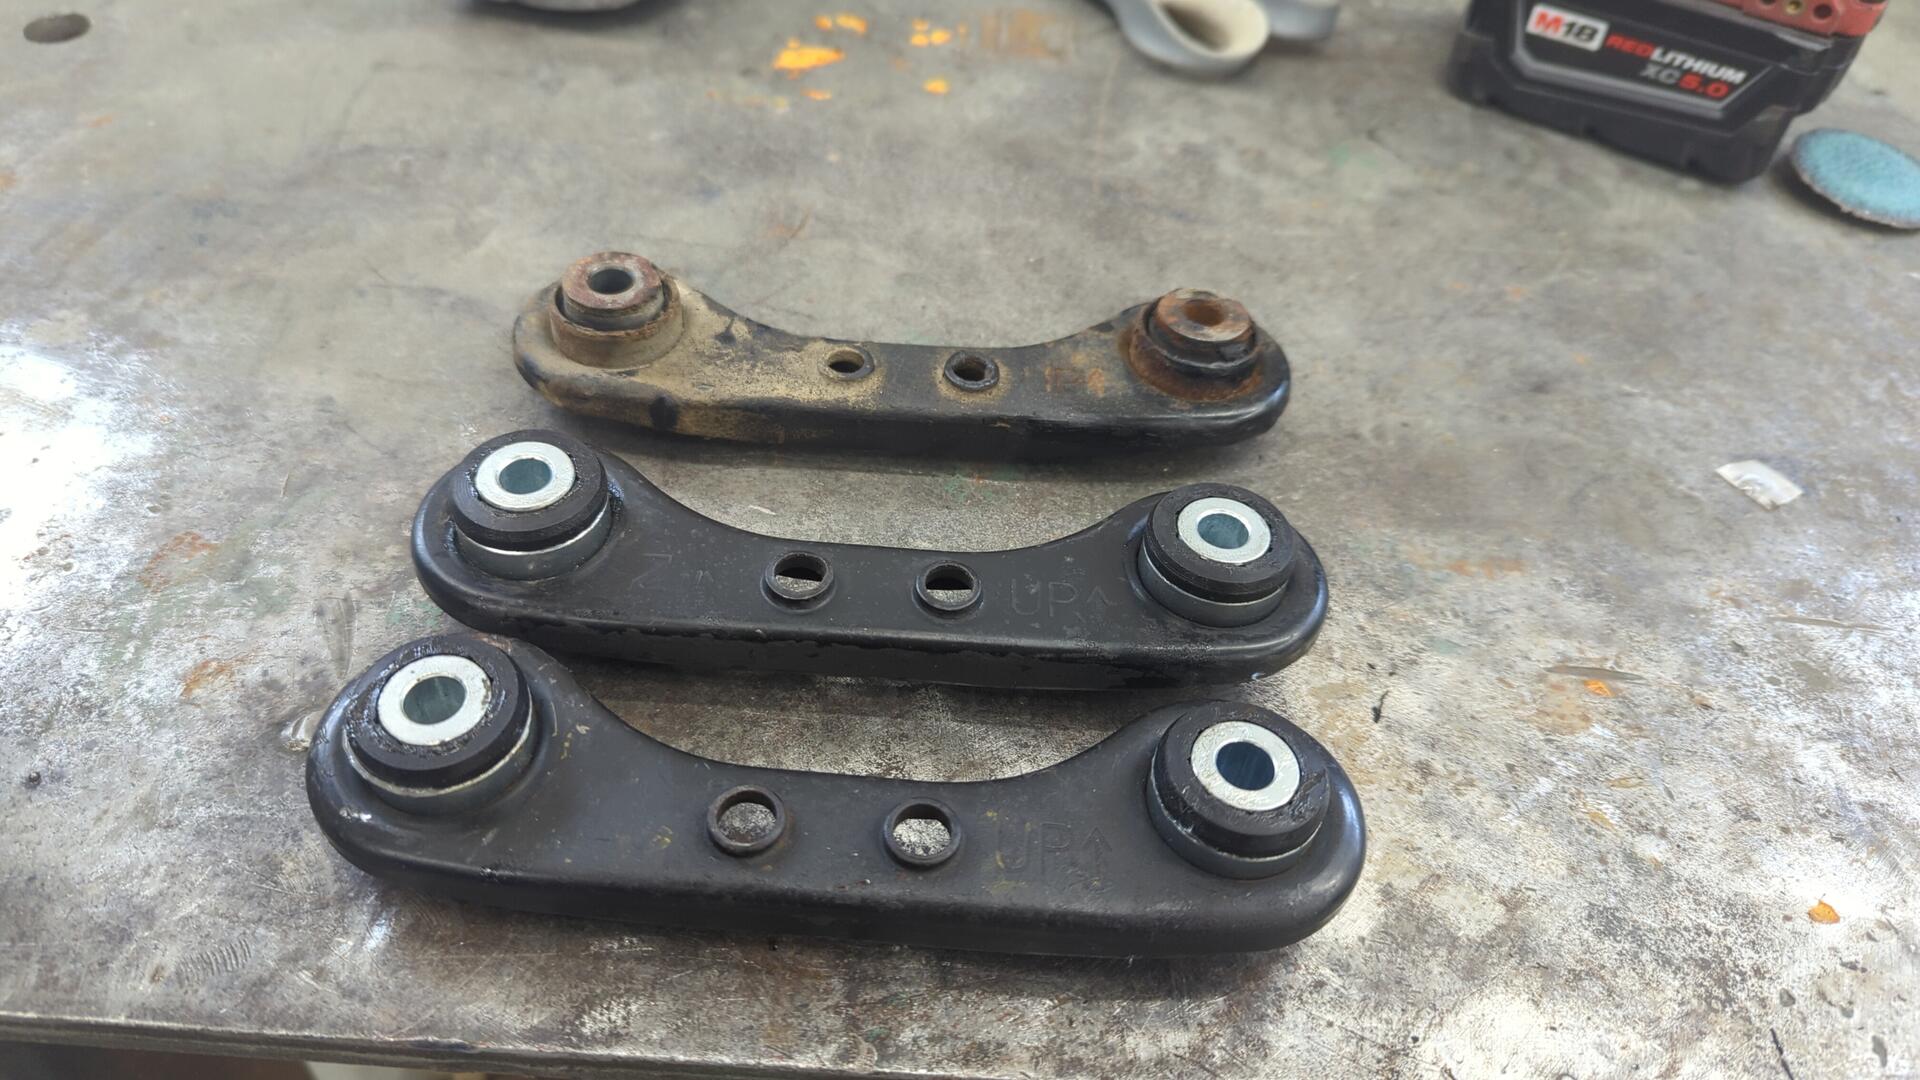
Amd the used compensator arms I bought were already in pretty good shape so I didn’t sand blasting or re-painting them. I did press out the bushings and put new ones in though.
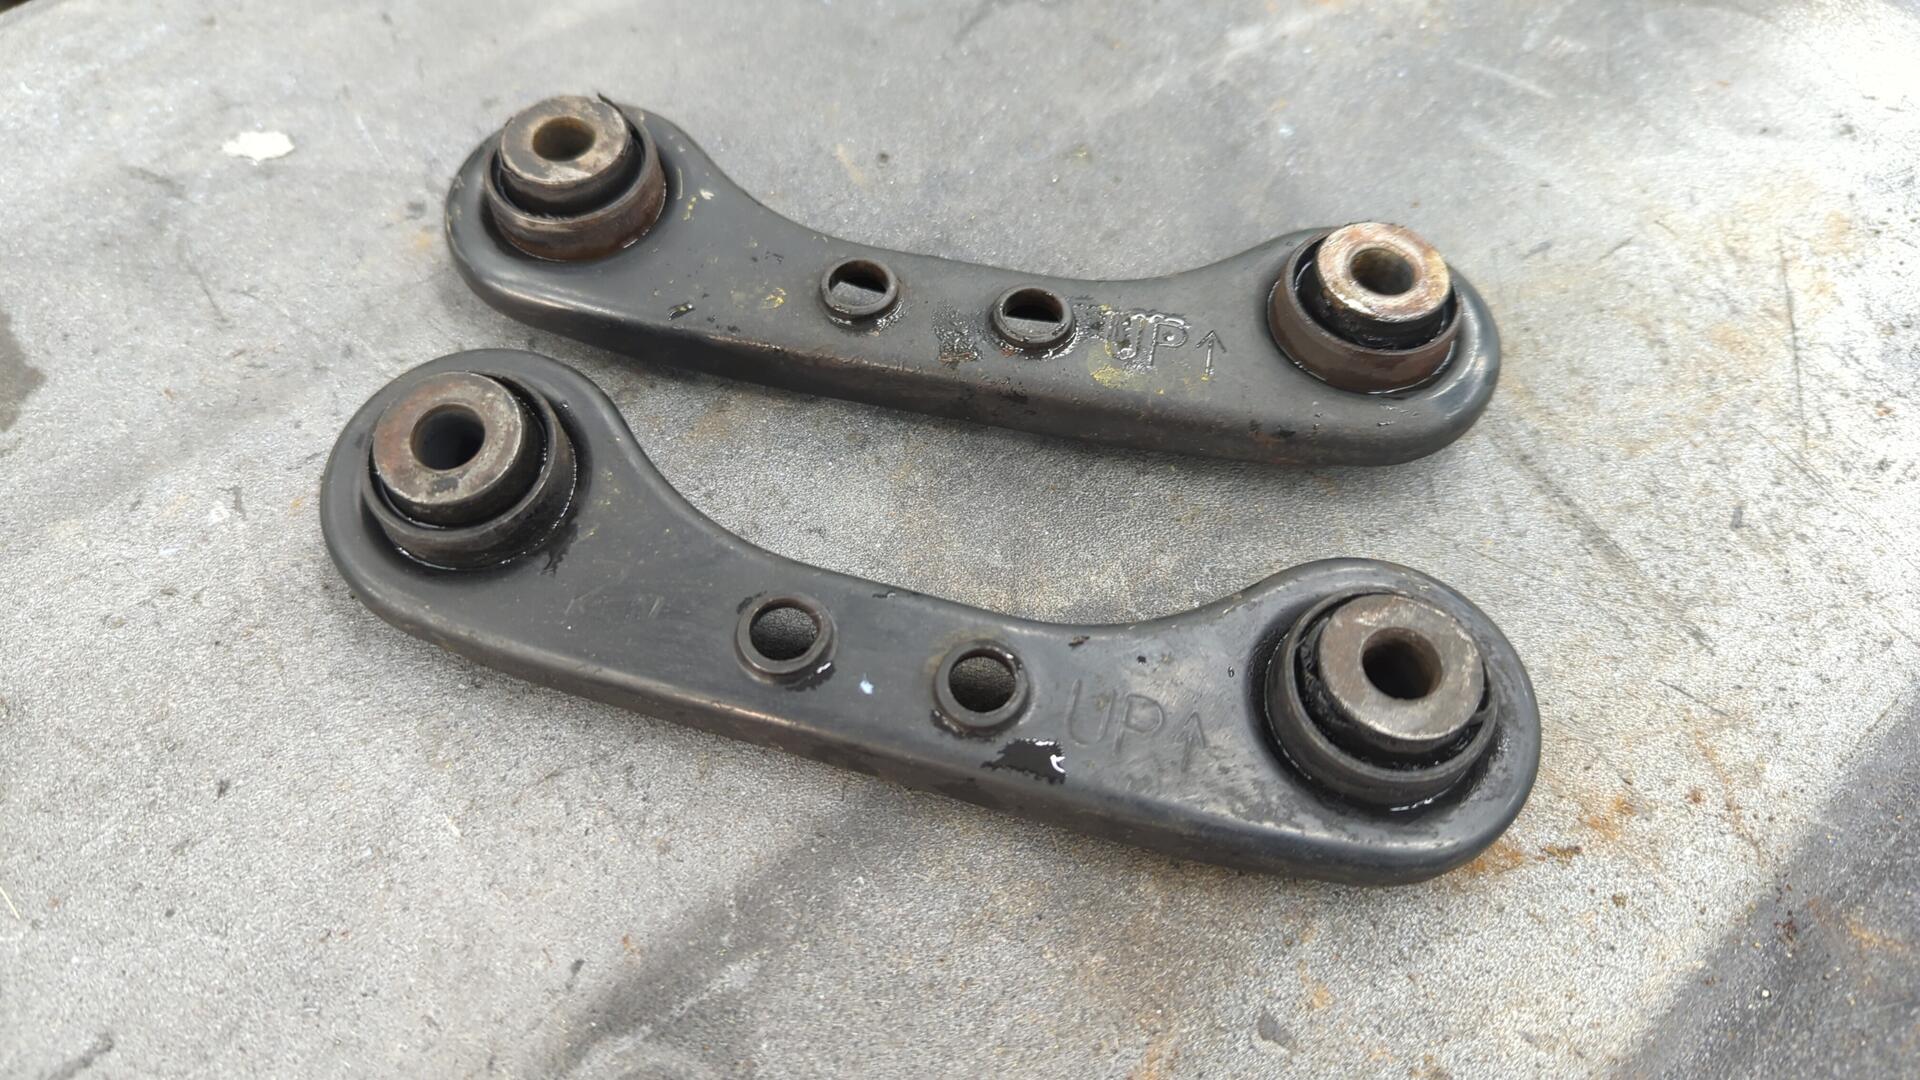
The top arm is the passenger side arm that was pulled from the car. I’m glad I ended up buying new arms since it saved me from having to restore the old ones.
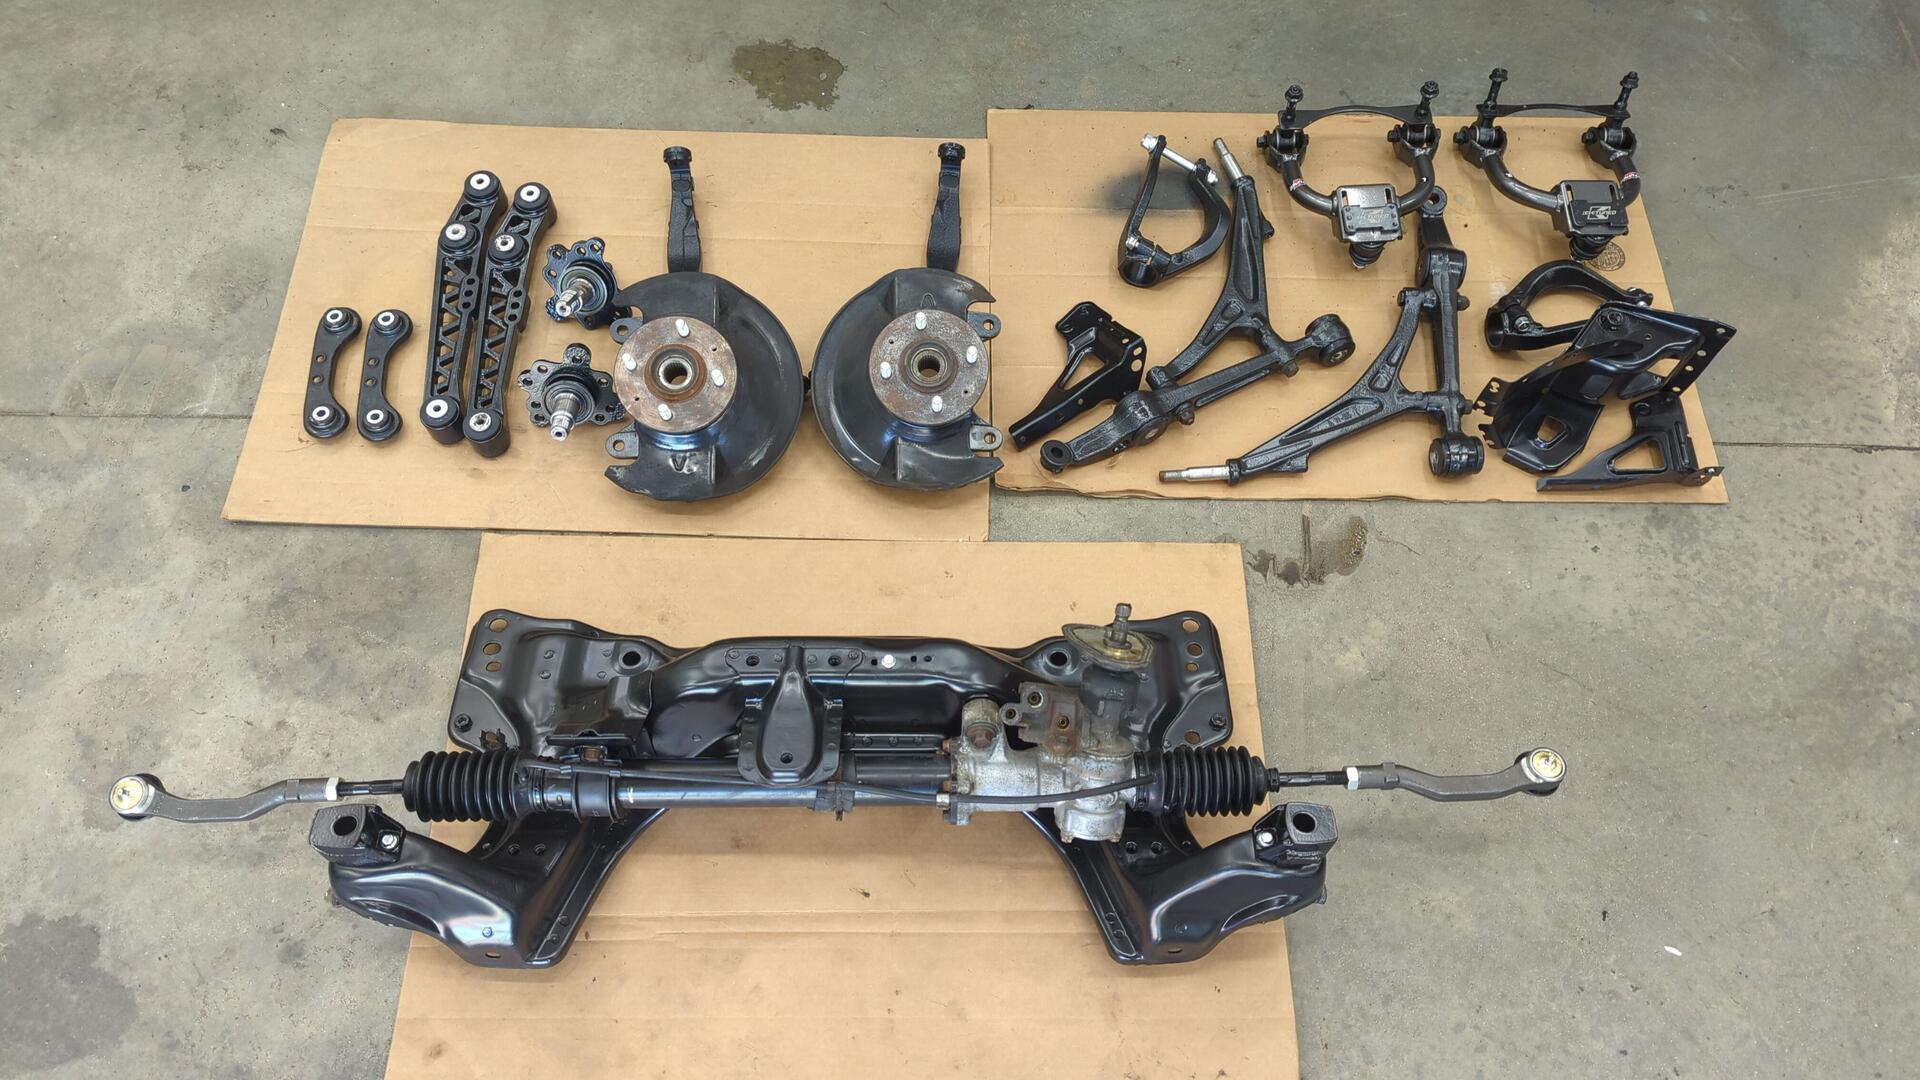
Family photo of all the suspension bits. Those upper control arms in the top right are K-Tuned camber arms.
Since I knew the rear trailing arms would be a pretty big job in themselves I decided to put off restoring them until the end. These arms are meant for drum brakes and won’t easily work with disk brakes but I plan on making conversion brackets to mount calipers with.
There’s a company out there that used to sell conversion brackets (Scarebird) but they’re in the process of switching to new management and don’t have any of the conversion brackets in stock, or in production hence why I’m going to make my own.

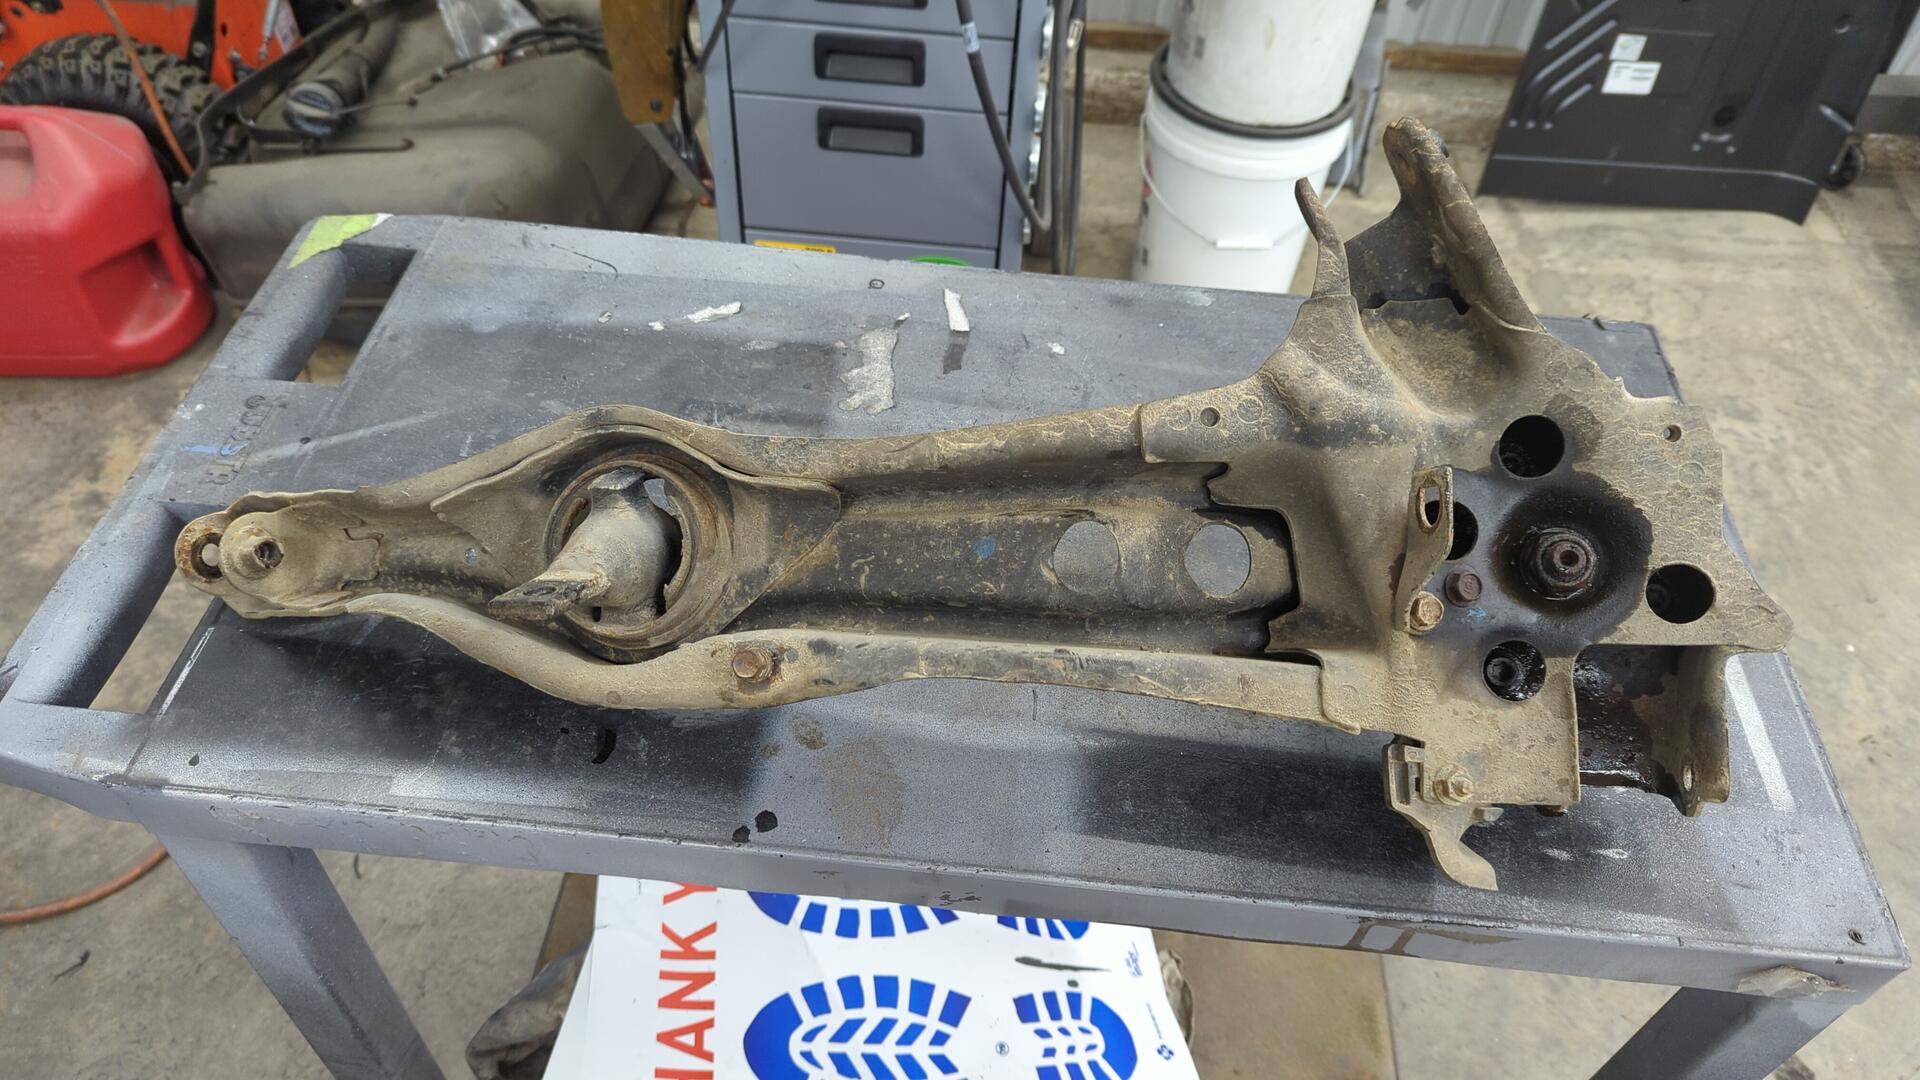
Removing the 4 bolts and nut holding the spindle in was actually somewhat challenging. They wouldn’t budge after trying PB Blaster. I ended up having to use my torch to heat up the metal around them to break them free.
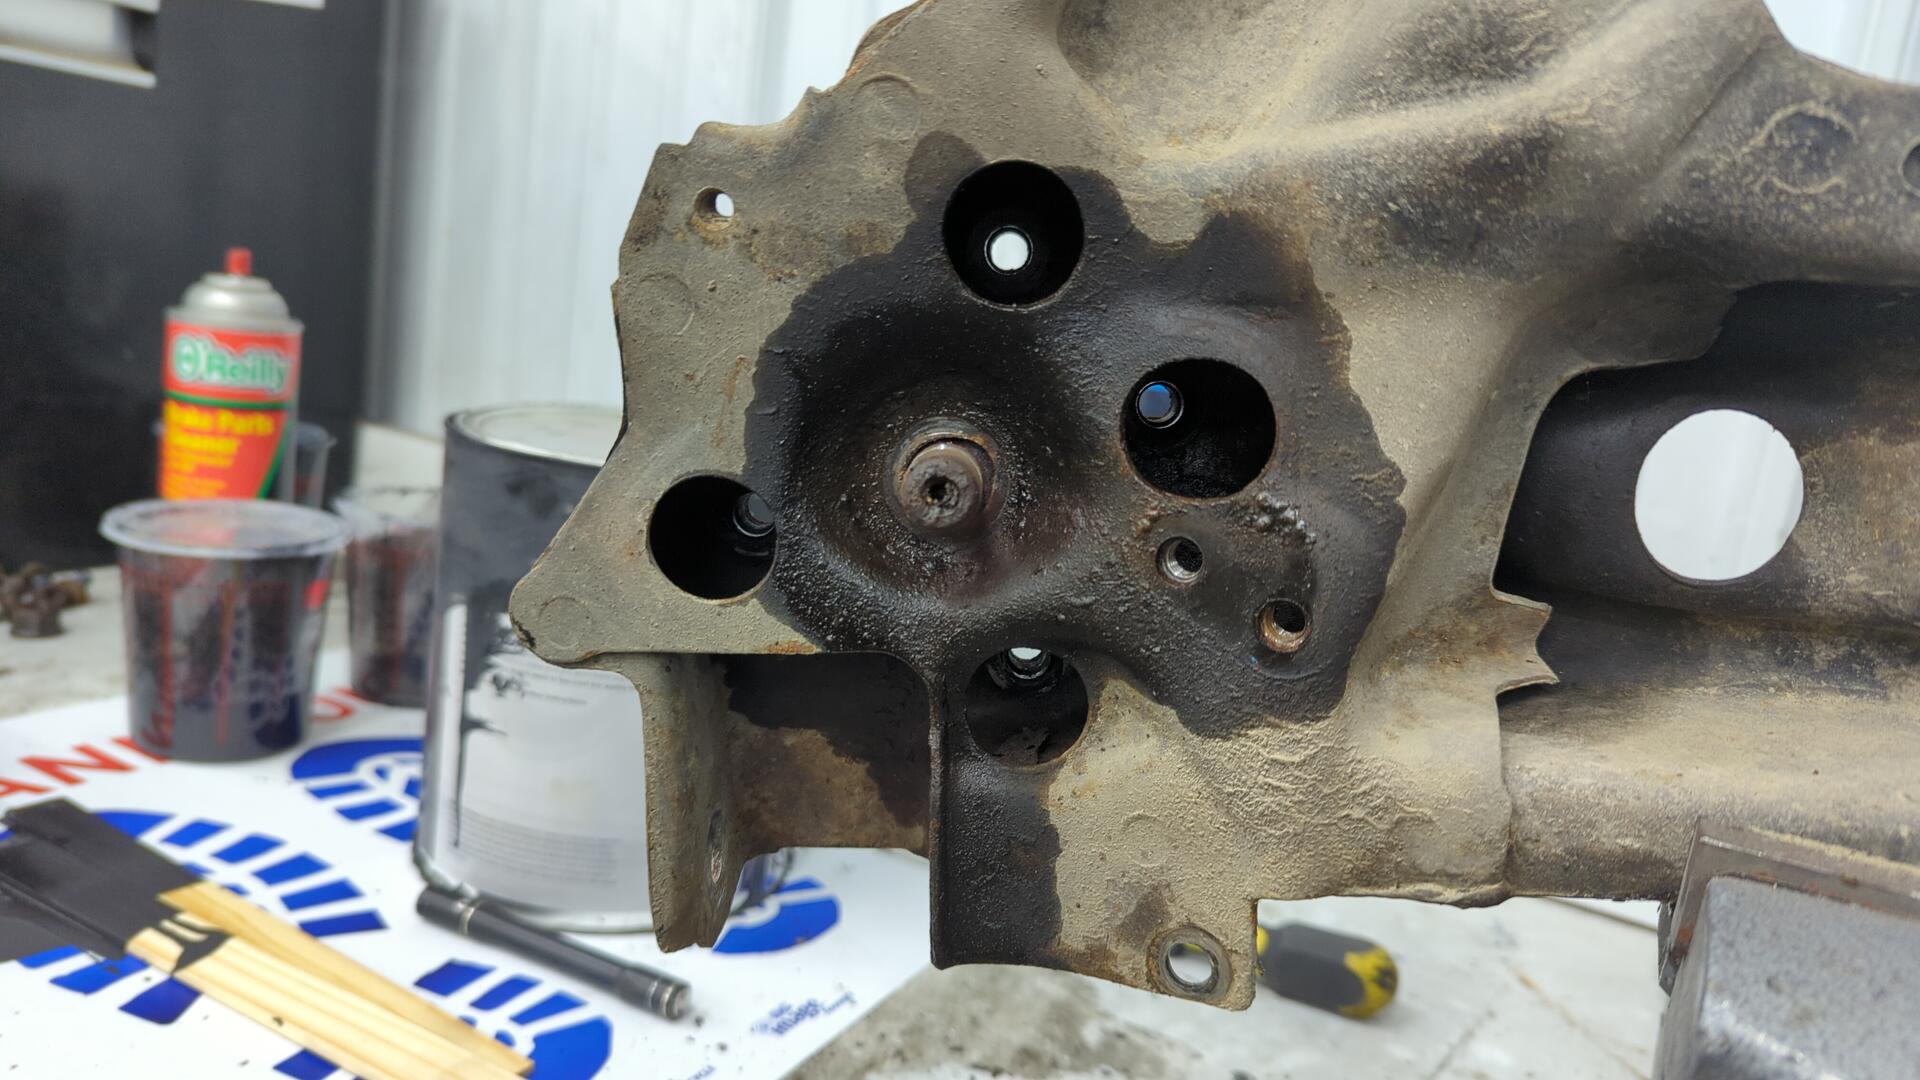
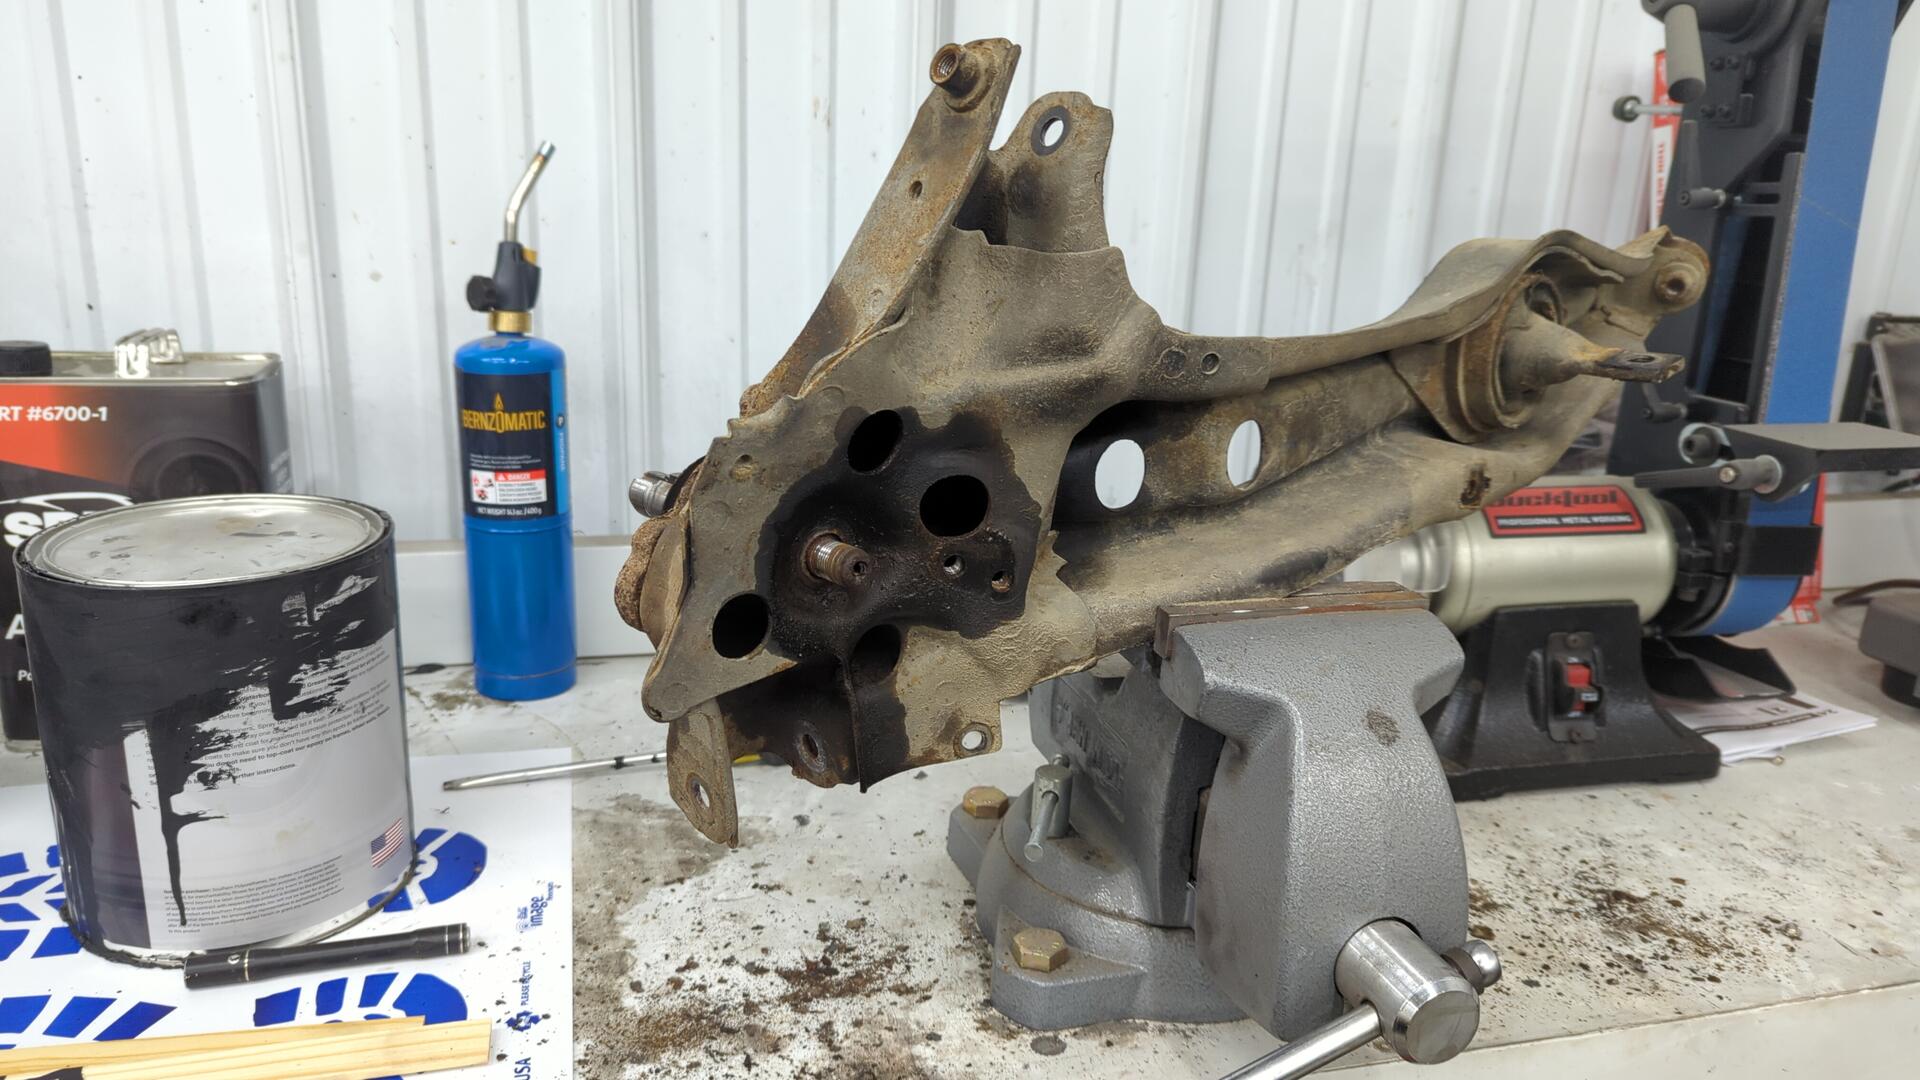
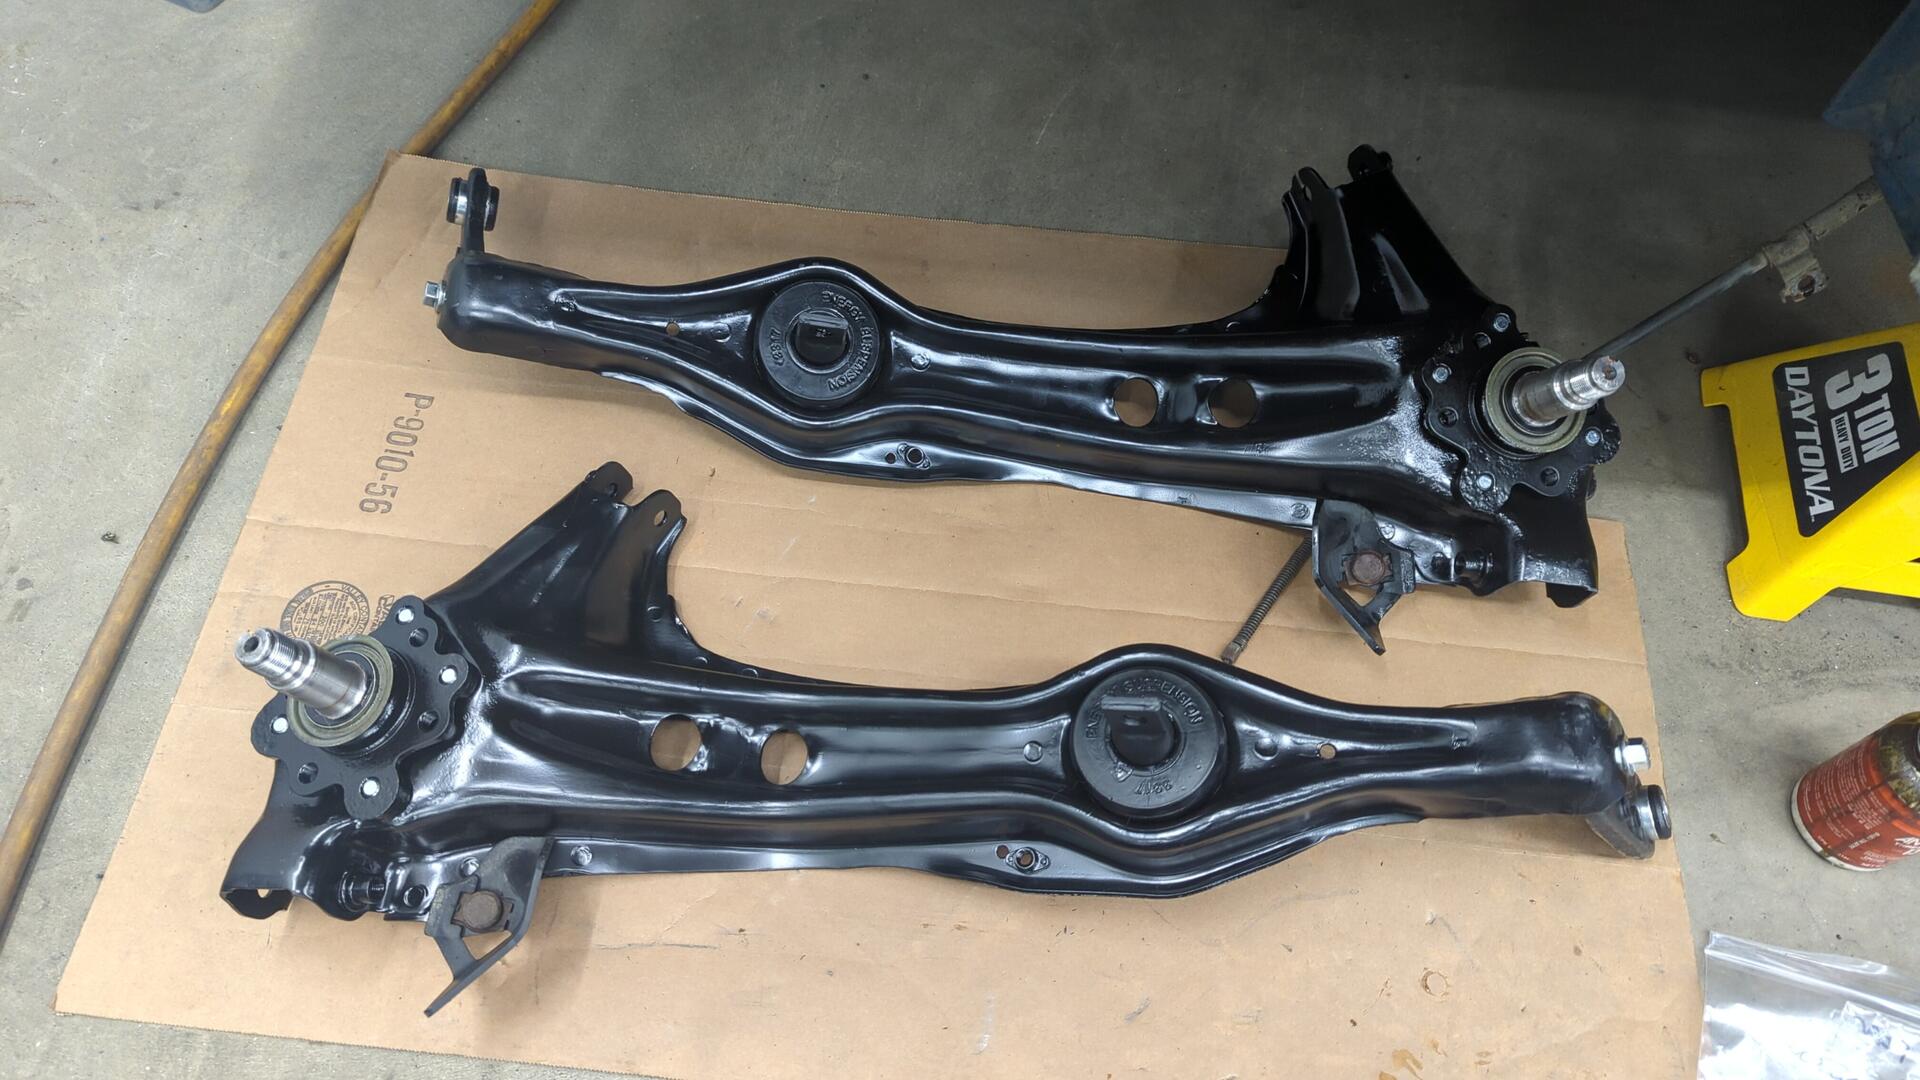
I removed the spindles because I wanted to address the rust that was sandwiched up between the arm / spindle.
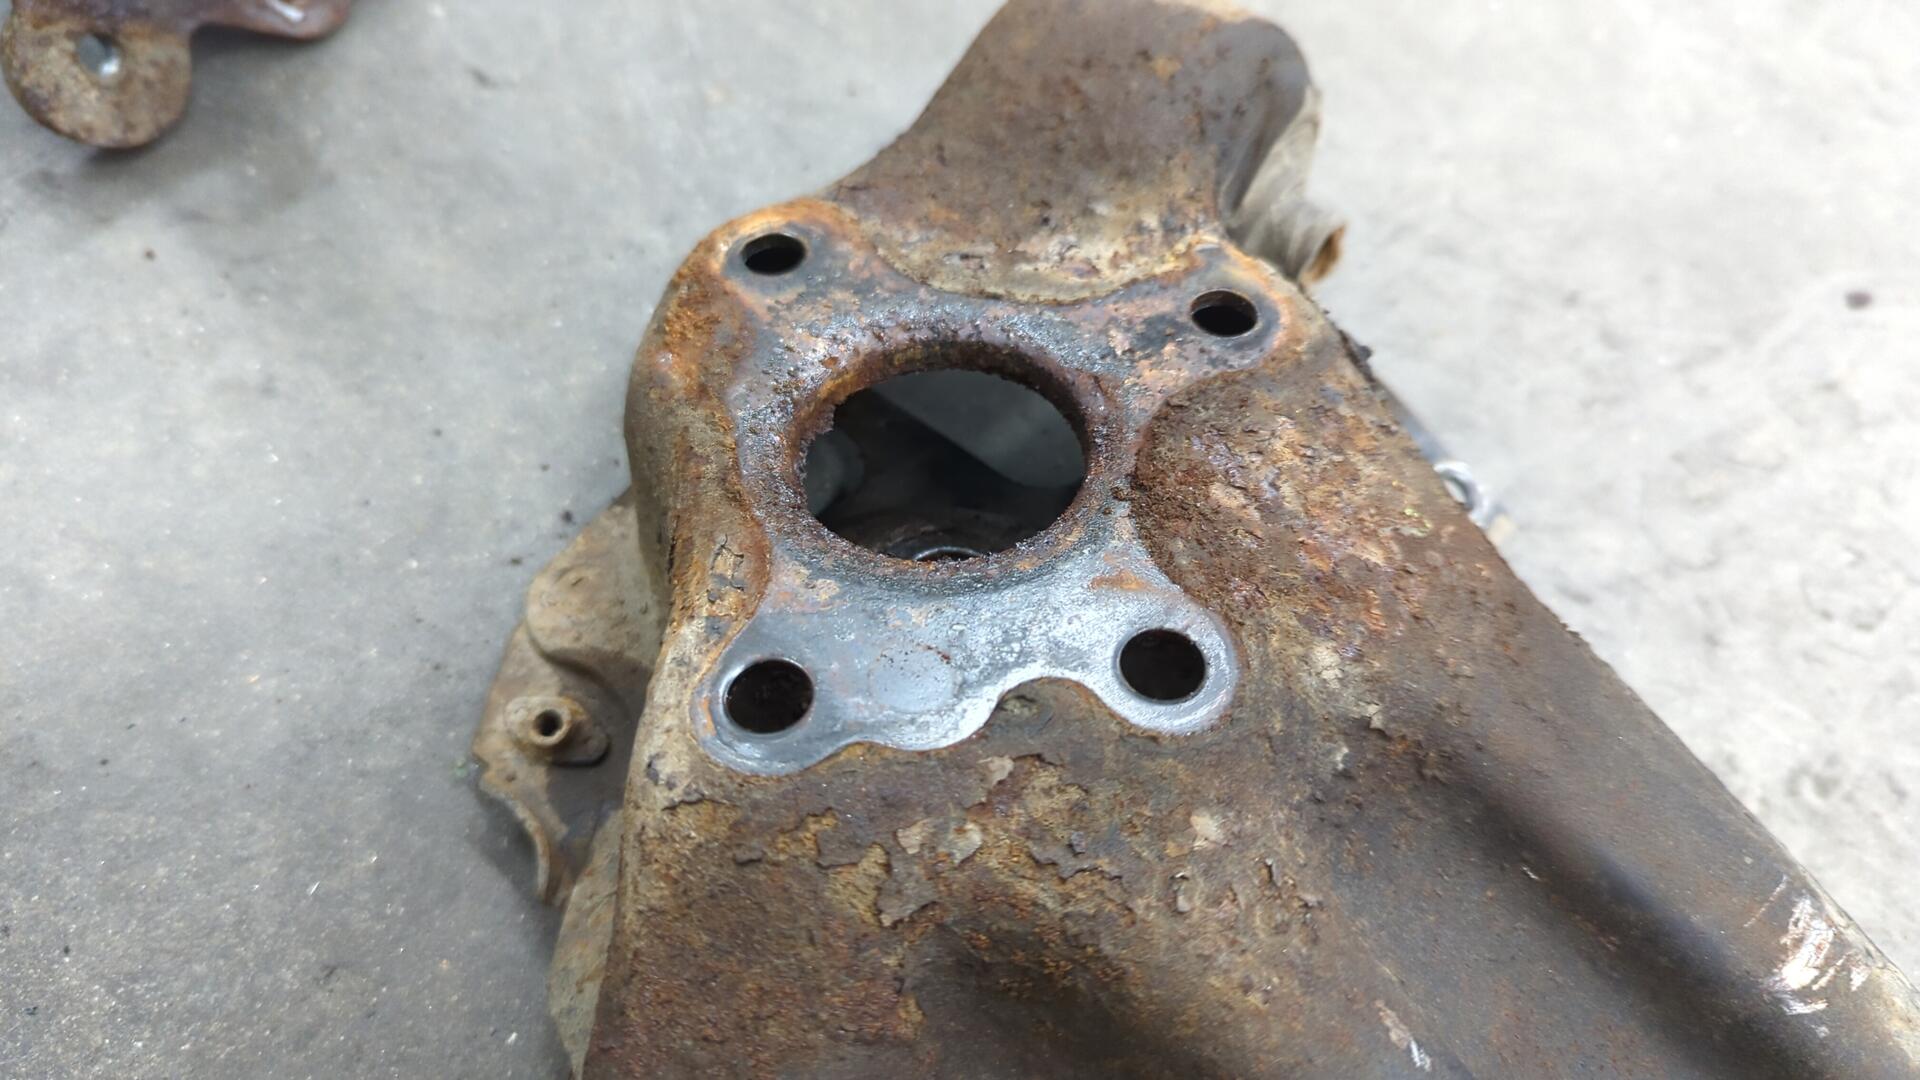
The back of the spindles were pretty rough.

Although the front sides weren’t much better.
I did my best to clean them up with the sand blaster but I worry with how deep the pitting was the rust may return.
Hopefully the epoxy will keep them in good shape.
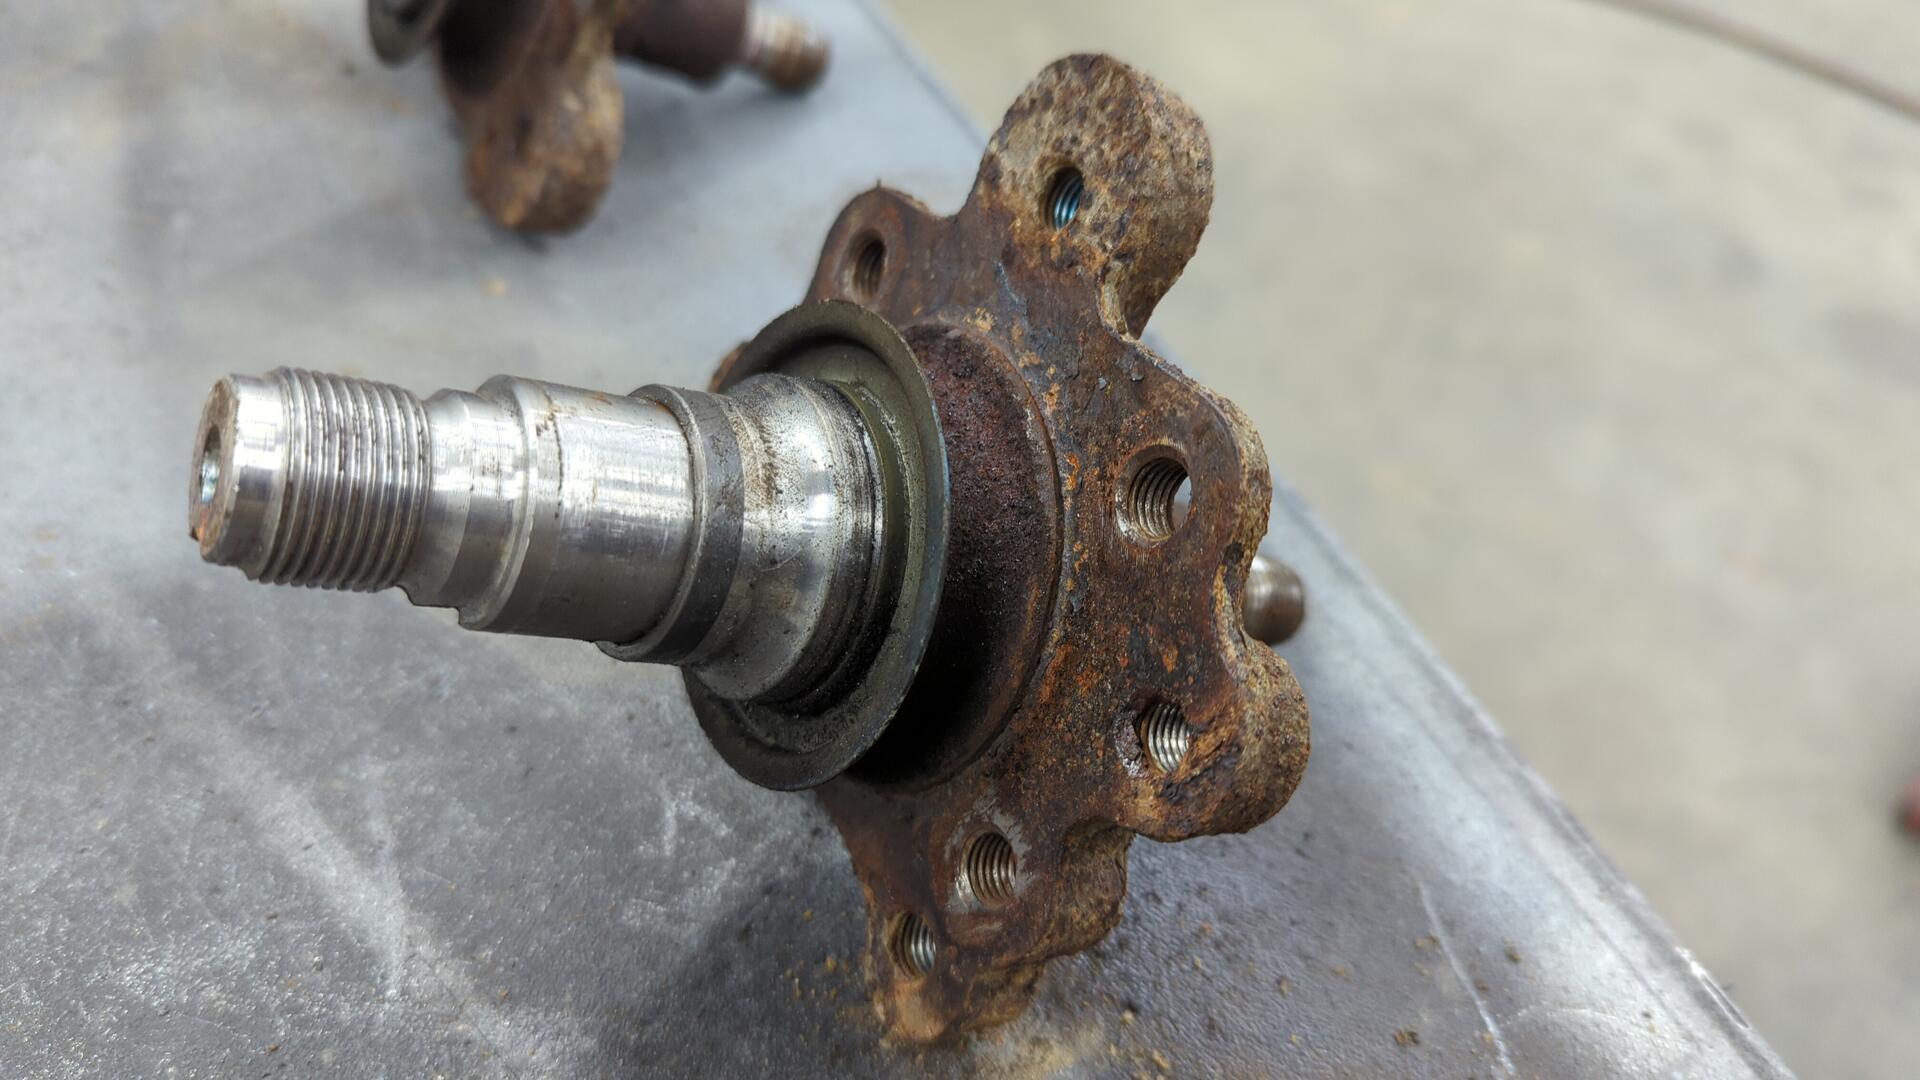
Pressed the circle things back on. I’m not sure what they’re called.
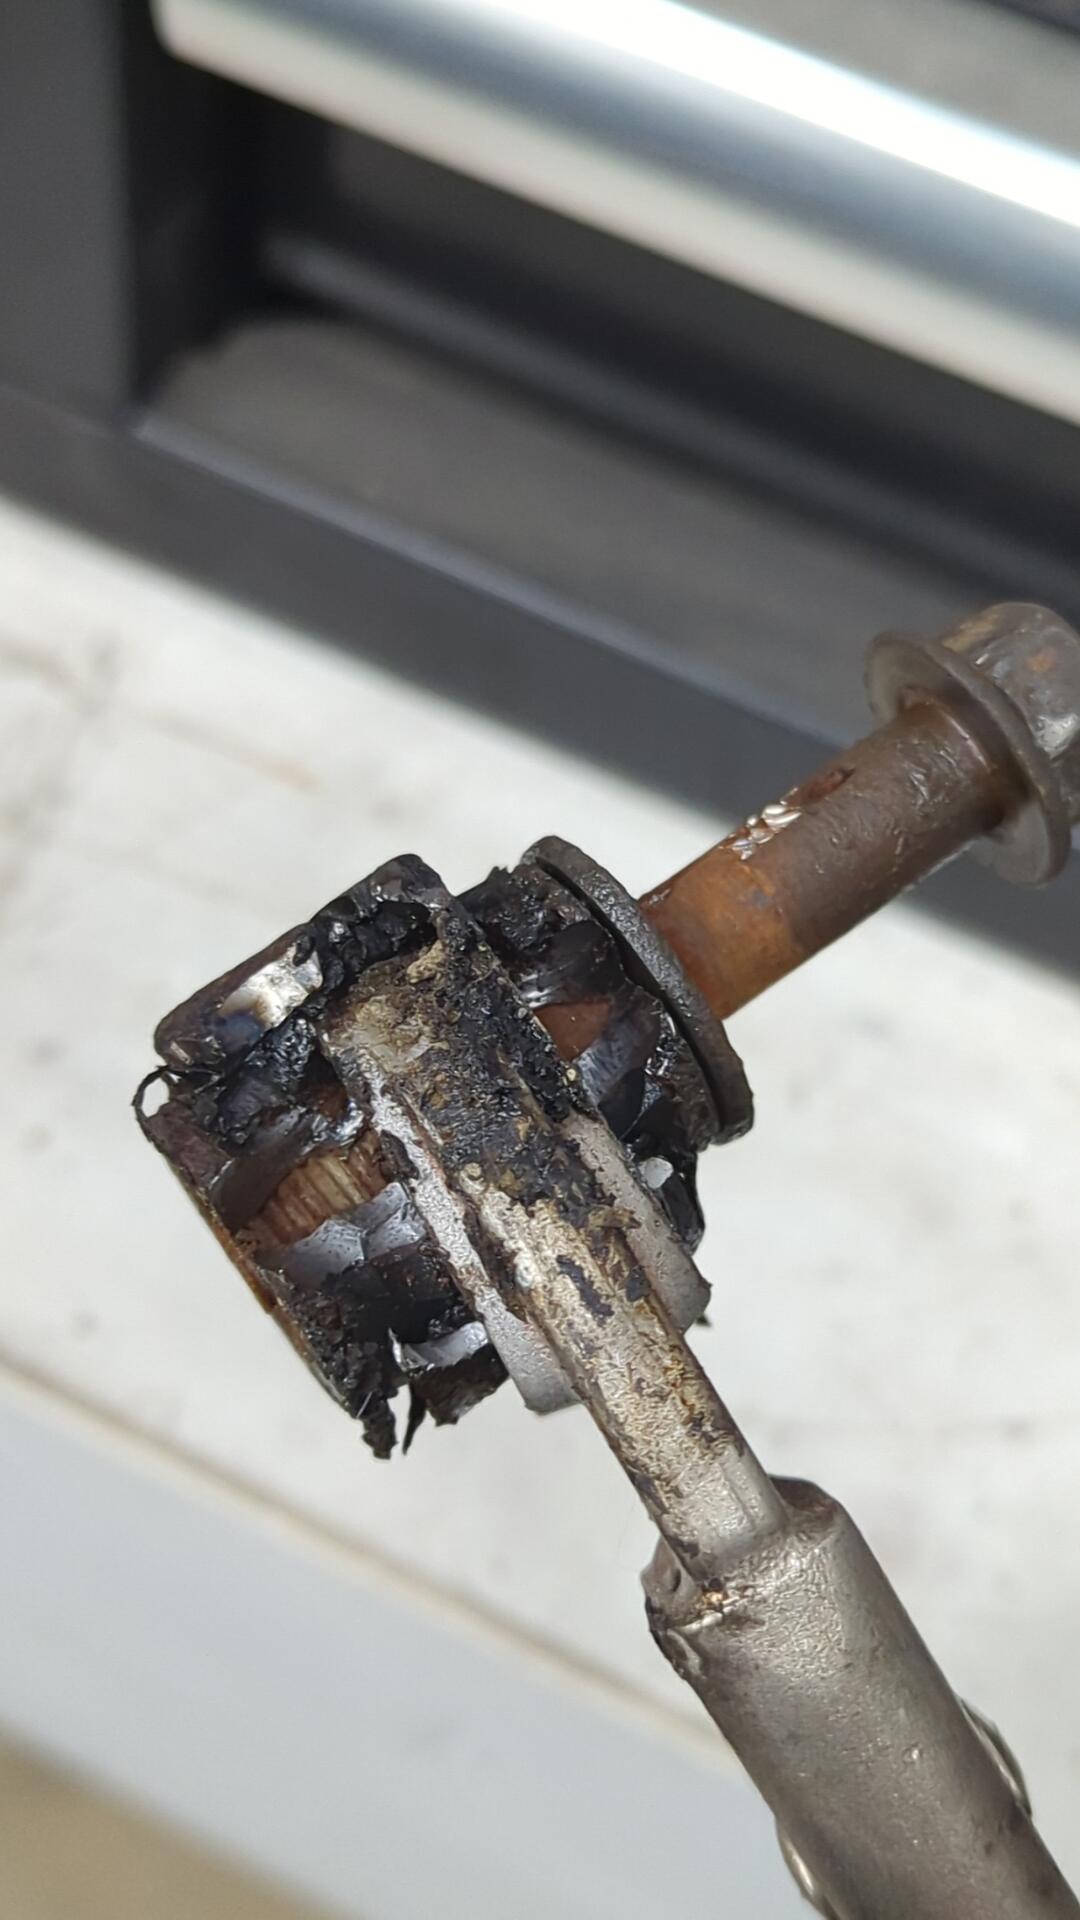
After cleaning up the spindles I started on the rear trailing arms bushings. Using a hammer you can knock the bushings out from the backside.
The Energy Suspension bushings I planned on using require you to re-use the bushing ring and dogbones. They claim you can use a knife to cut off all the rubber but it wasn’t working well for me so I ended up burning the rubber off.
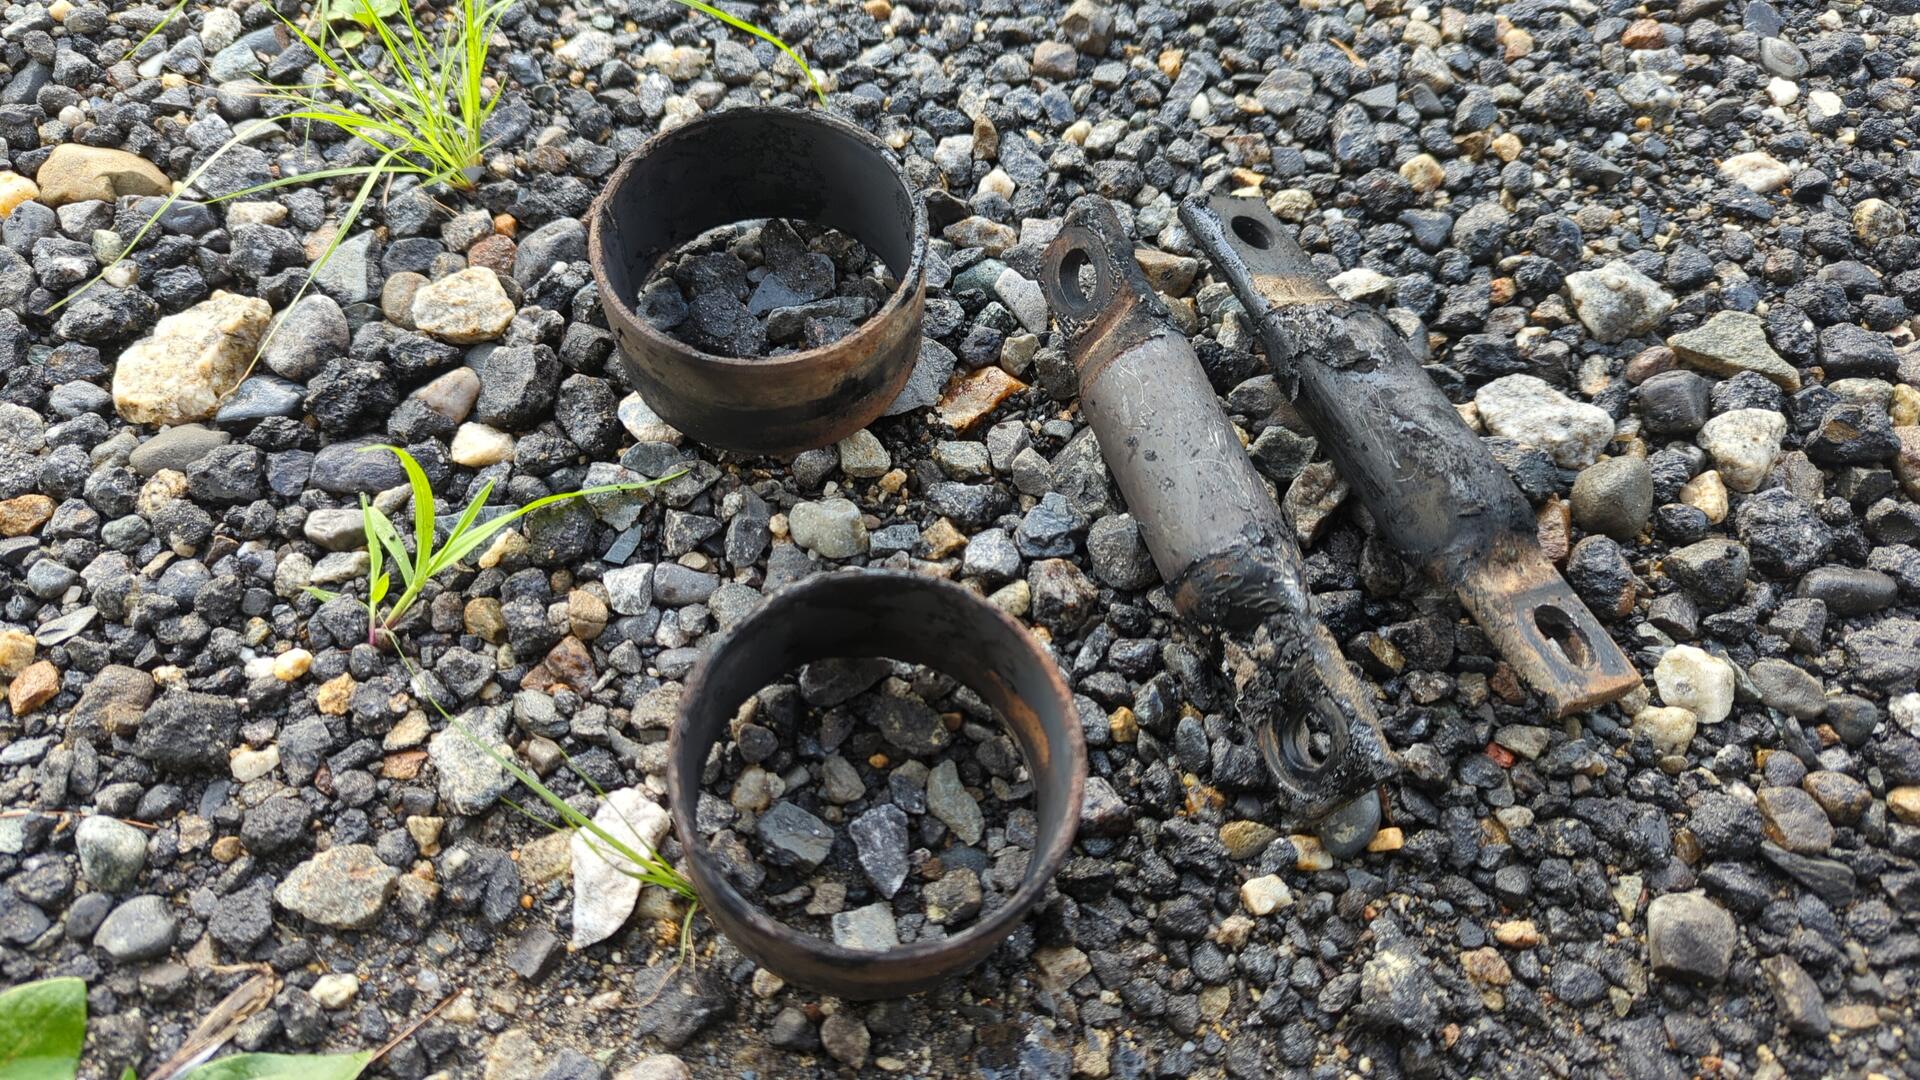
I forgot to take a picture of the pieces all cleaned up but I re-painted them to look new.
With the bushings and spindles all set the last step was to sandblast the arms themselves. The sandblaster took off most of the paint with ease but there was some undercoating on the bottom side that I had to wirewheel off.

3 coats of epoxy later.
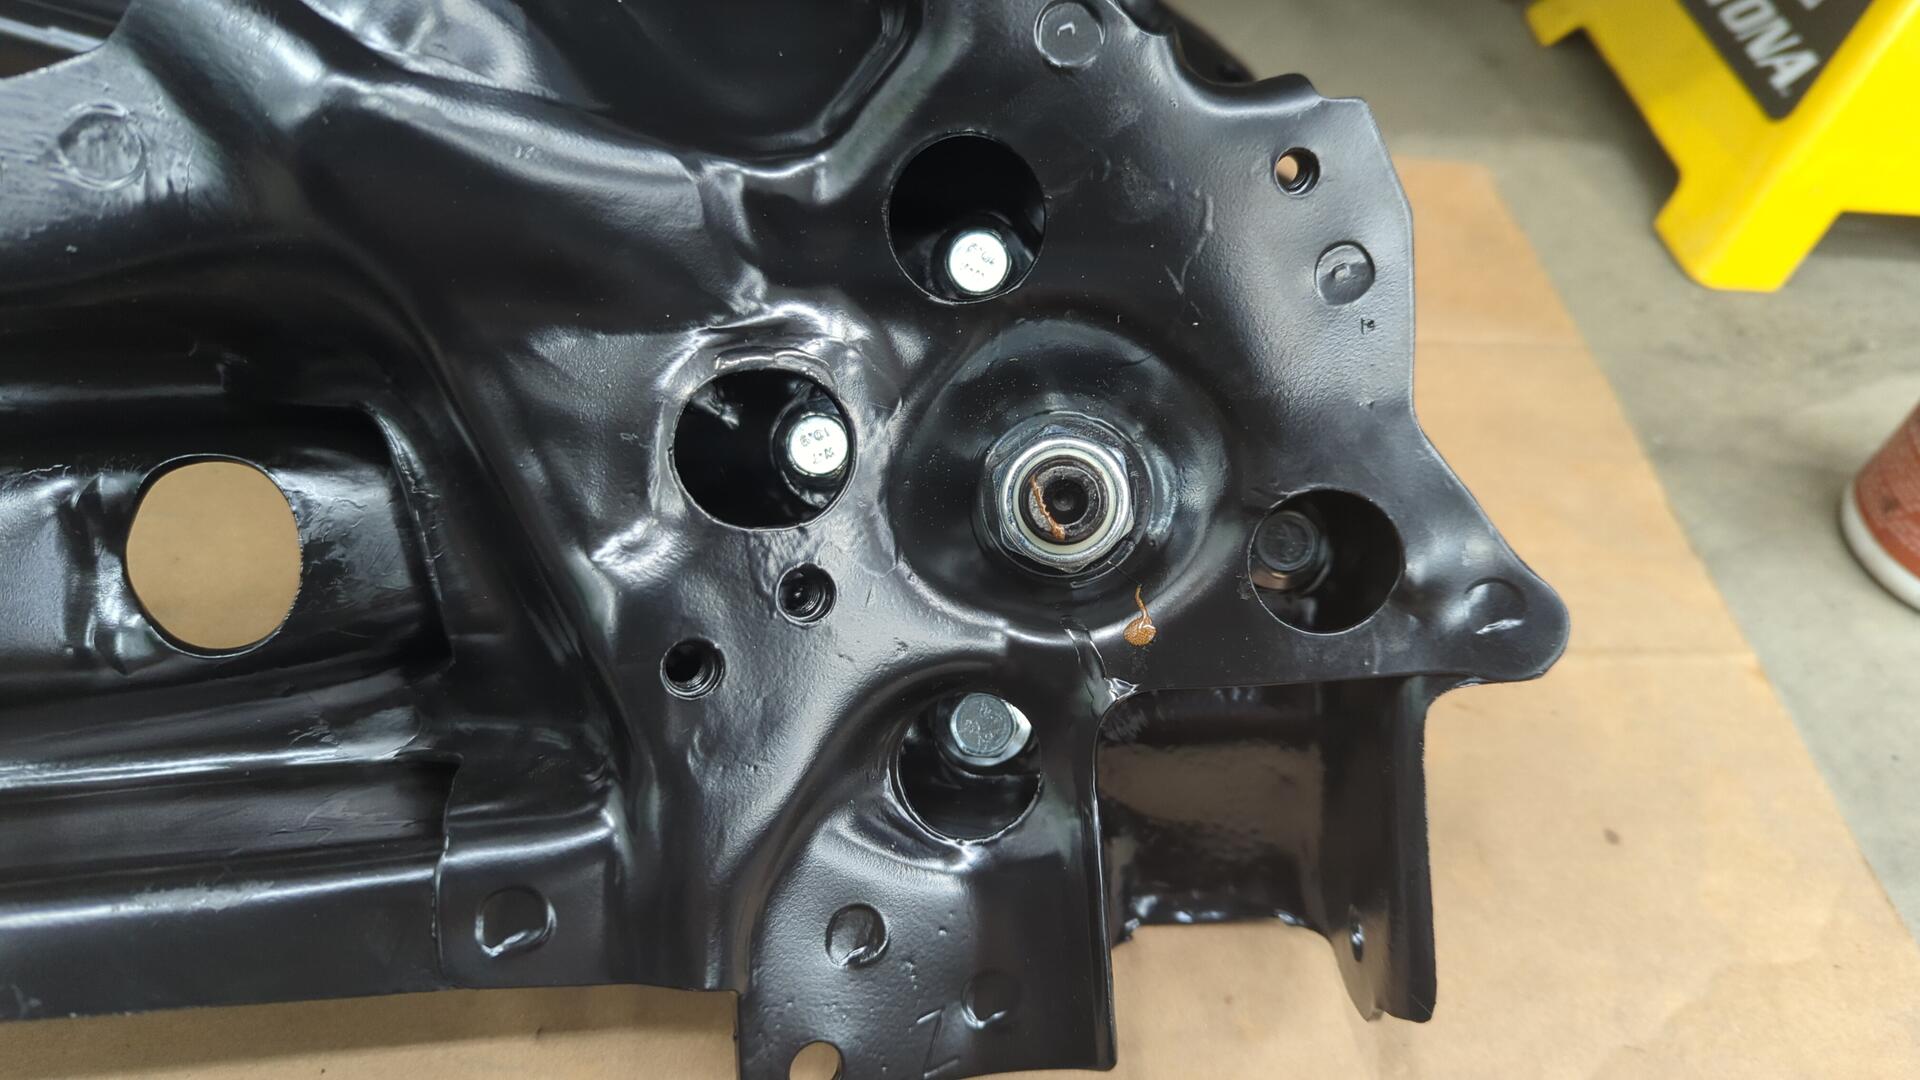
New bushings pressed in, and spindles all bolted up.
Honda never posted the torque specs for the spindle hardware so I invented my own. I torqued the bolts to 27 ft/lbs and the center nut to 64 ft/lbs.
Parts List
- K-Tuned front camber kit KTD-FUR-924
- K-Tuned rear camber arms KTD-RUR-880
- 12 Energy Suspension 9002G universal bushings
- Energy Suspension rear compensator arm bushing set 8309
- Energy Suspension steering rack bushings 16.10102
- Energy Suspension rear trailing arm bushings 16.7106
- 2 M16x1.5 nuts (center nut for rear spindles)
- 8 M10x1.25x20 bolts (mounting bolts for rear spindles)
- 4 M10x1.25x60 bolts (compensator arms)
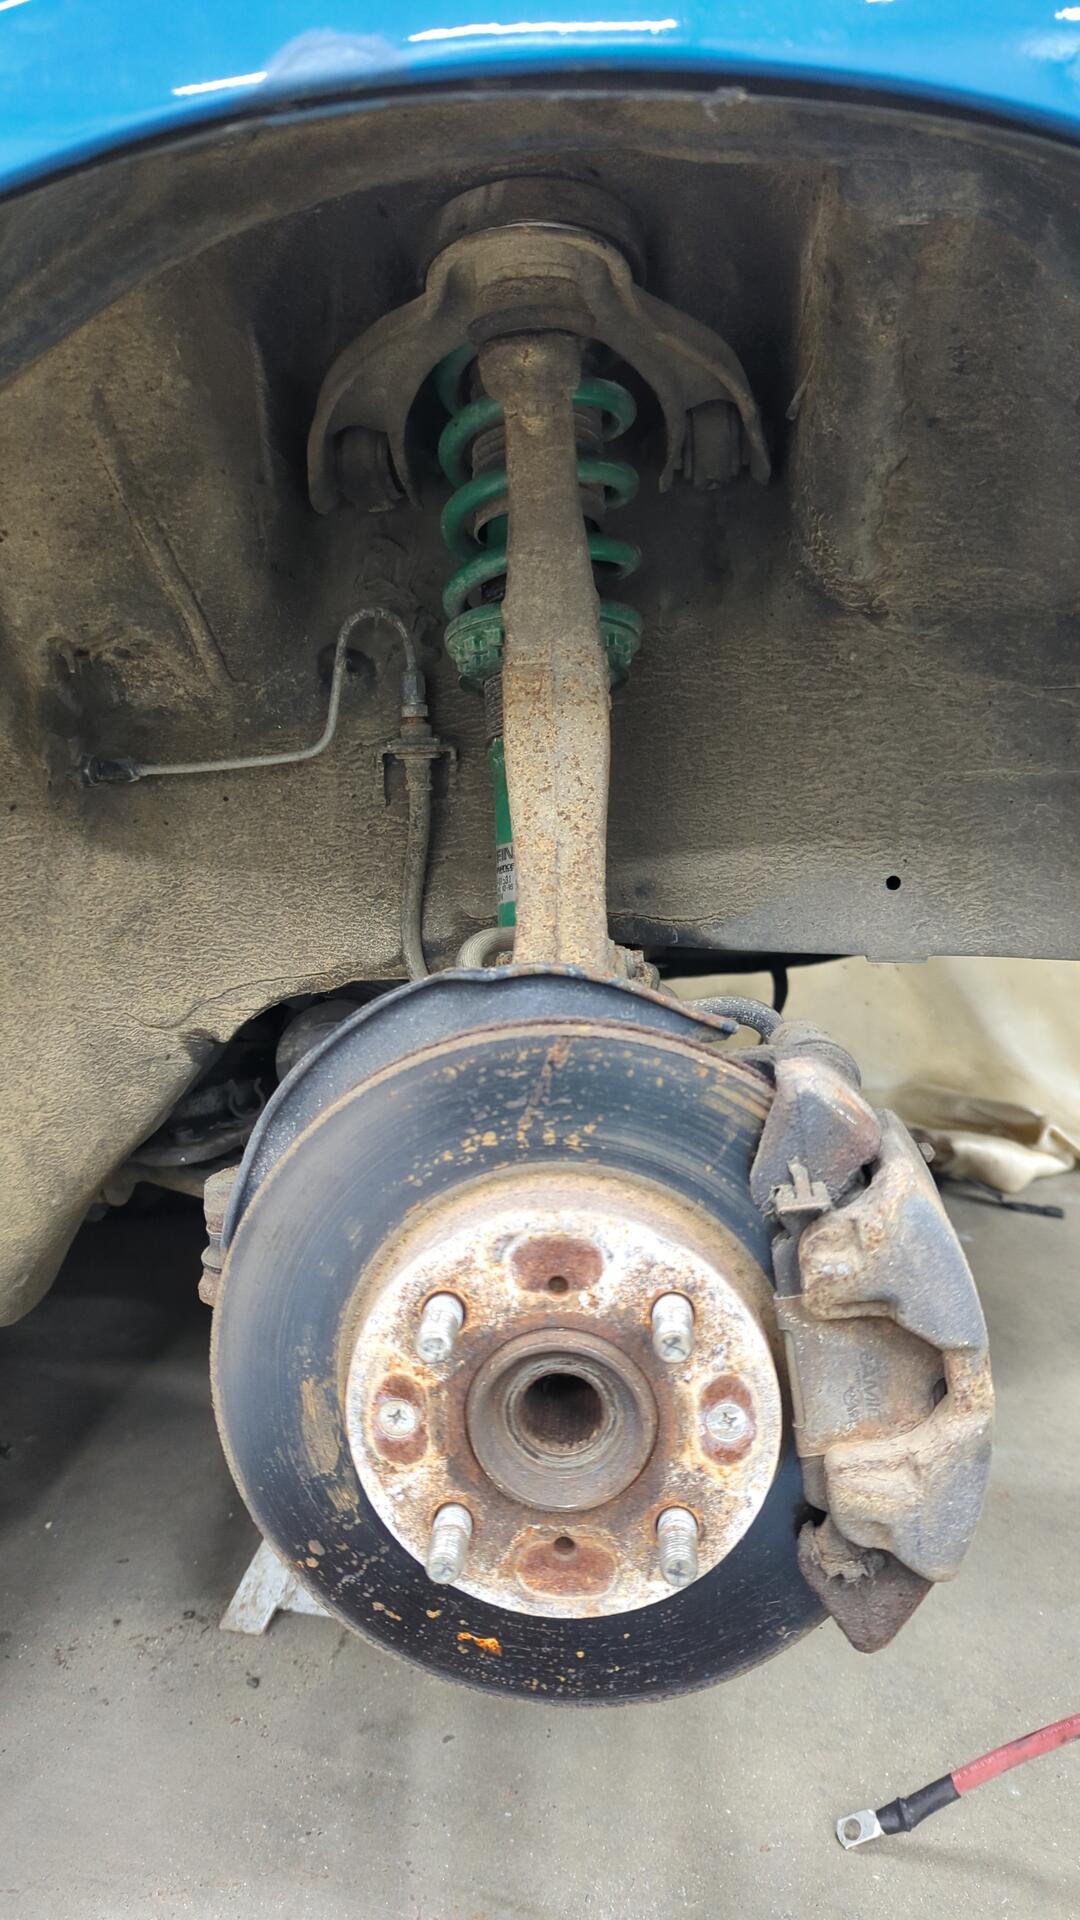
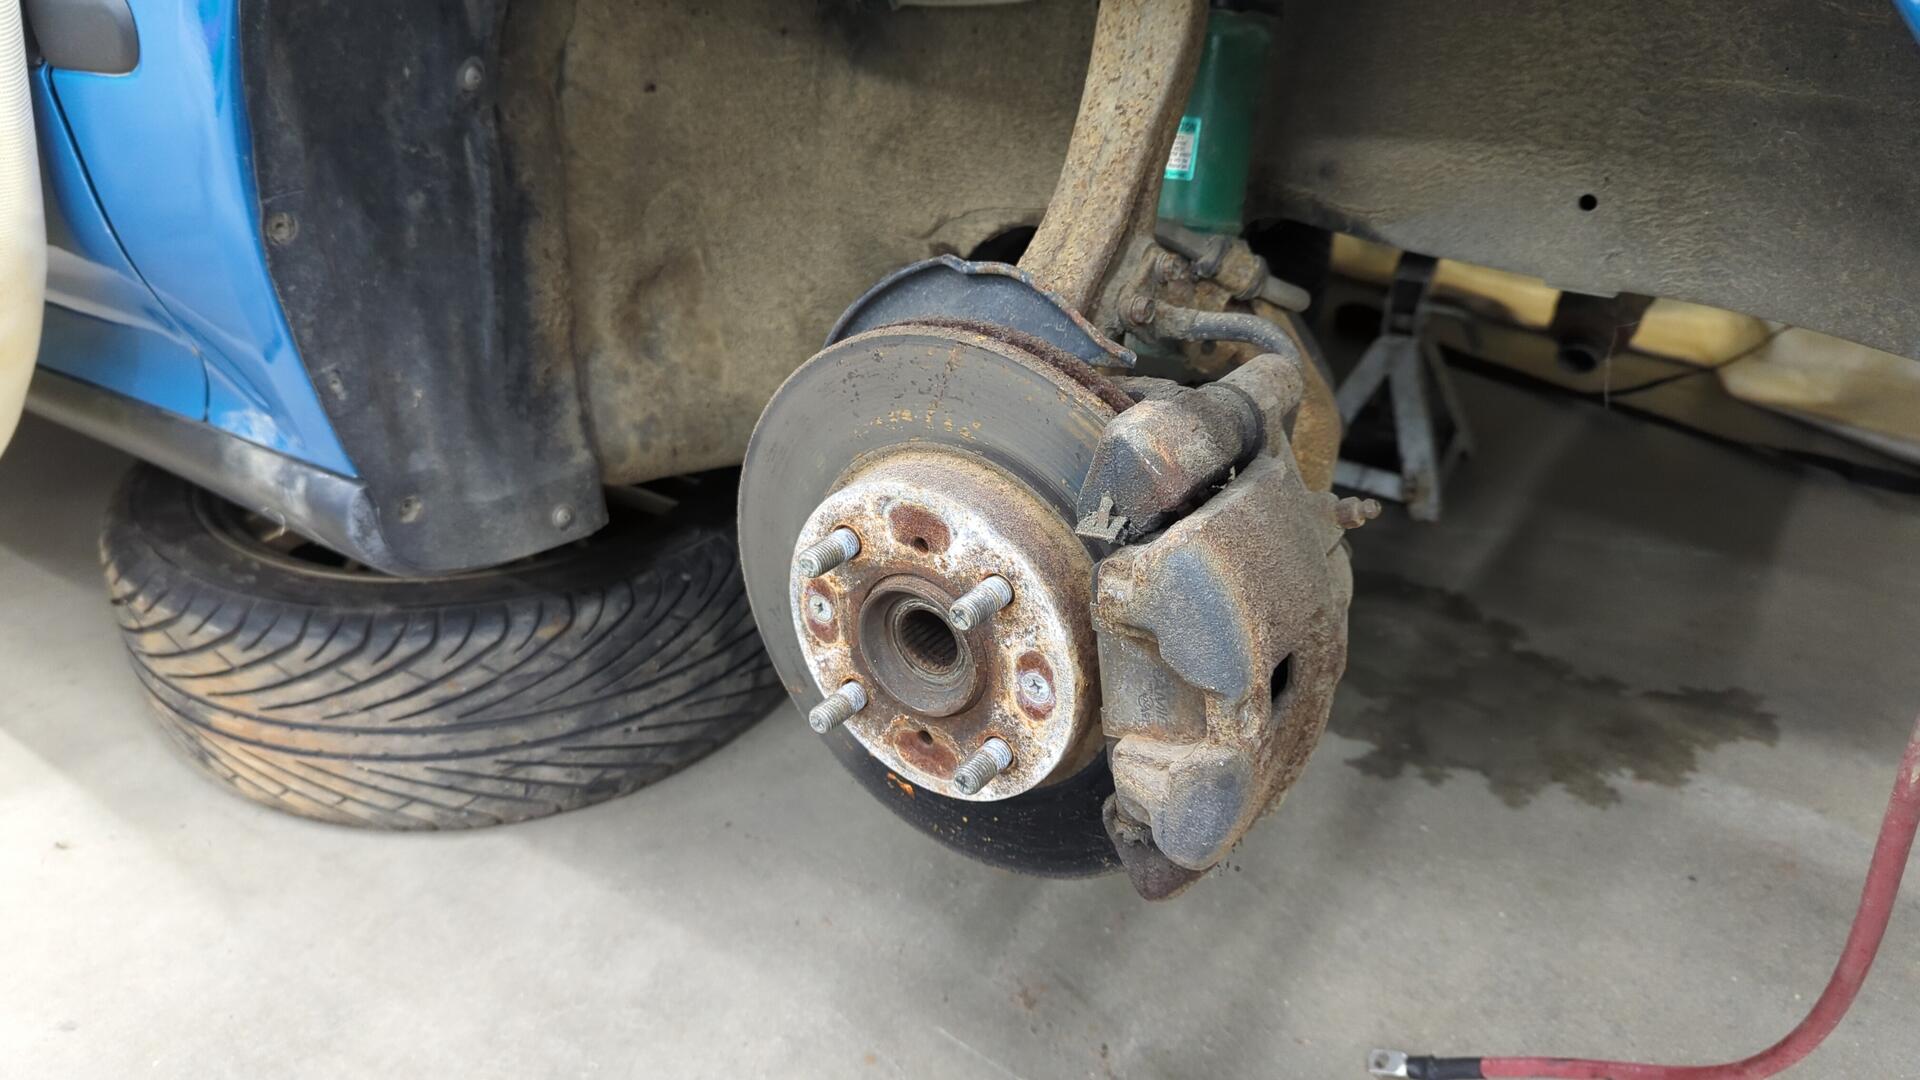
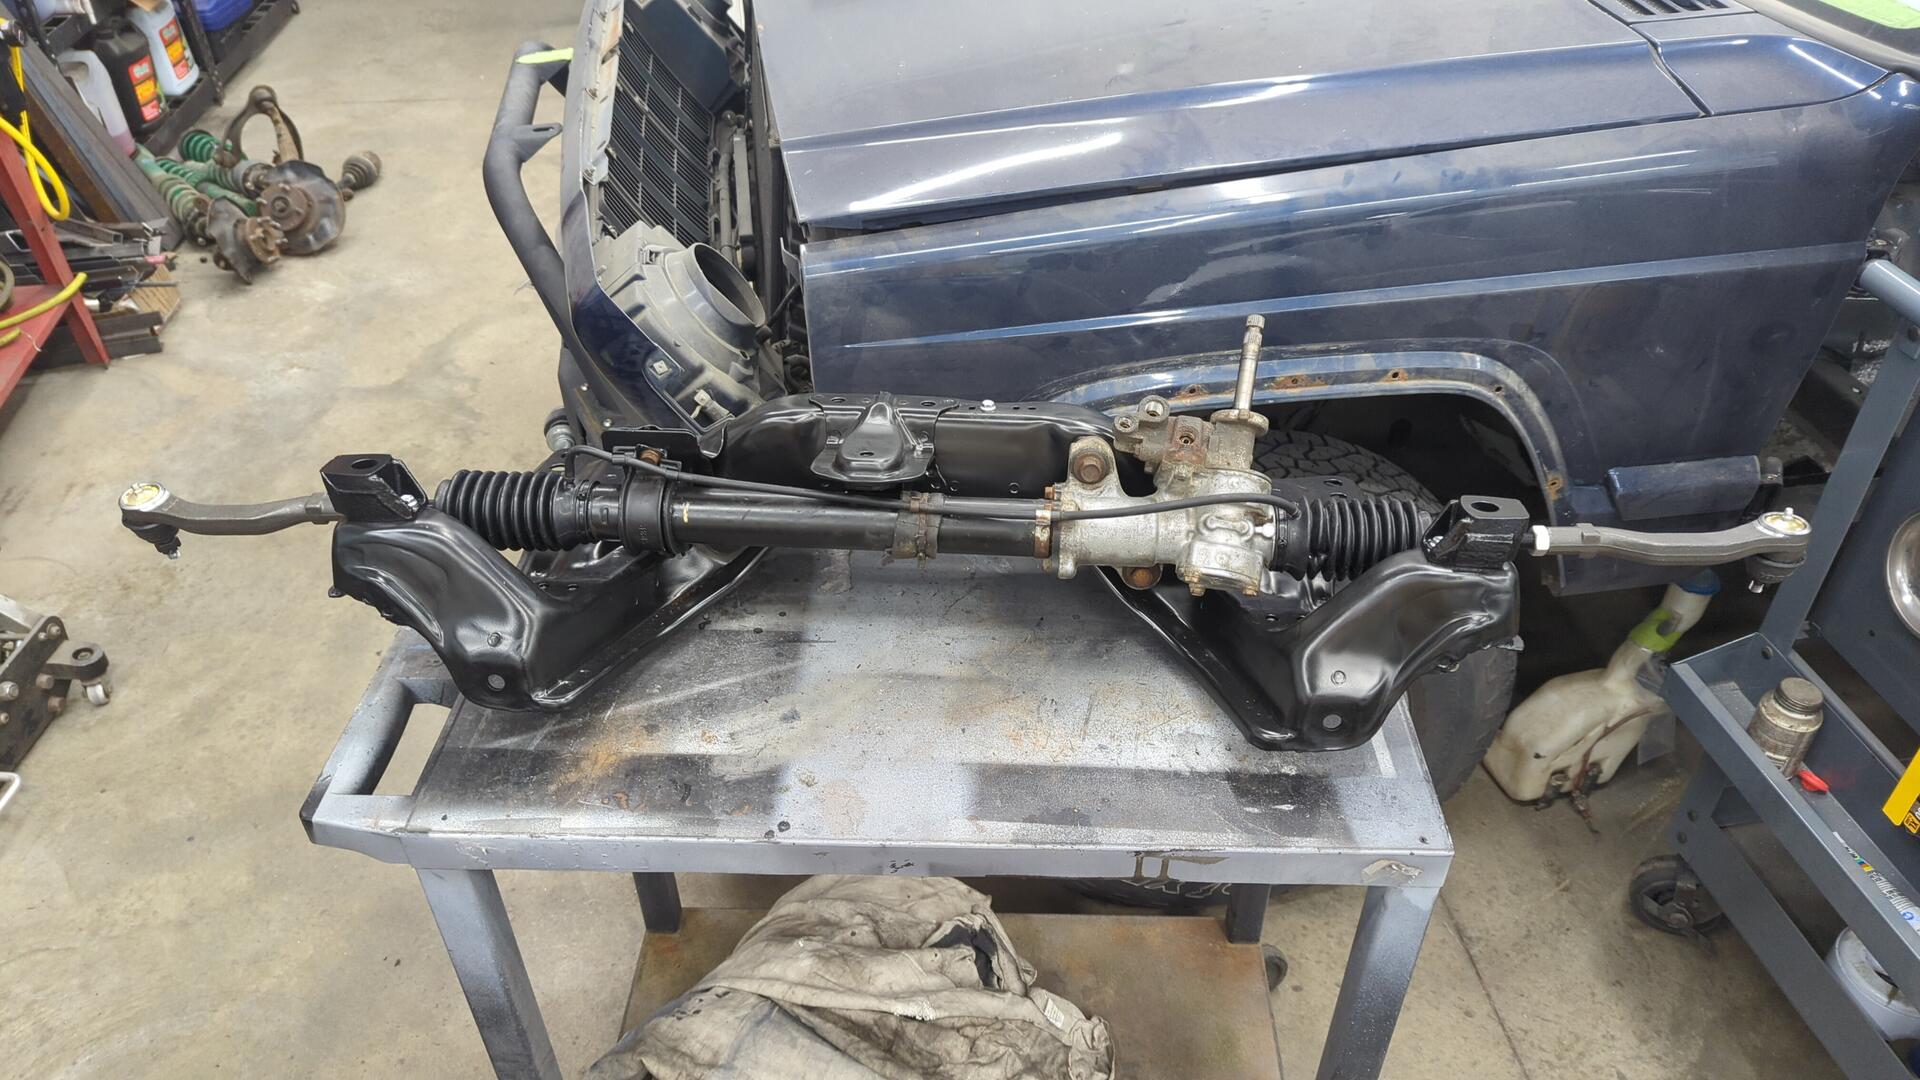
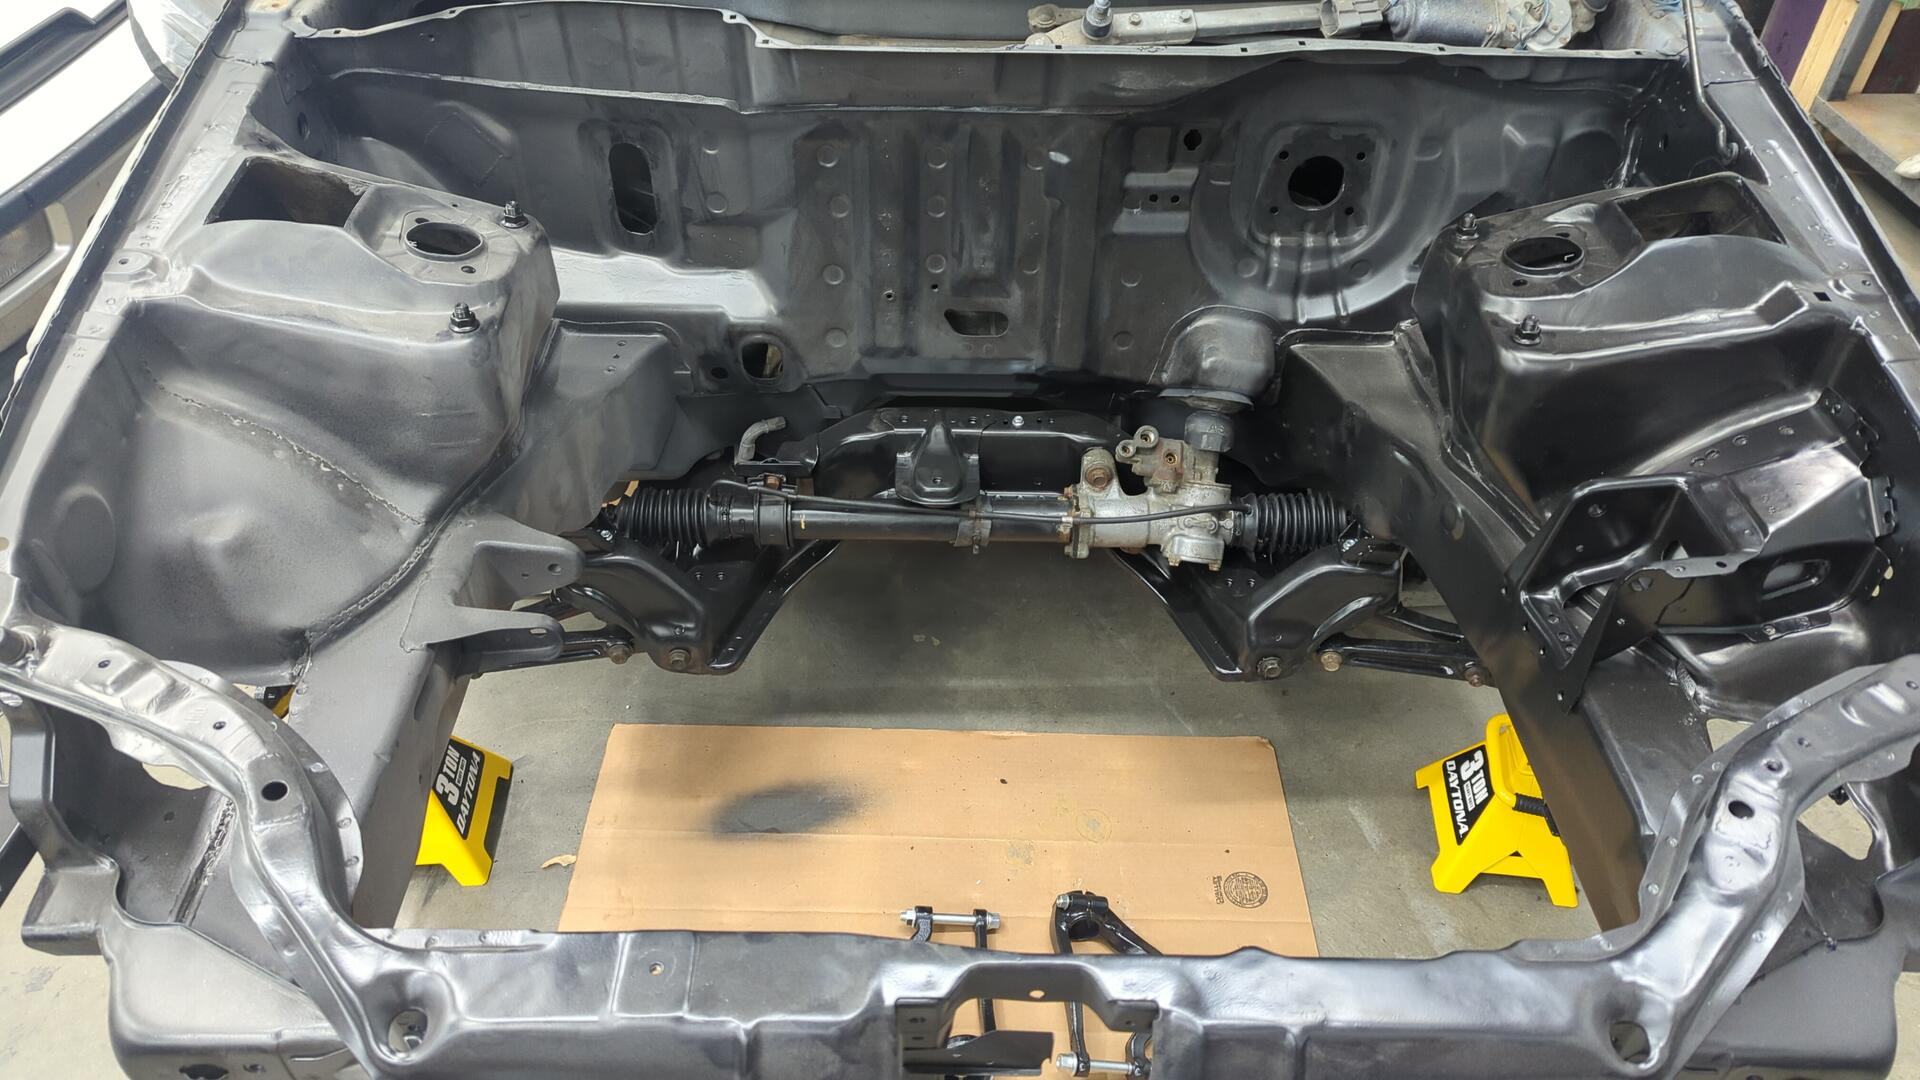
Test Fitting the Suspension
Since I’m not able to torque down all the suspension nuts / bolts yet because the car has to be at it’s ride height, I decided to at loosely least bolt everything up for a test fit.
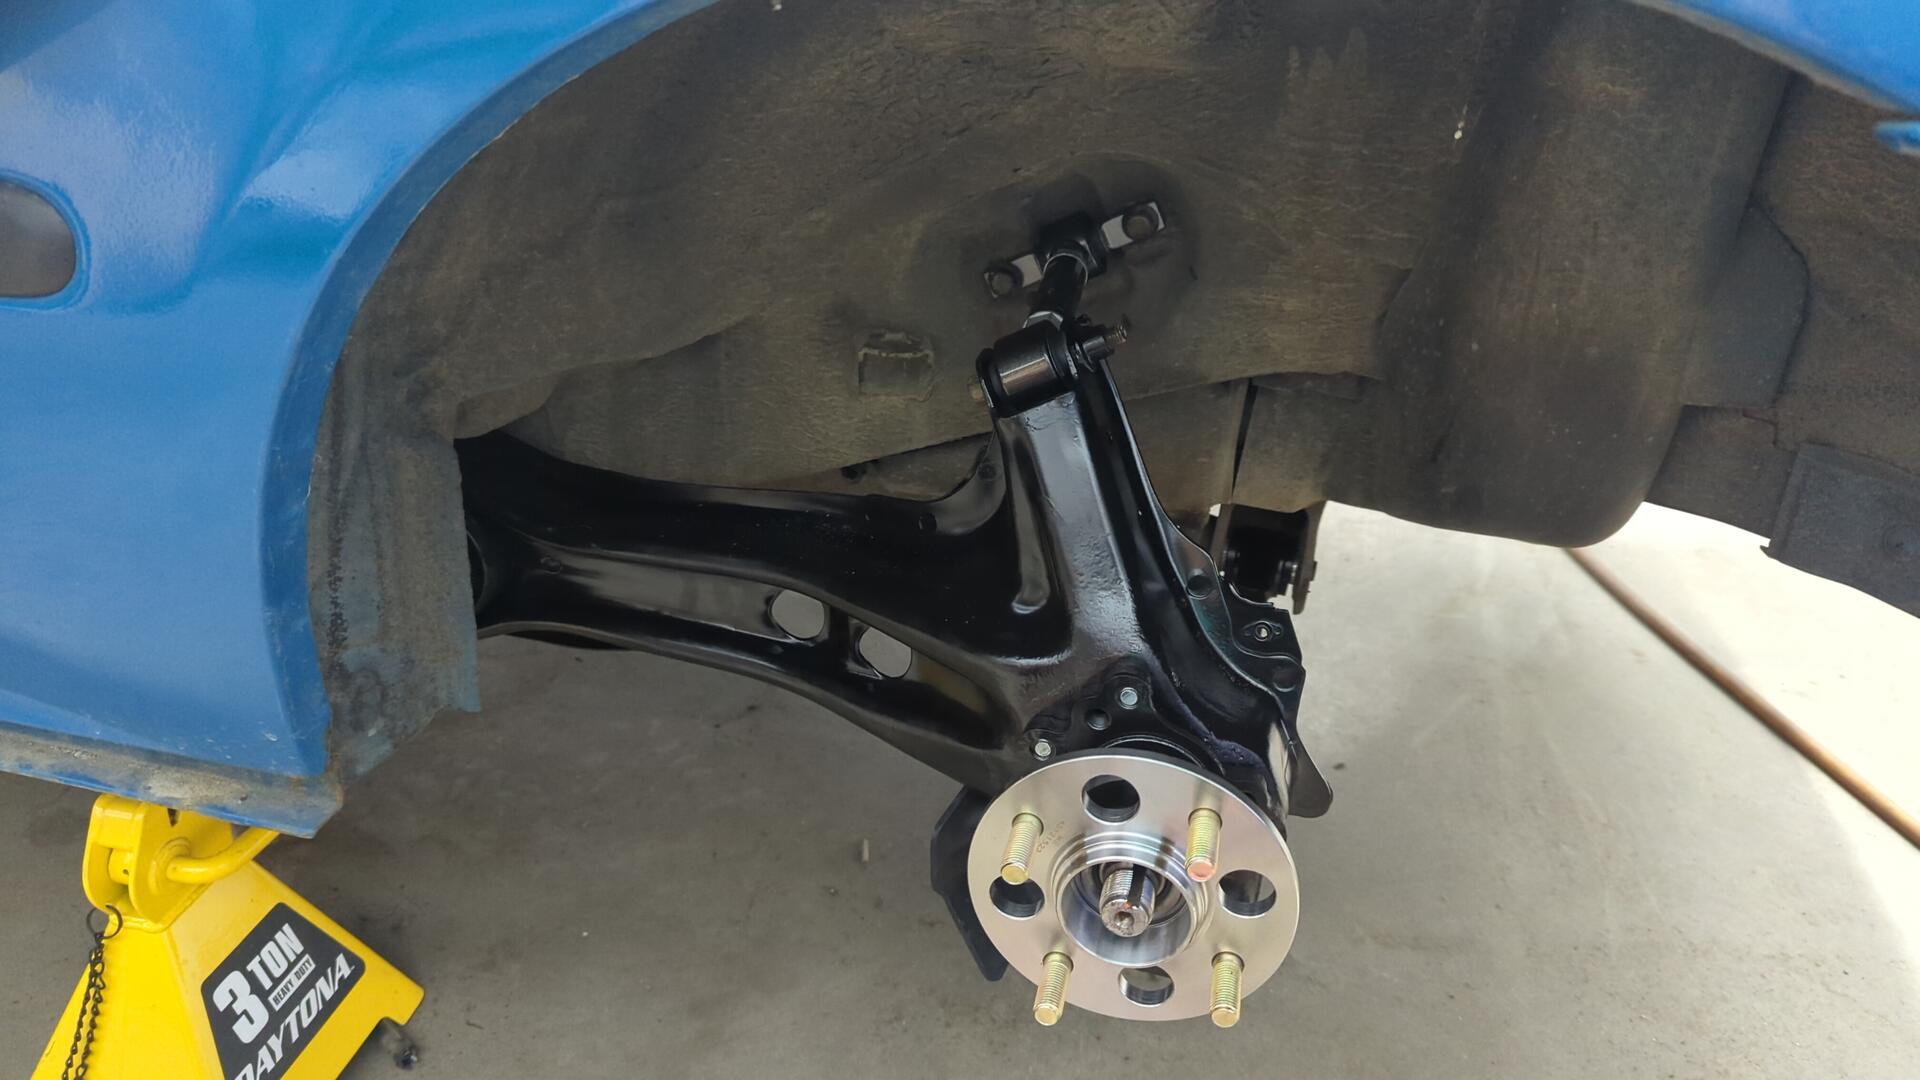
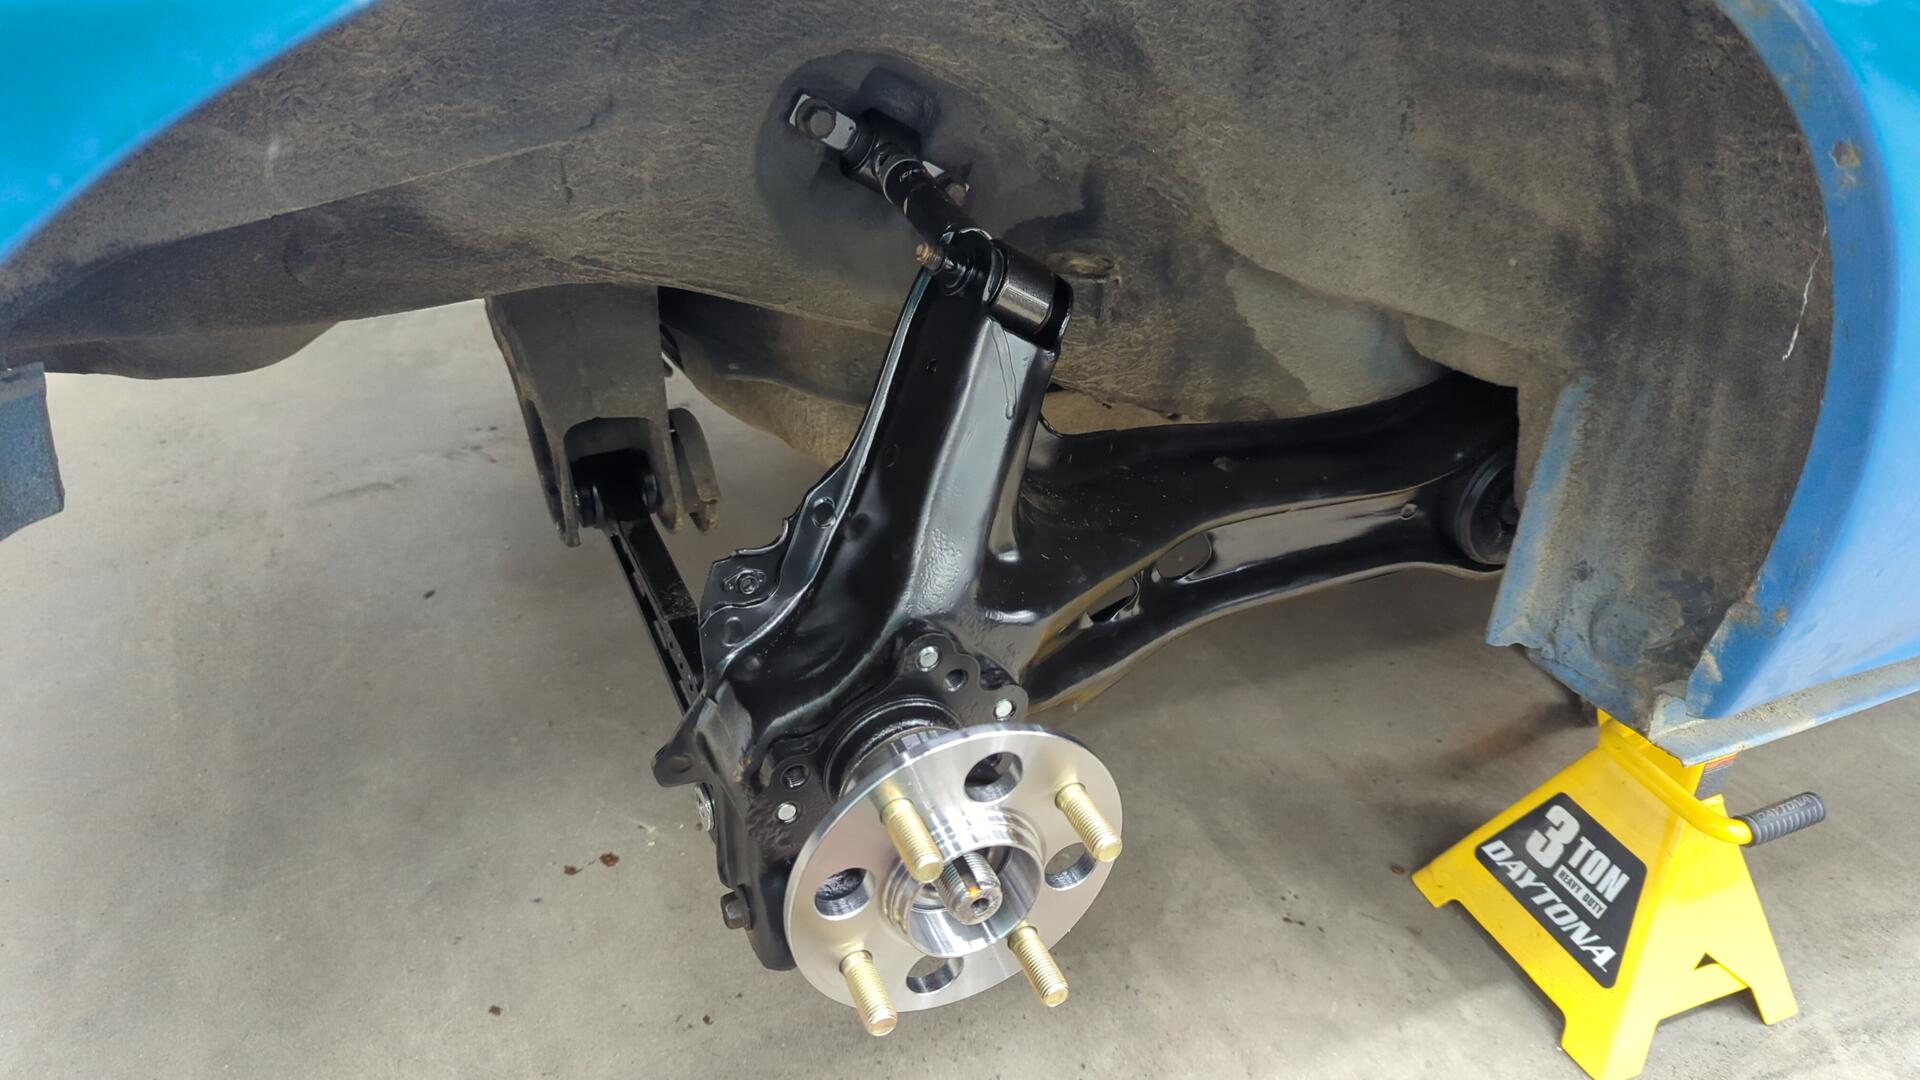
It may seem preemptive to install the suspension while there’s still a bunch of body work to do in the front, but I wanted the frame in place because I need to custom mount some components to the firewall and wanted to make sure there wouldn’t be any clearance issues.
Plus with the suspension mounted up I can make the shock tower extensions.
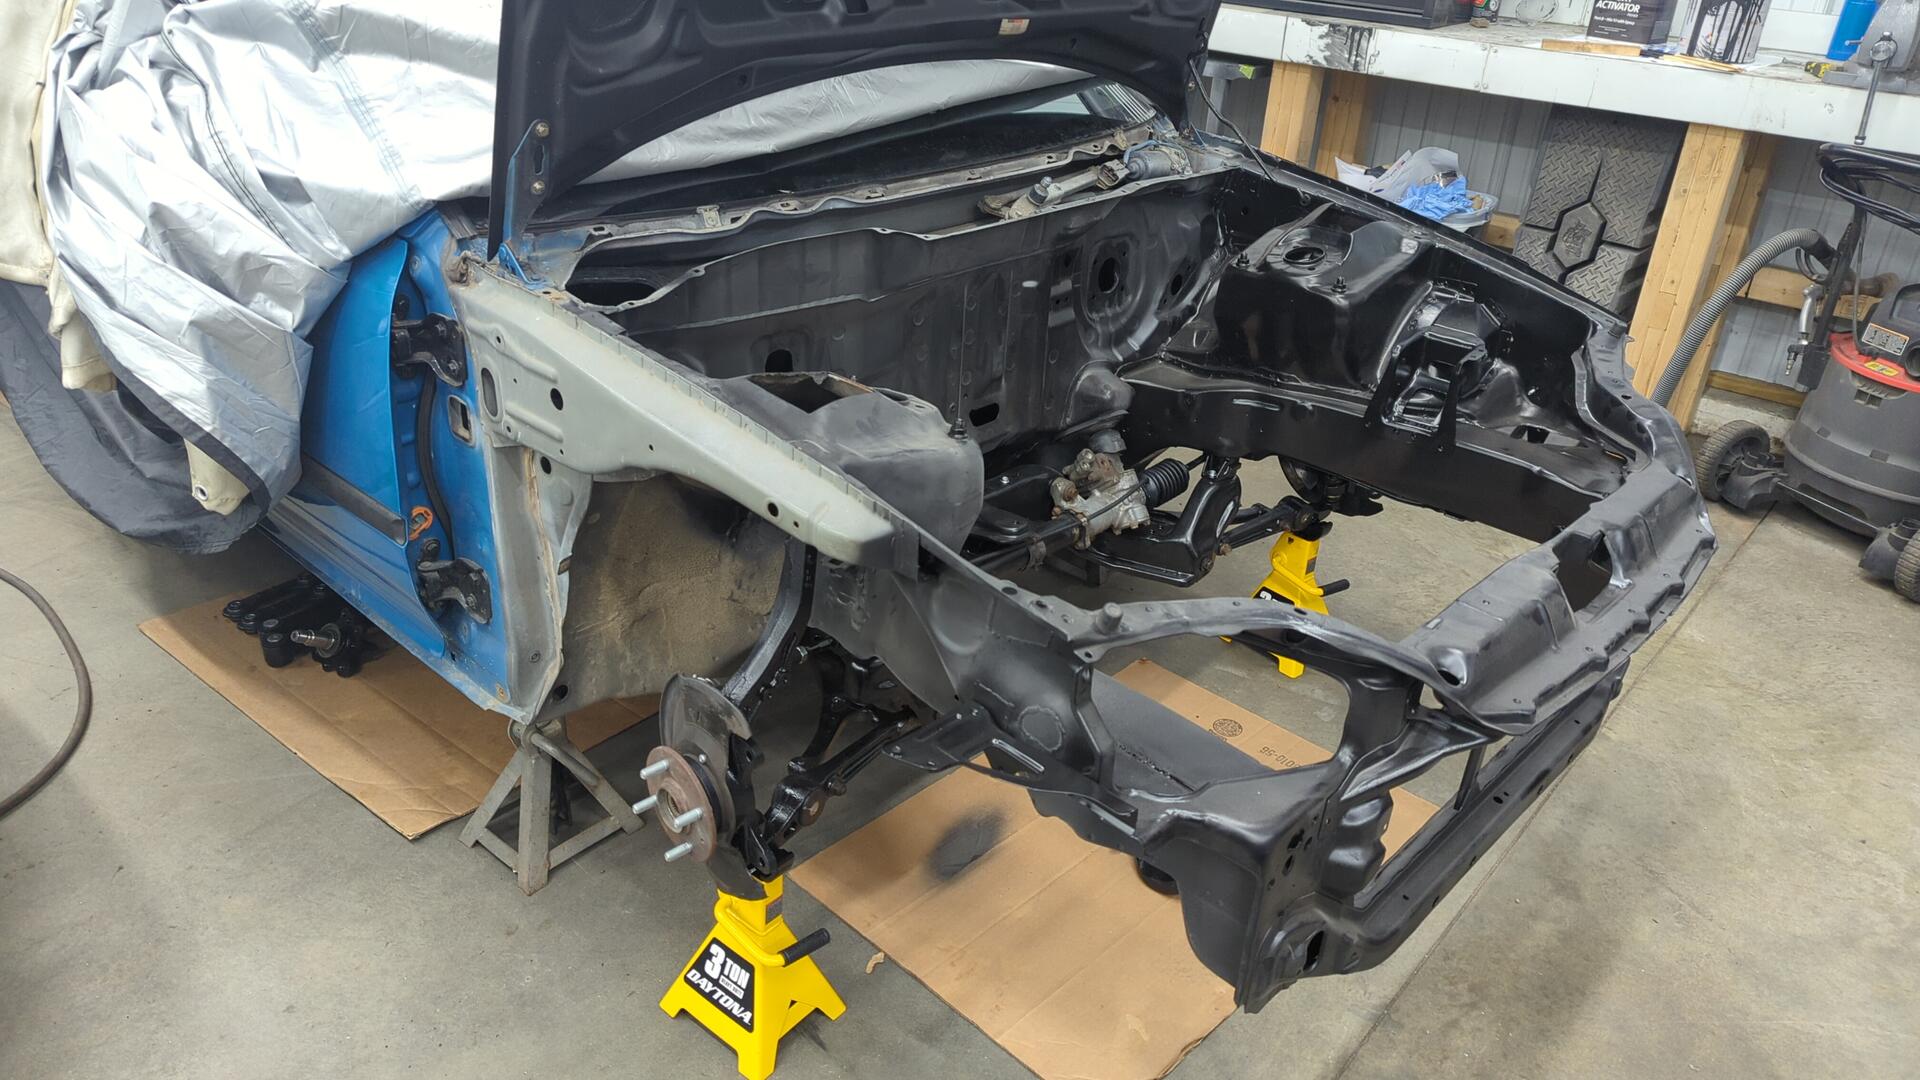
Last but not least, the new hood came in. It’s a Seibon carbon fiber hood.
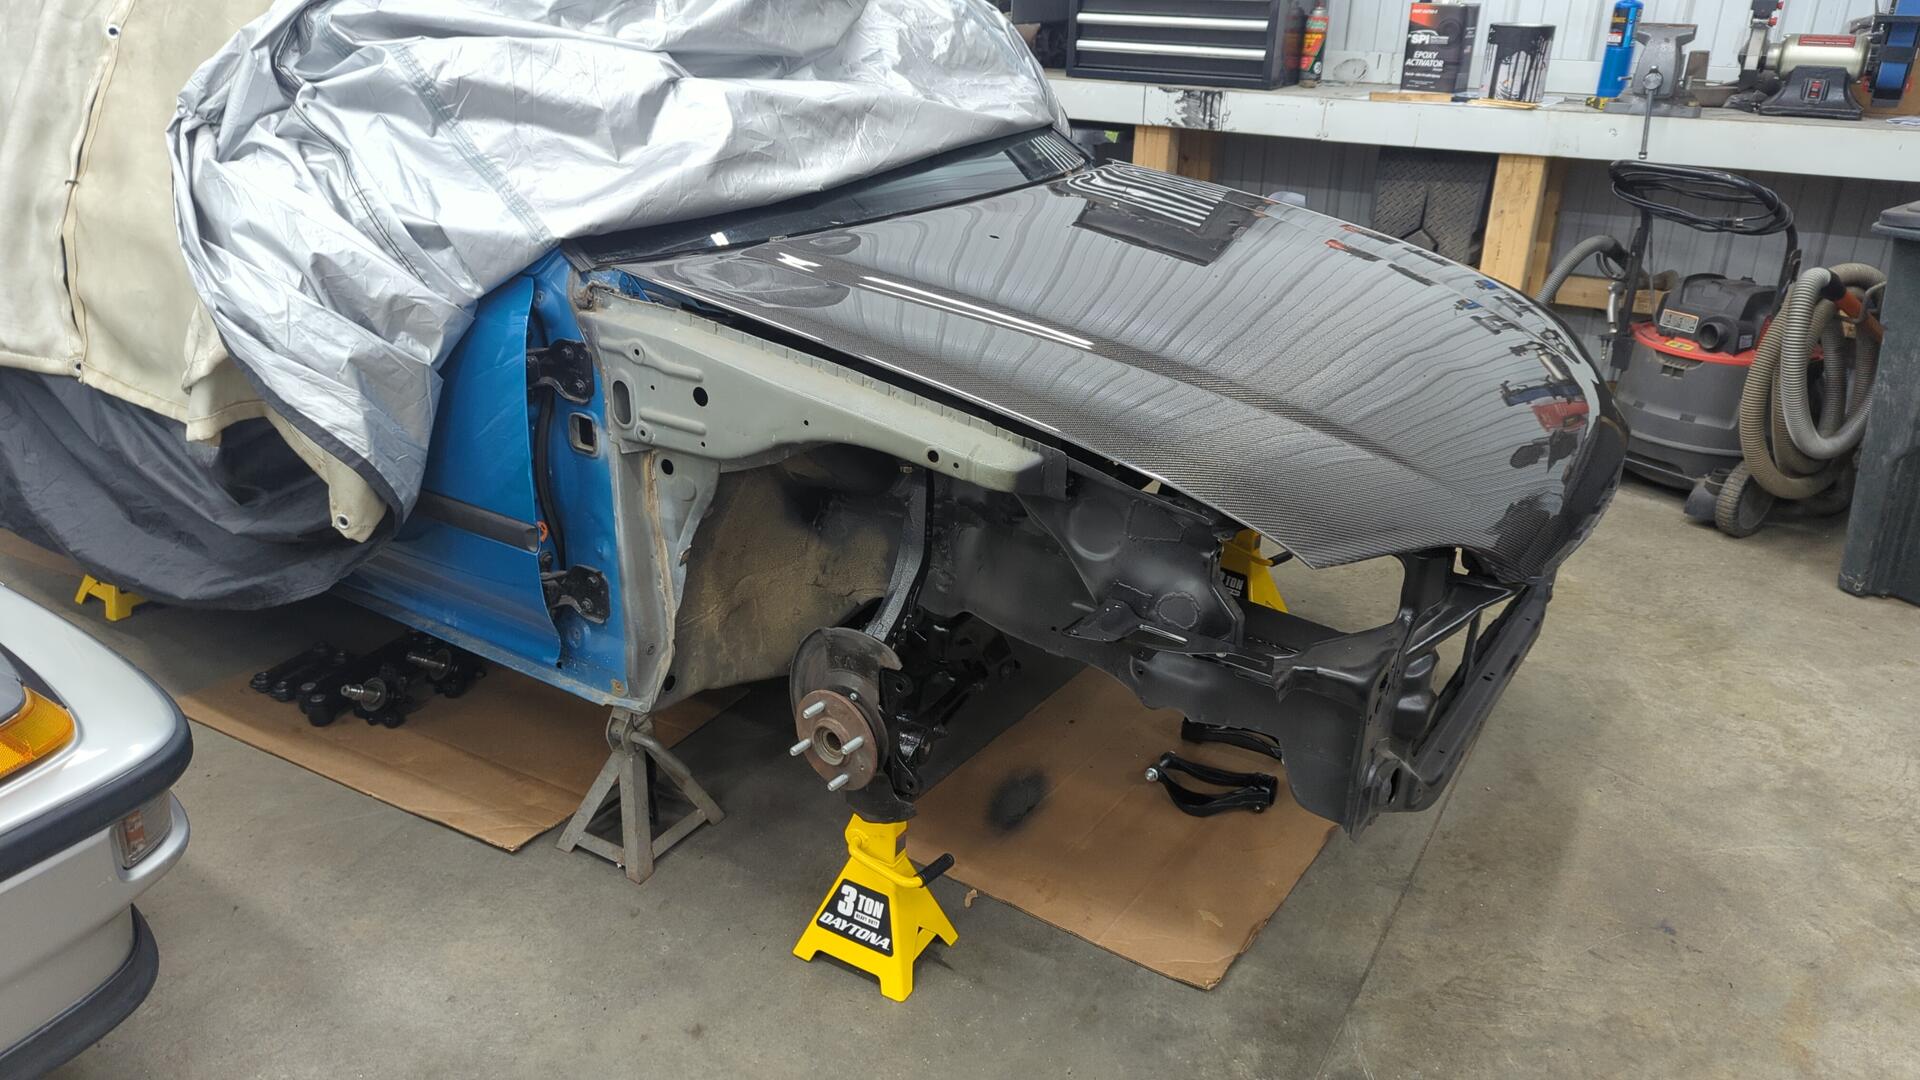
I’m pretty excited about the hood. I’ve always wanted a carbon fiber one.